My Header
Rendering Engine in Python and OpenGL
Introduction
For some years I've been writing shaders in Unity, then in Unreal Engine and I was always wondering for example how shadows are handled. I wanted to extend my knowledge so I decided to write a renderer and explore this area on my own. First I had to setup a goal of how far I want to take this effort. I knew that writing a full game engine is kind of a stupid idea to do alone, just because I can't match for example with Unreal Engine as a single person. Therefore I've set my goal to be able to load meshes and render them like in Marmoset Toolbag (or Substance Designer or Quixel Suite) and be able to render out my own art in it some time later. Visually, the inspiration was mostly Doom 4 and Unreal Engine 4.
Here are some results you can find through the page:


Architecture
Influenced by many years spent in Unity3D and later Unreal Engine I knew I have to do some research about architecture. I went through few articles about this topic and confirmed to myself that I want to be using components. It boils down to decision, how to represent Game Object. In my case, game object is an entity which got name, transform and link to parent. However, when it comes to rendering, I didn't want to recalculate a tree of transforms each time and more important, I wanted to be able to use queues of rendering components, which I can sort, cull and do whatever I decide to do with them in the future. The most important reason for me was also the fact of avoiding CPU cache invalidation (and therefore loosing performance) as much as possible when the data I'll be traversing will stick together in the memory, when I would switch to C++ instead of Python.
The Game Engine itself is basicly "just a big clock". It runs in a loop, handles different OS events and inputs and splits available CPU time between other engines, like rendering engine, physics, networking, etc. Rendering Engine handles everything about displaying geometry in the scene, lights, scene management and transfering data between CPU and GPU. Rendering Engine was my primary focus, so I wanted to spent as much time as possible writing and exploring those.
I've also decided to go with OpenGL, since it's multiplatform and also has binding to Python. It was obvious choice for me, because I've spent some time with DirectX 7 and 8 and other MS APIs or woe systems in general (why woe? You can read more here or here at the end of the page), and still up to this date, those are ones of my most painfull experiences working in these developer-unfriendly environments.
Beginnings
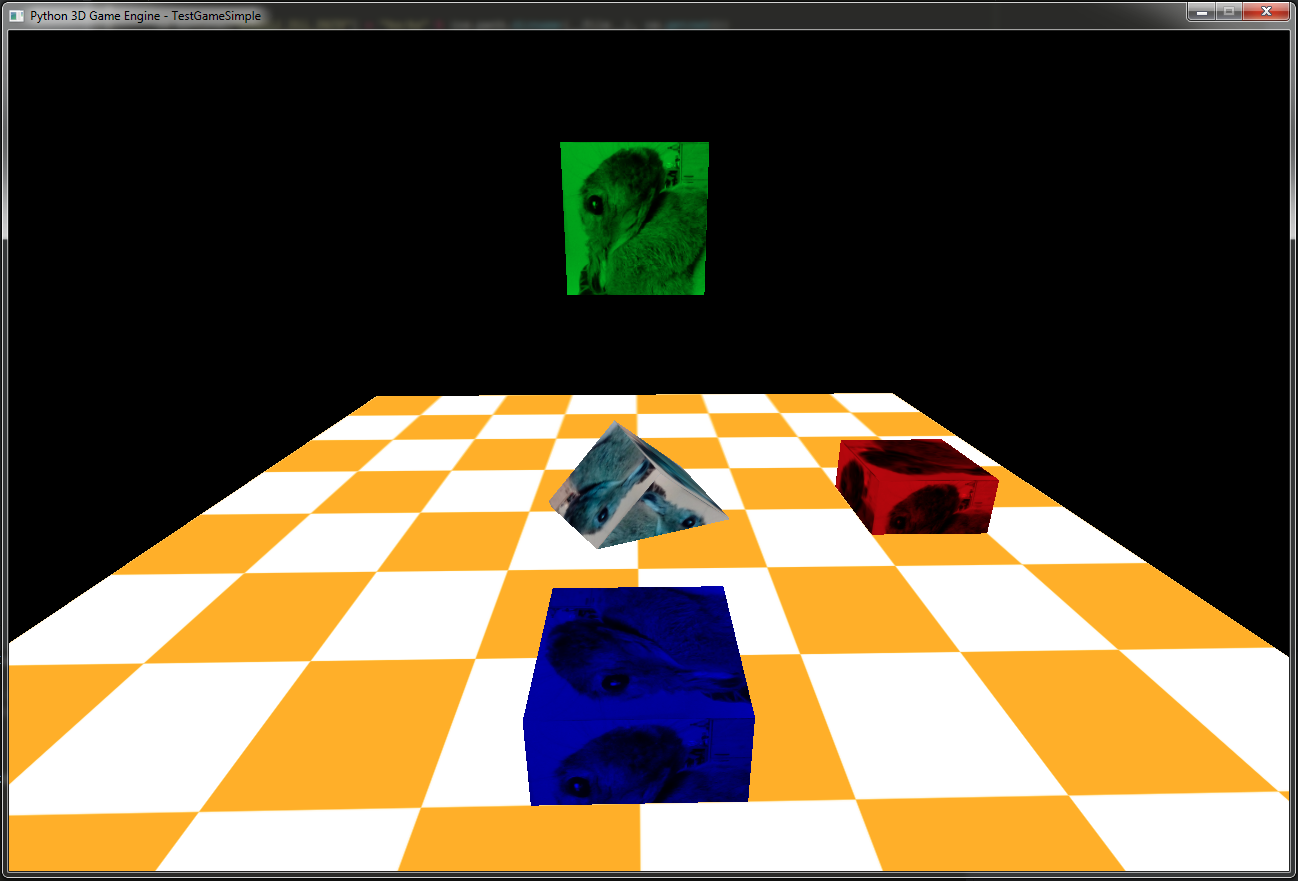
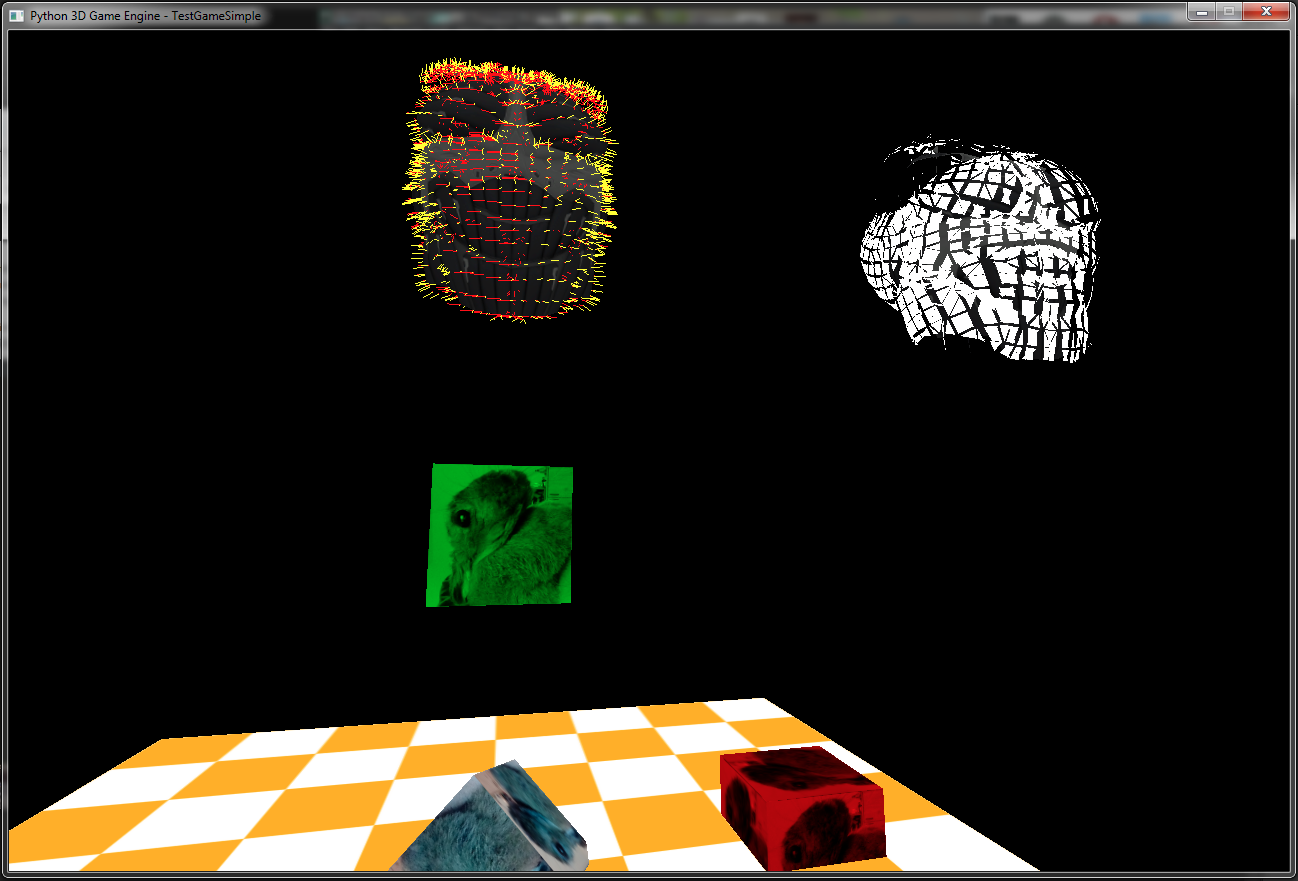
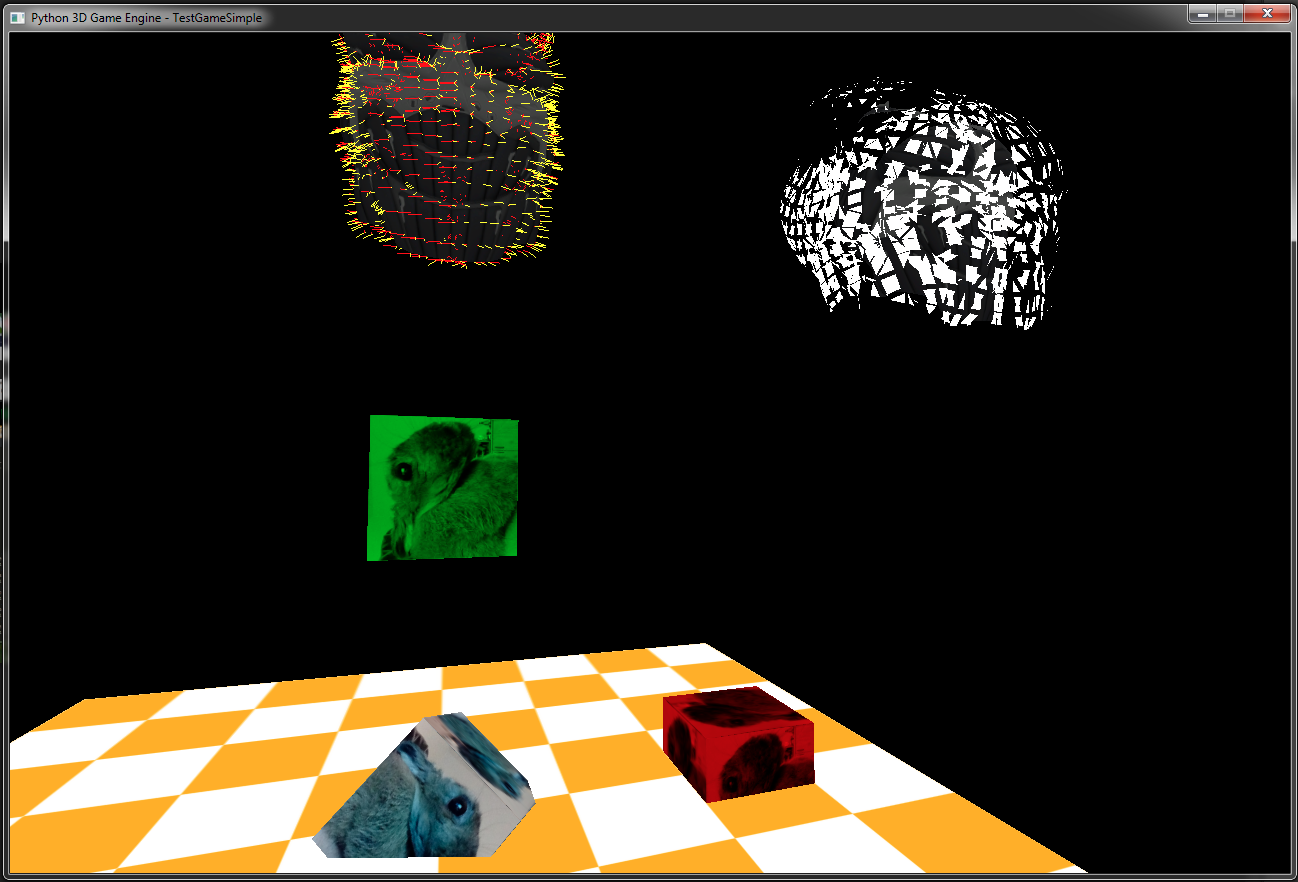
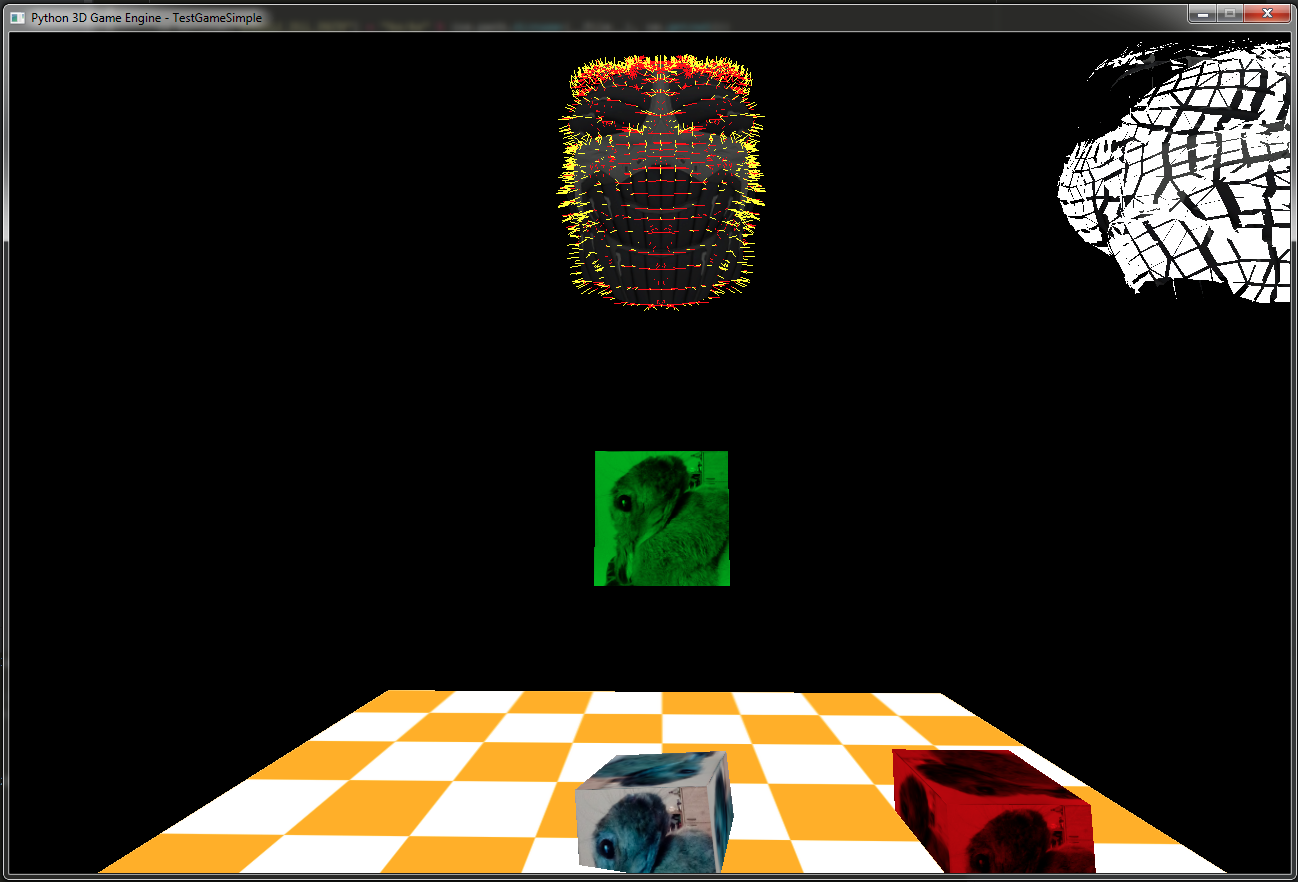
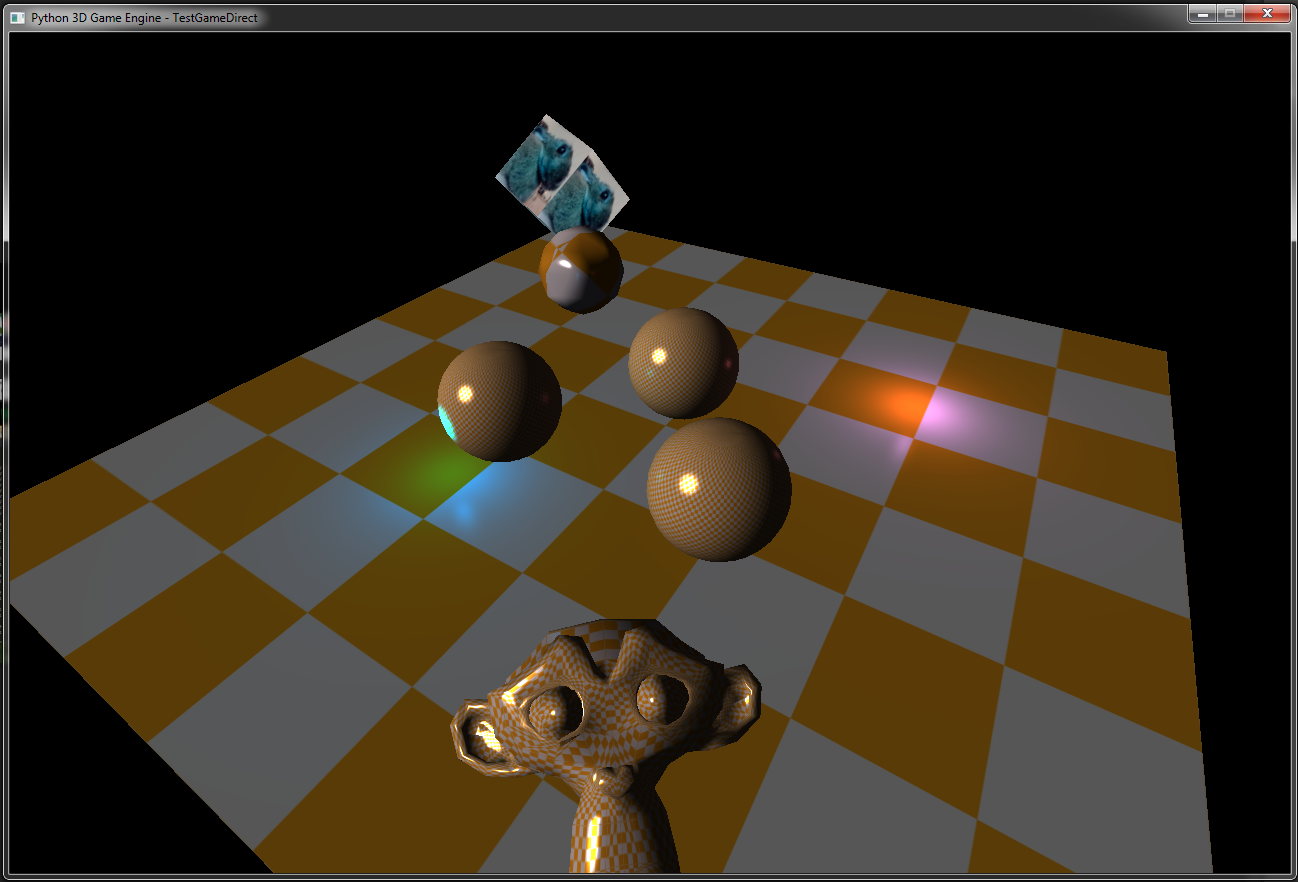
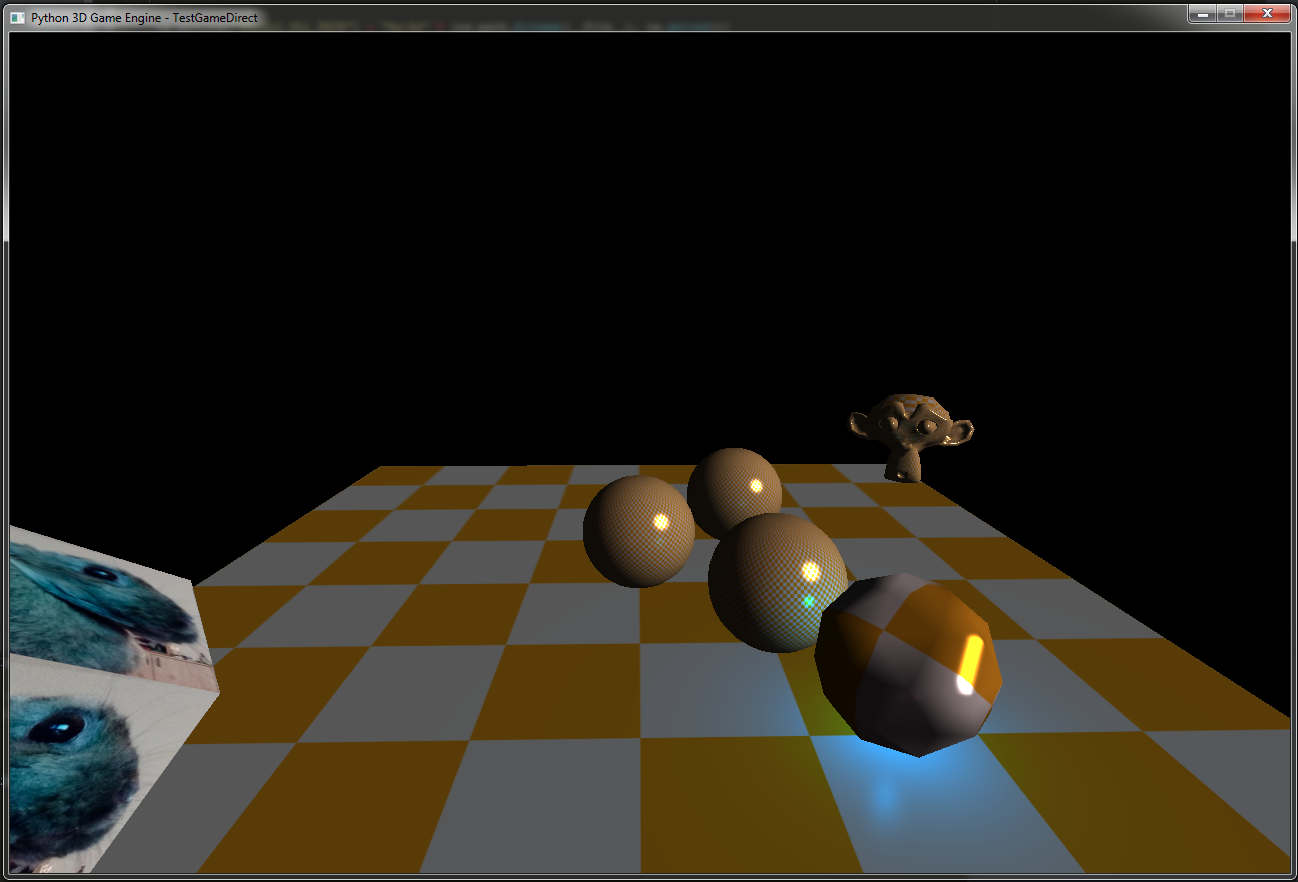
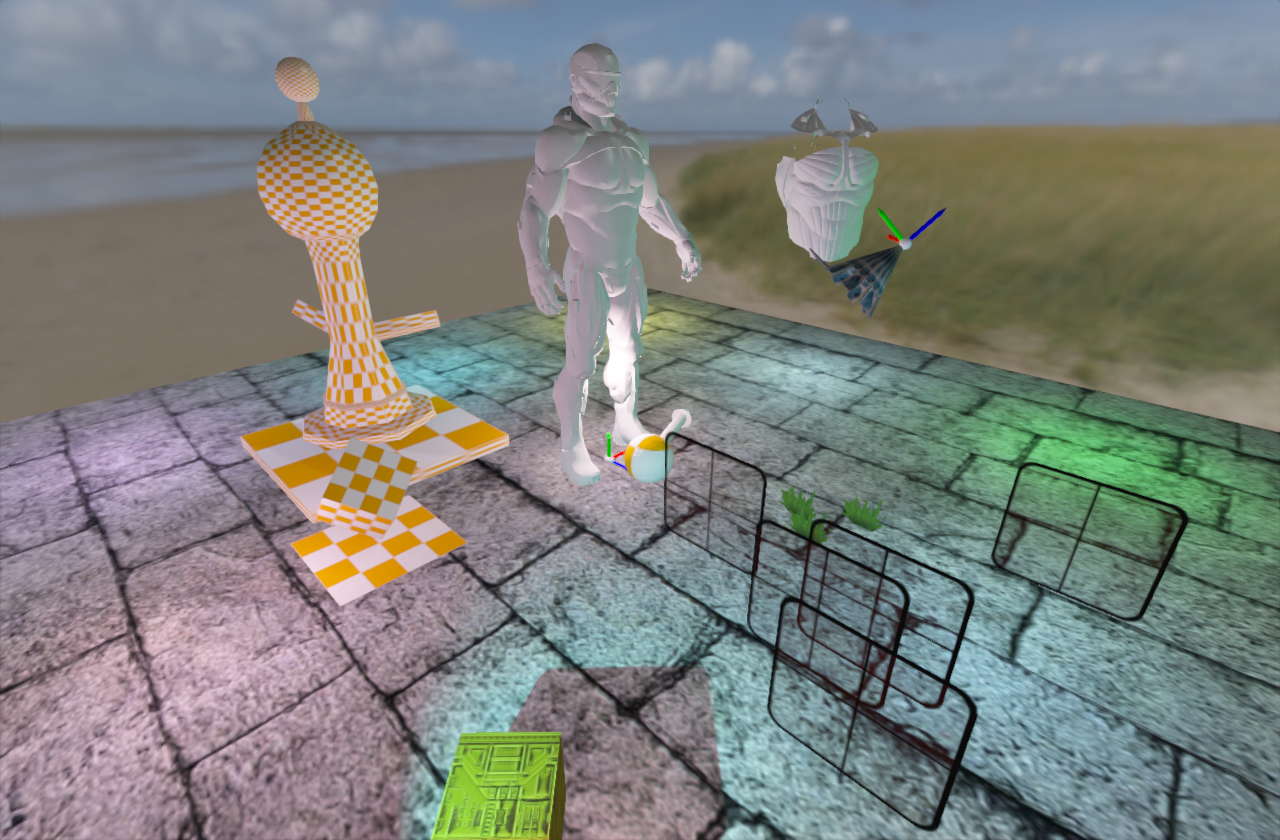
First I had to setup the game engine loop, reading inputs and window. I use SDL2 because it's robust and saves you lot of headaches when it comes to cross-compatible code. I've implemented event system and manager for input, to be able to react on closing window, maximalization, connecting new device (like controllers) etc. Then added some basic architecture for "Game" to have update function and was free to start with first version of rendering engine. This one I call "Direct Rendering Engine" because each game object, which is rendered by a Mesh Renderer component can determine which Shader to use for the whole rendering and spits everything directly into buffer, which you see on screen. Most of the shaders were unlit in the beginning and ended up implementing Blinn-Phong shading model. Later I came back to use this renderer to test out geometry shaders for exploding effect and other stuff like debugging normals, tangents and bitangents. (Yes, monkey has a Look At component, so she is always watching ^.^)
Demo 01: Unlit - Direct Renderer
Demo 02: Blinn-Phong - Direct Renderer


Moving Forward
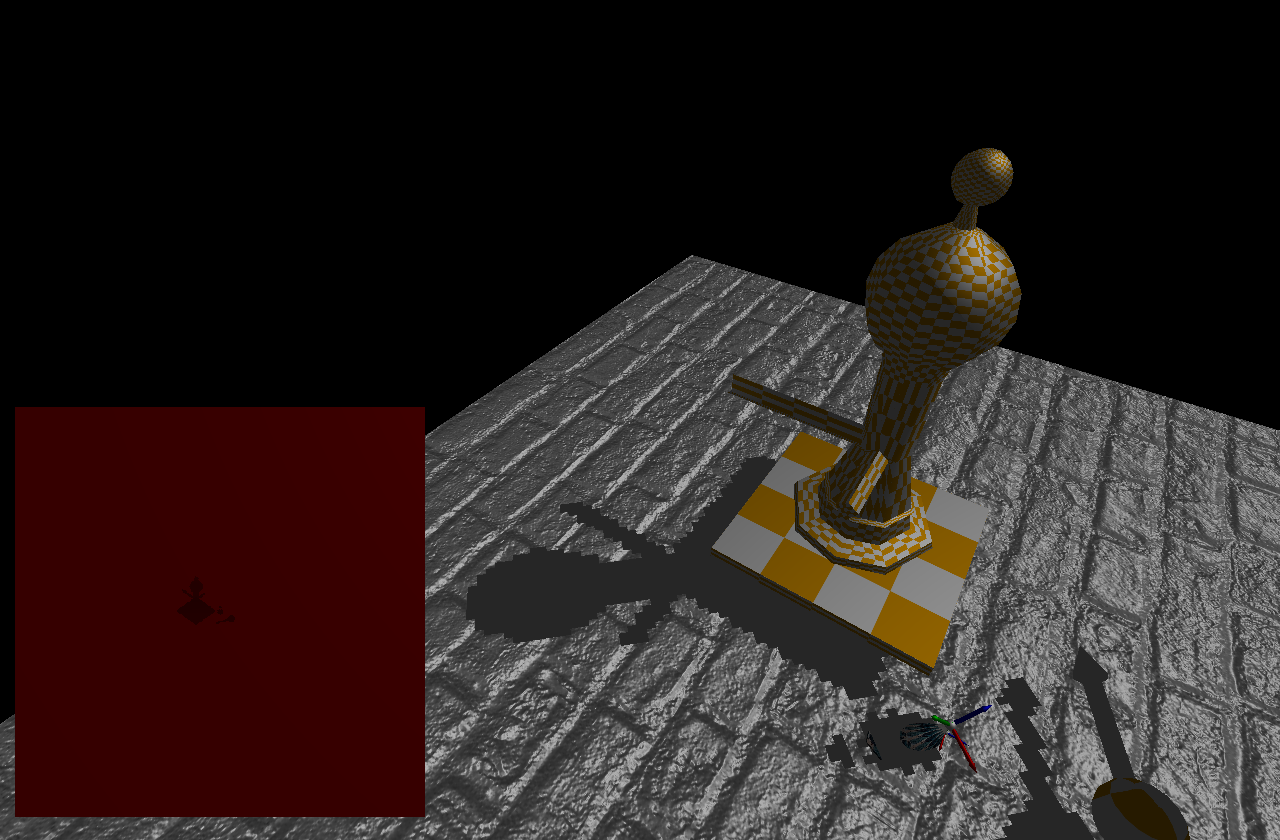
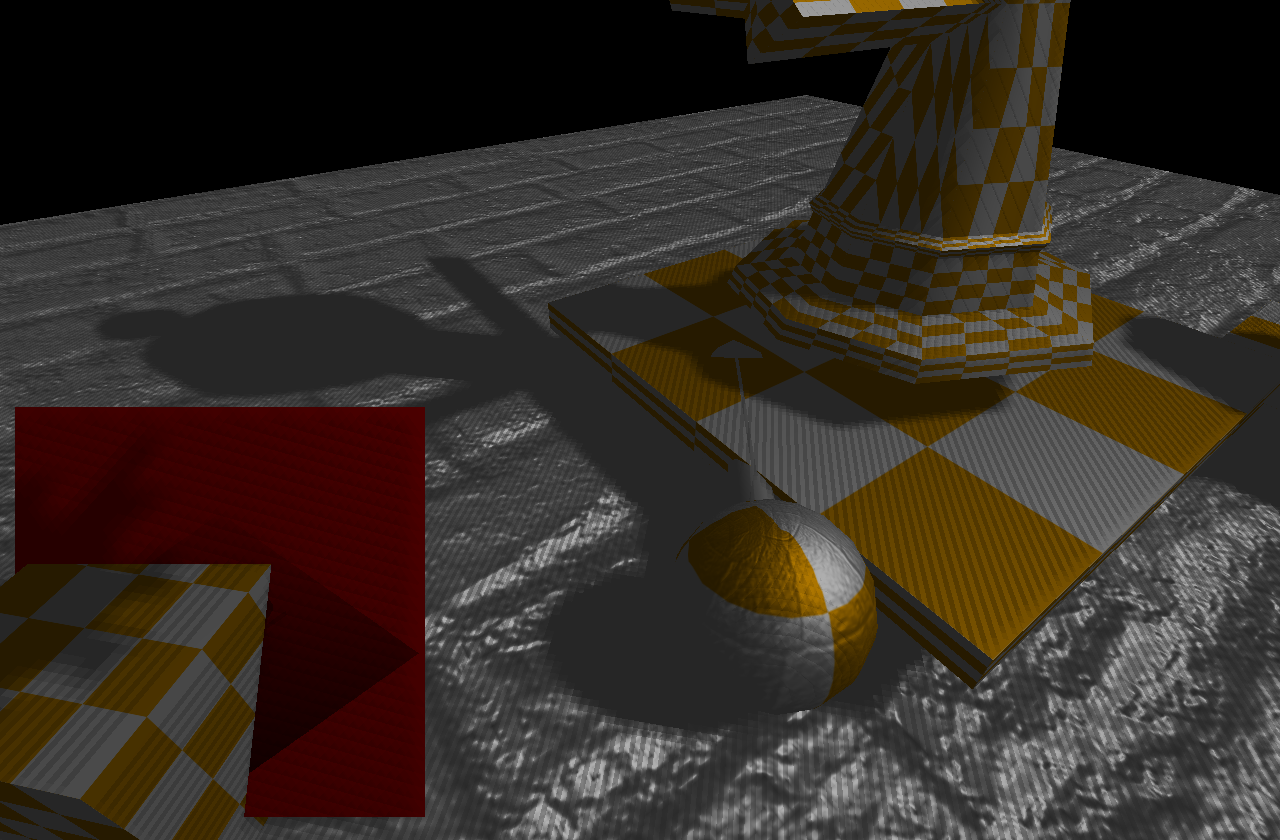
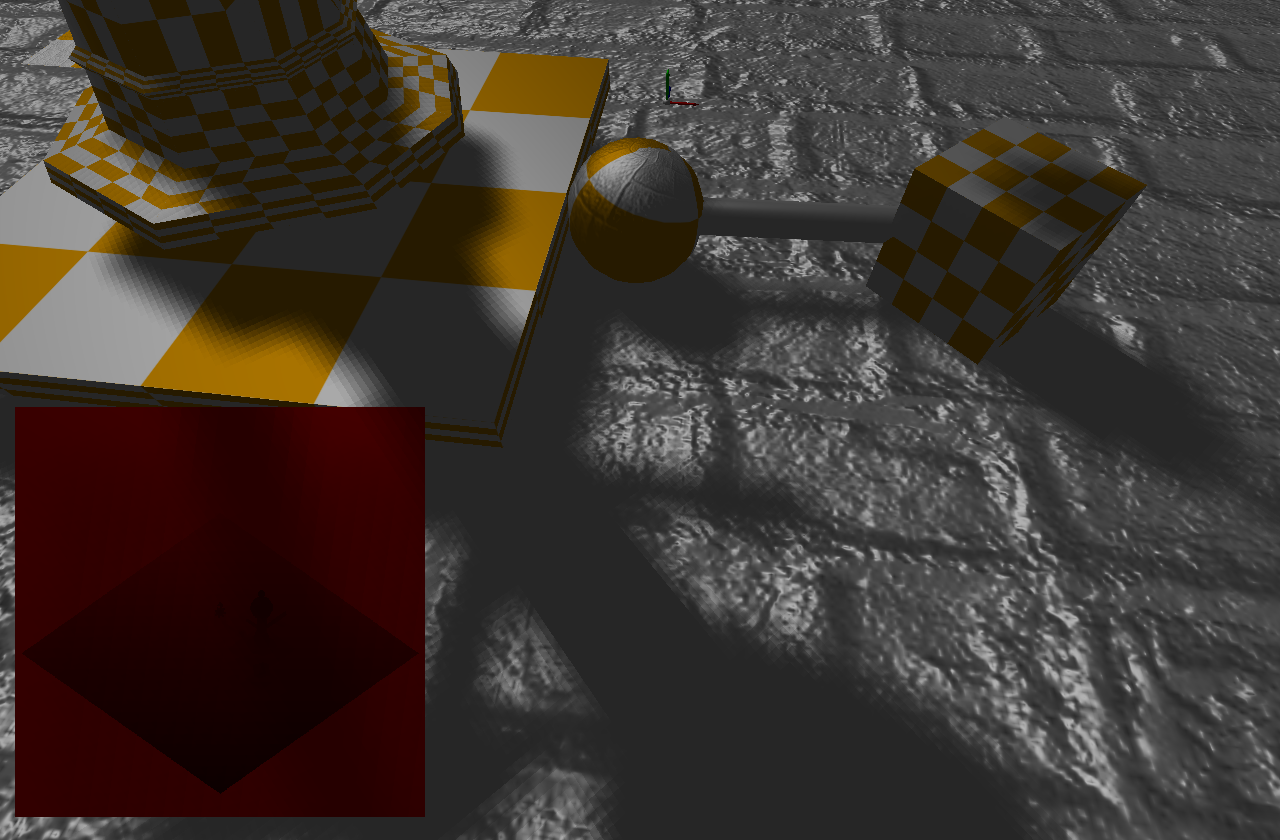
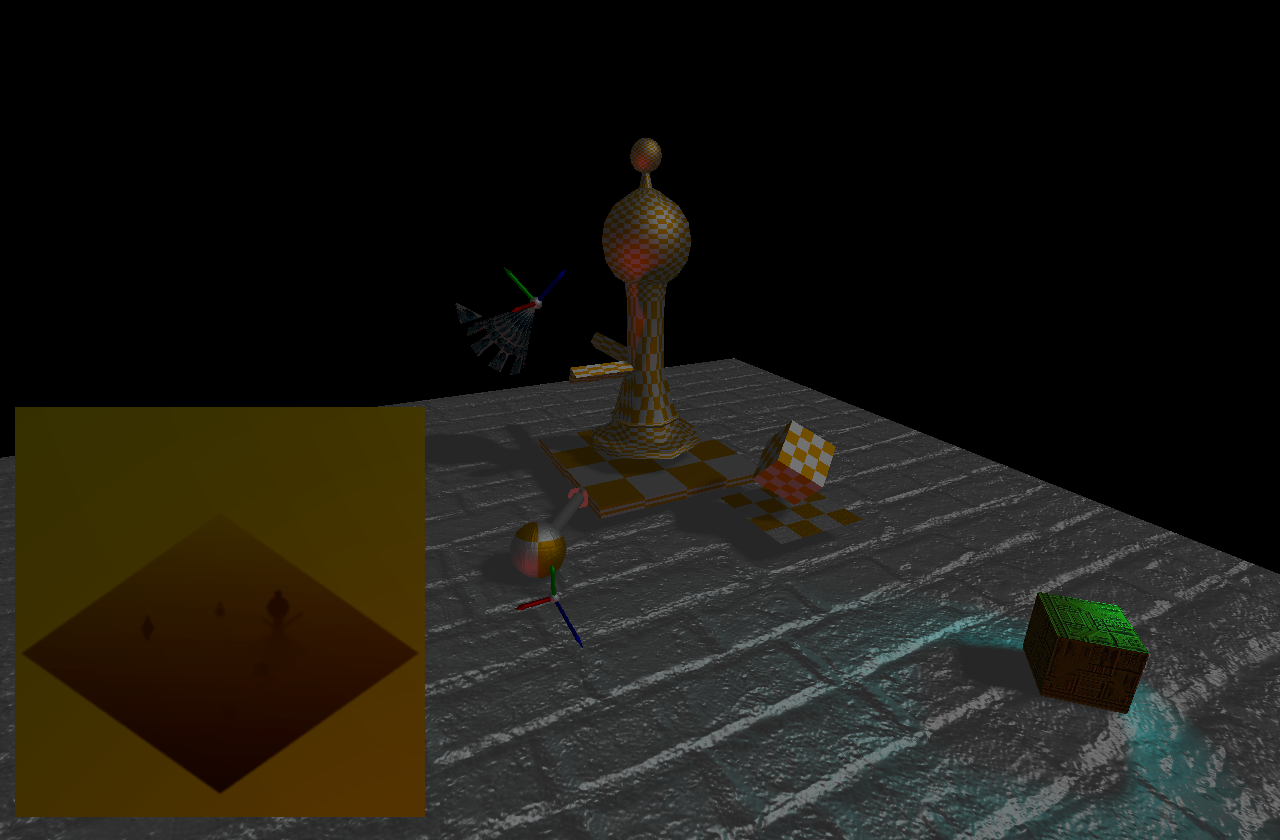
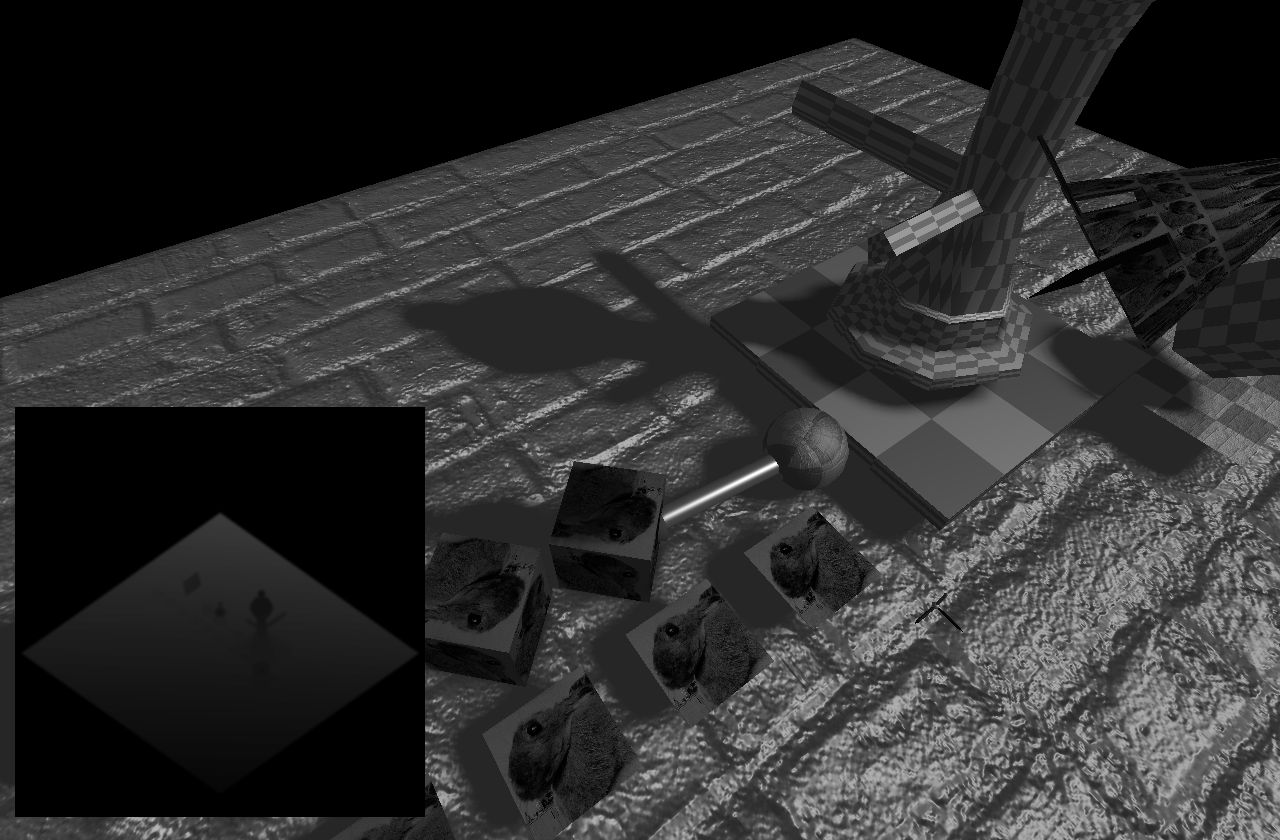
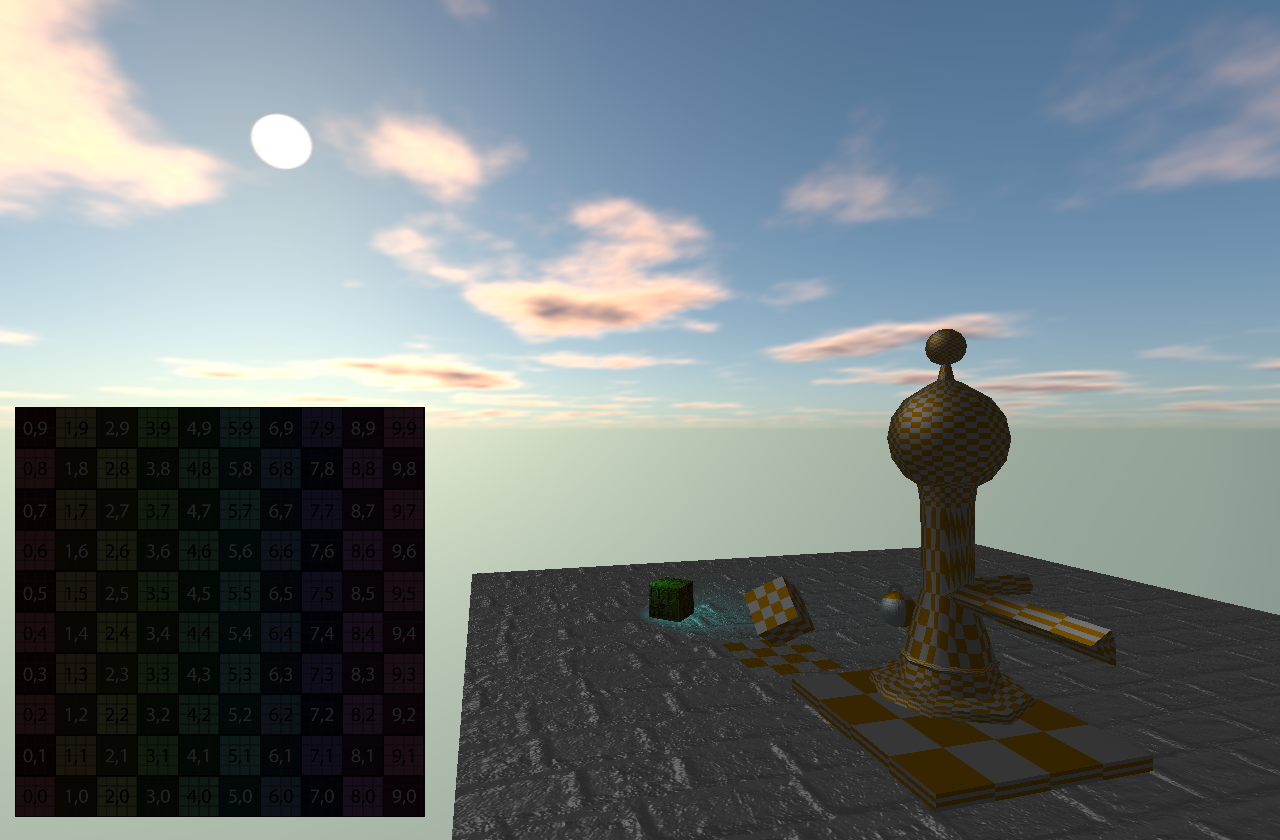
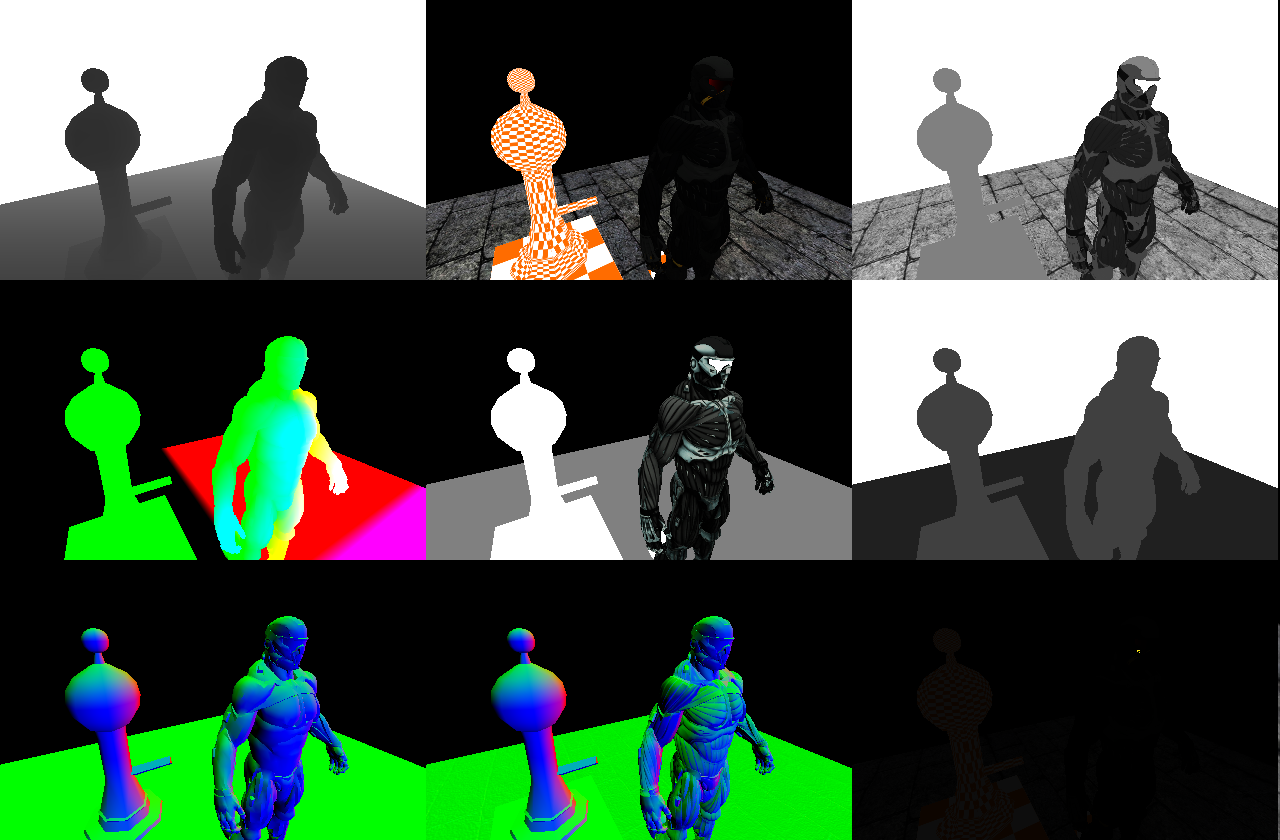
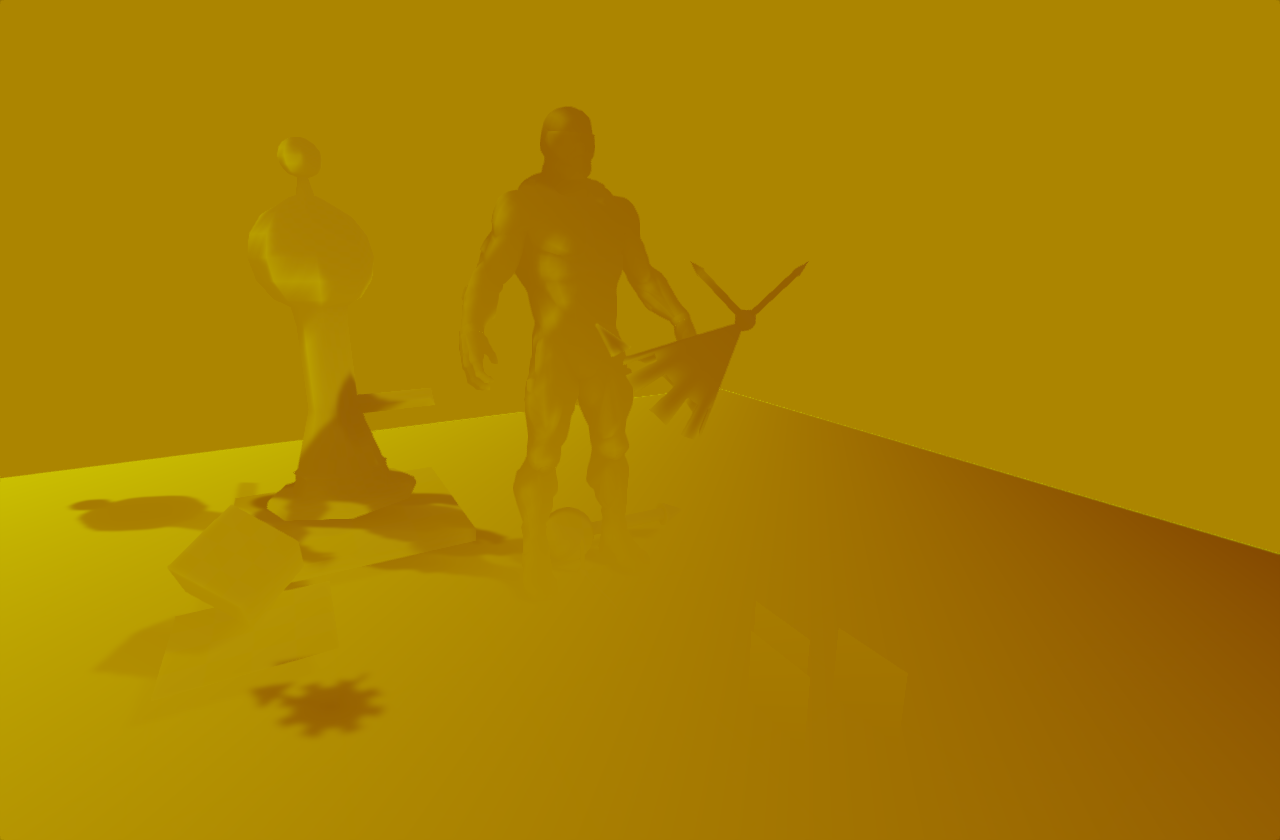
It was time to move forward to Forward Renderer and it is here I spent a lot of time. I started implementing Render To Texture (screenshot 1), first Bump Mapping, rewriting math library and figuring out row-major, column-major matrices. After bunch of trial and errors I finaly ended up with my first shadow map (screenshot 2) and was extremly happy to see my first Shadow Acne :) (screenshot 3). Easy fix: adding shadow bias and get yourself Peter panning problem :D. Adding first shadow penumbra filtering (screenshot 4) and ending with more lights and pretty neat versions of shadow filtering (screenshot 5).
Disclaimer: For most majority of people these screenshots will be ugly, but they mean a lot for me, since those are my first steps in rendering engine development.
Moving Forward to Forward Renderer
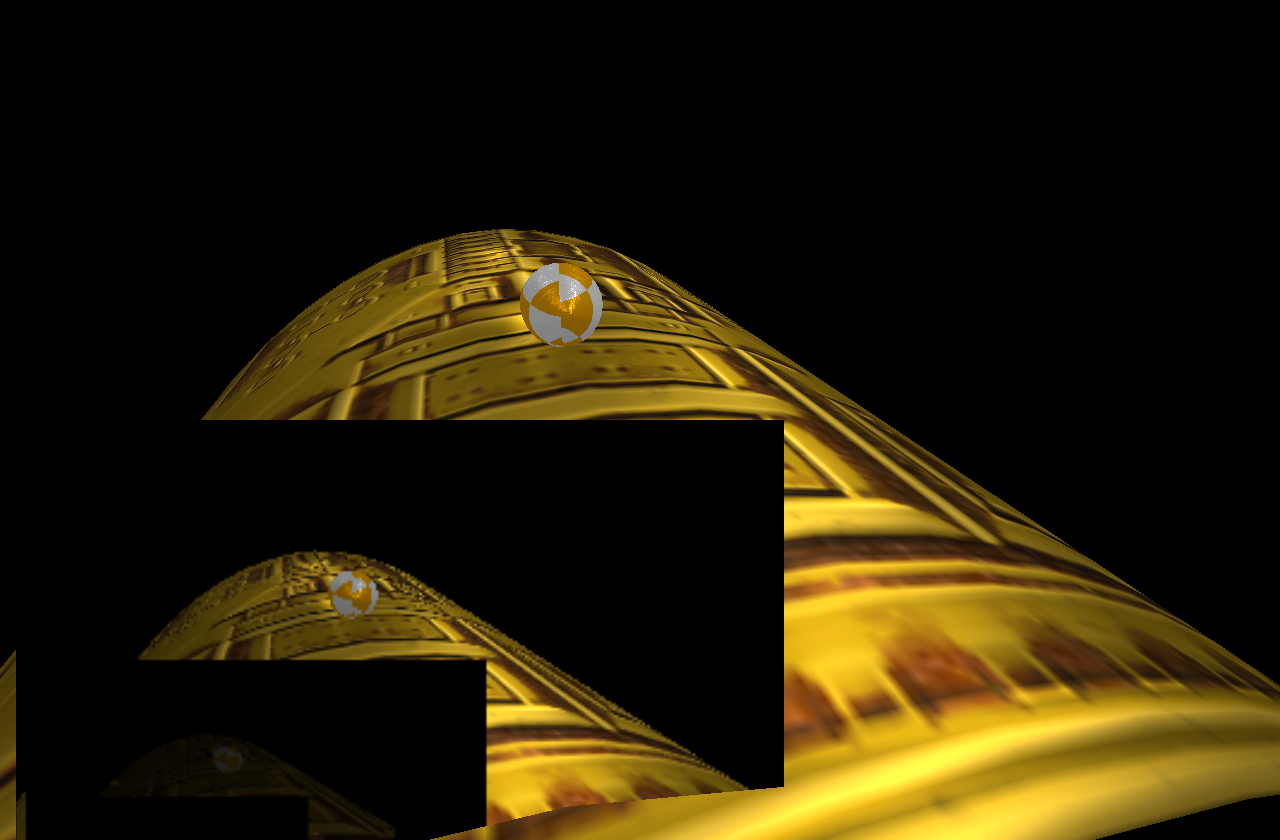
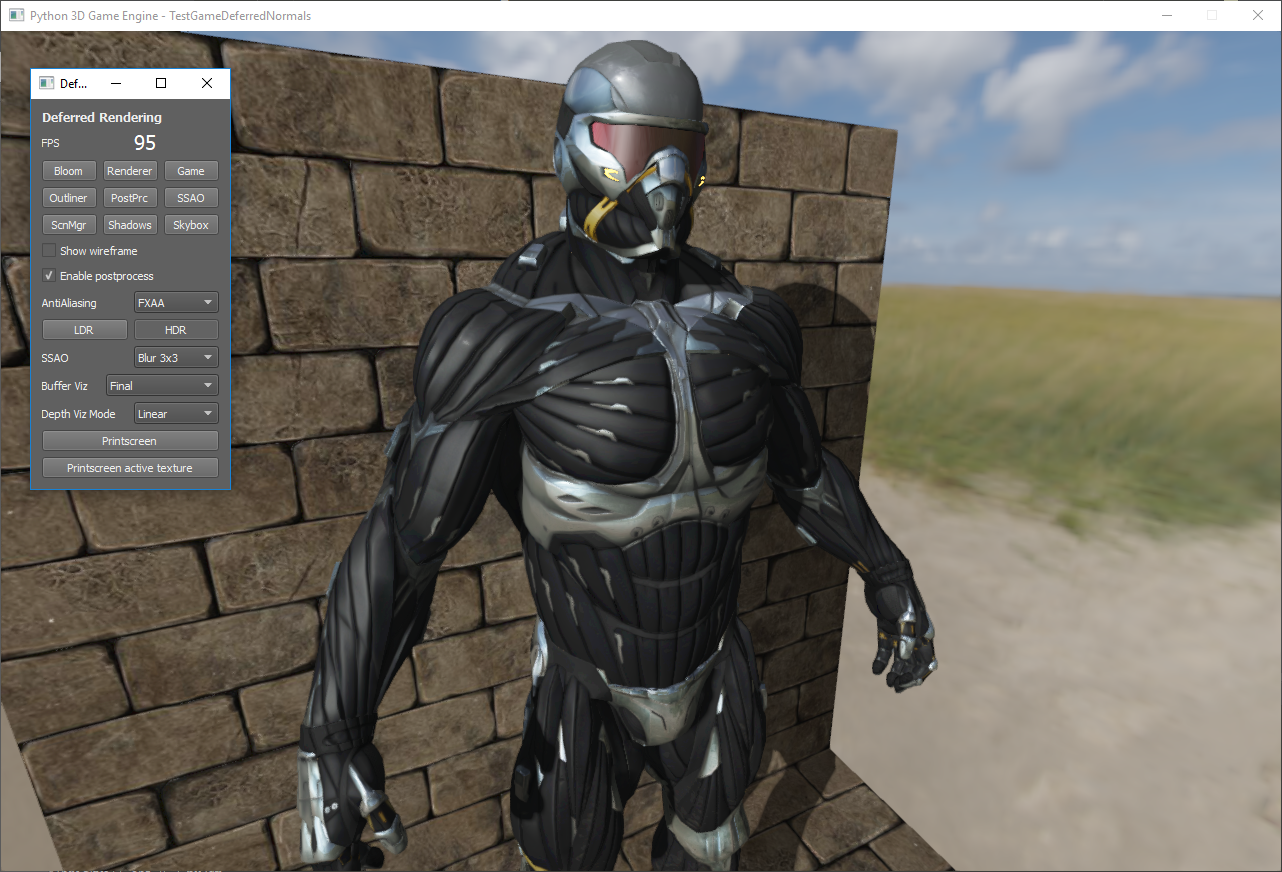
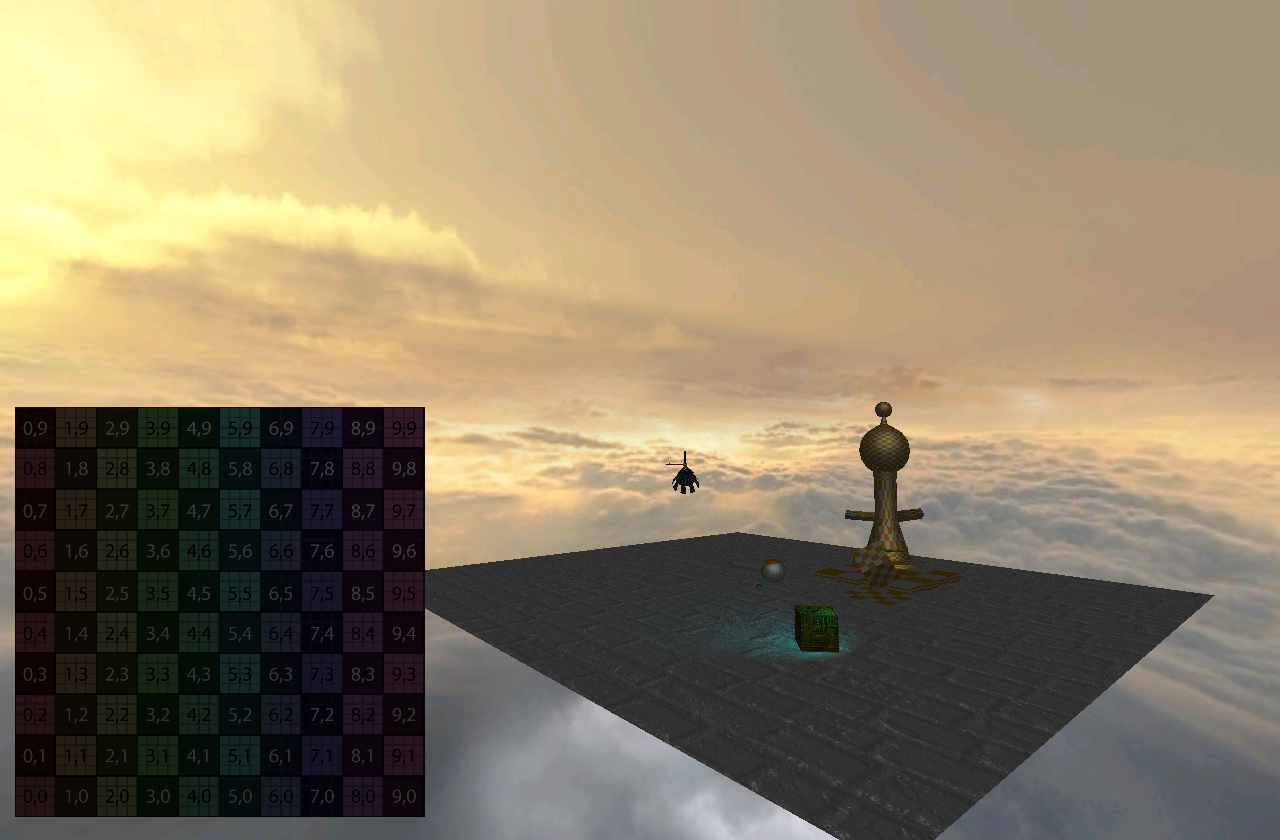
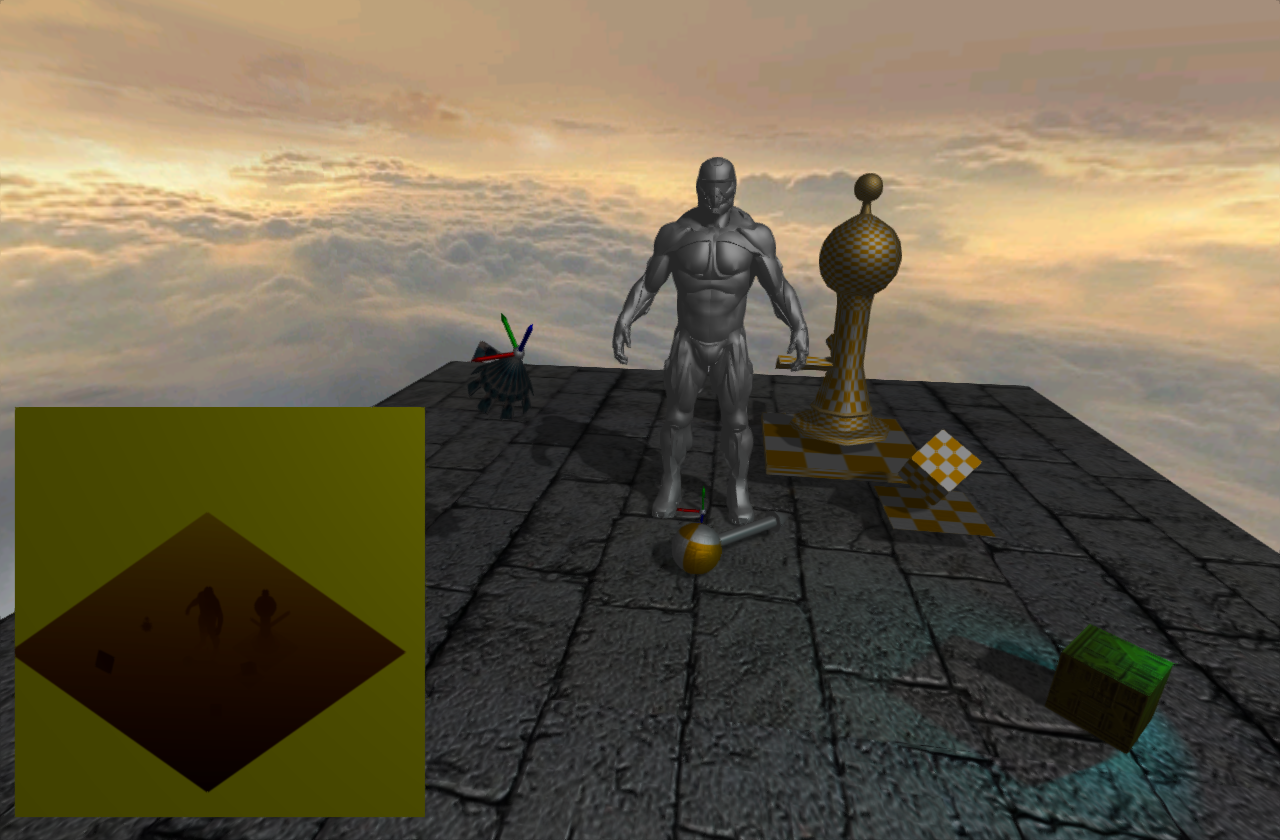
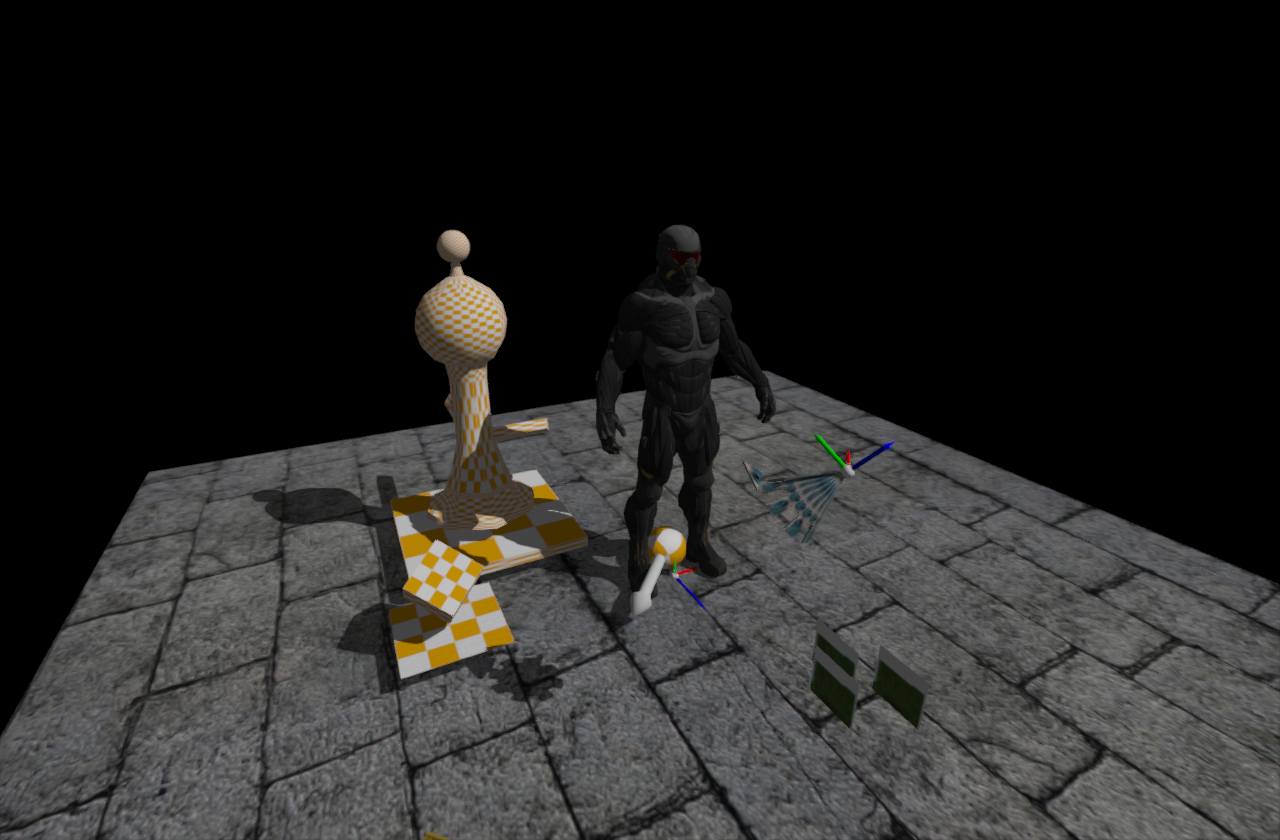
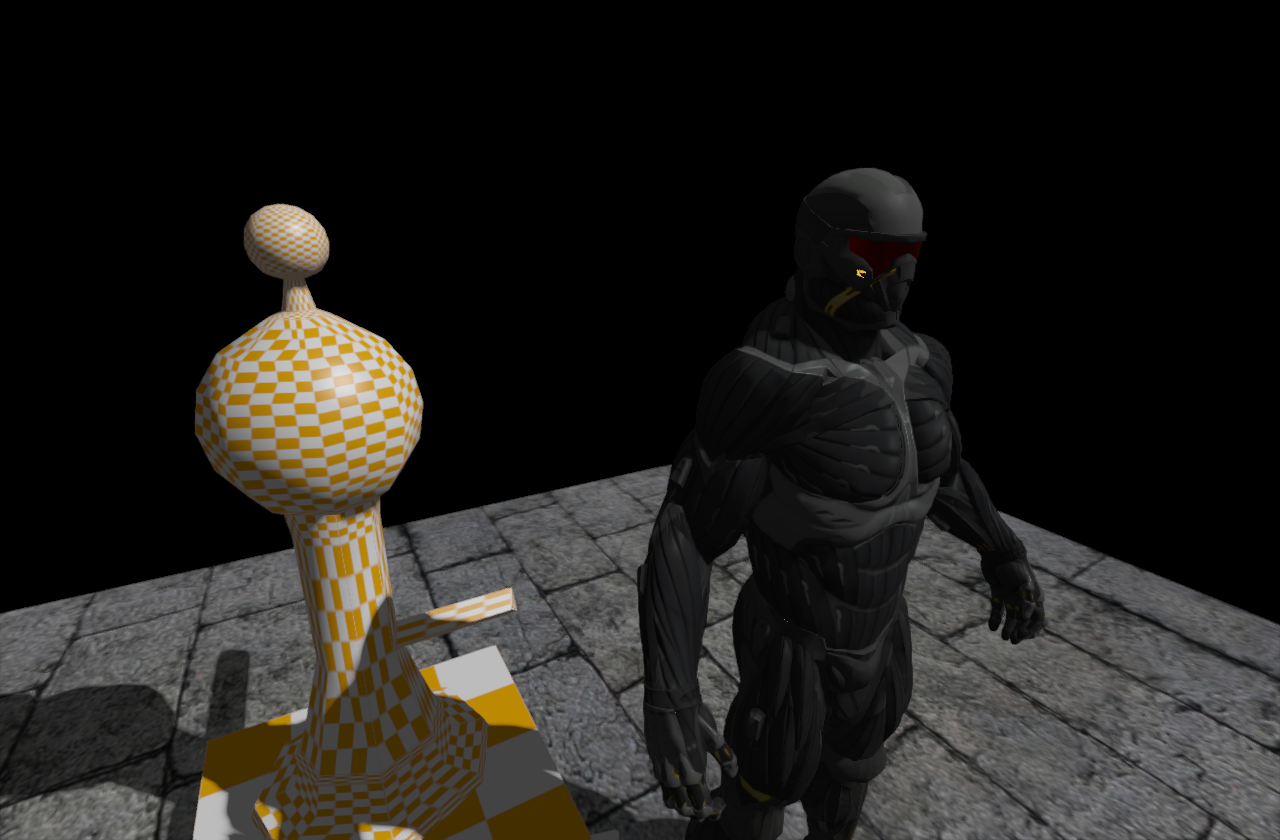
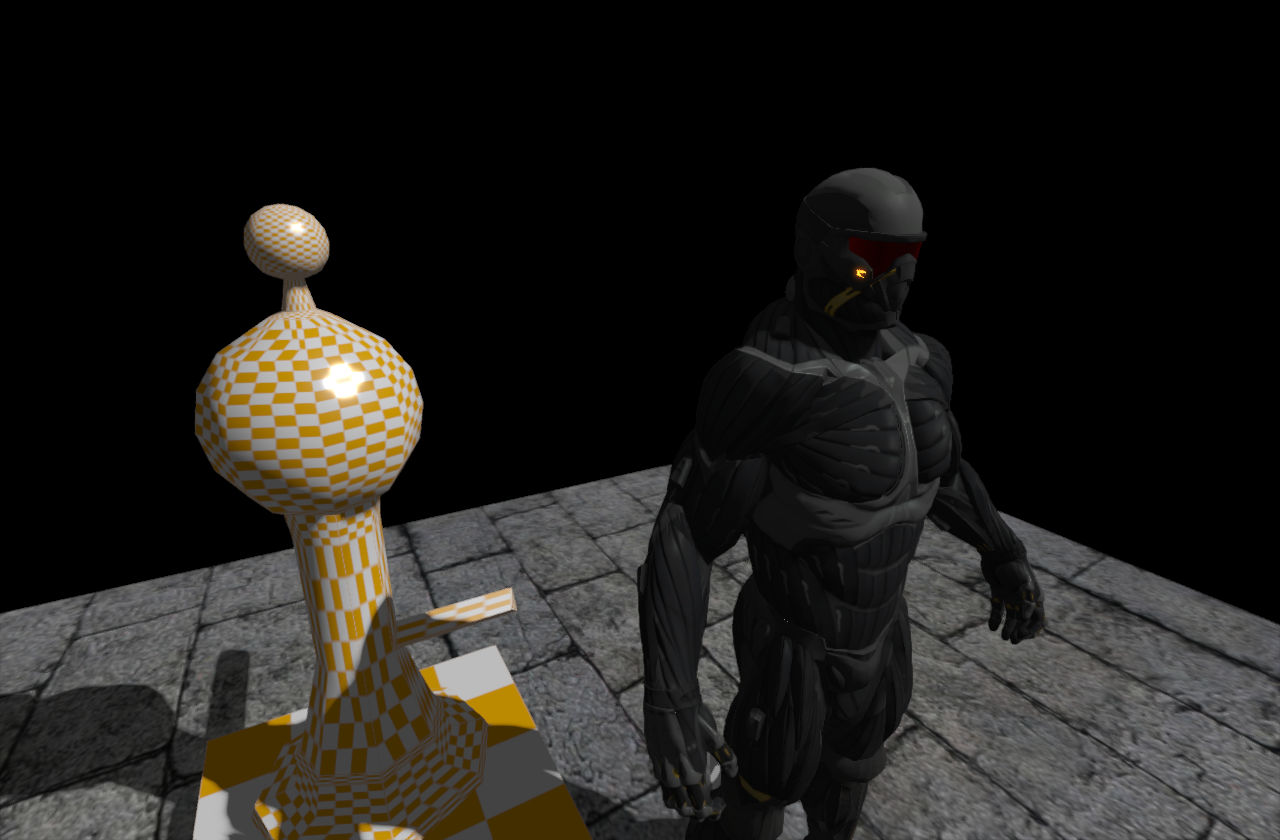
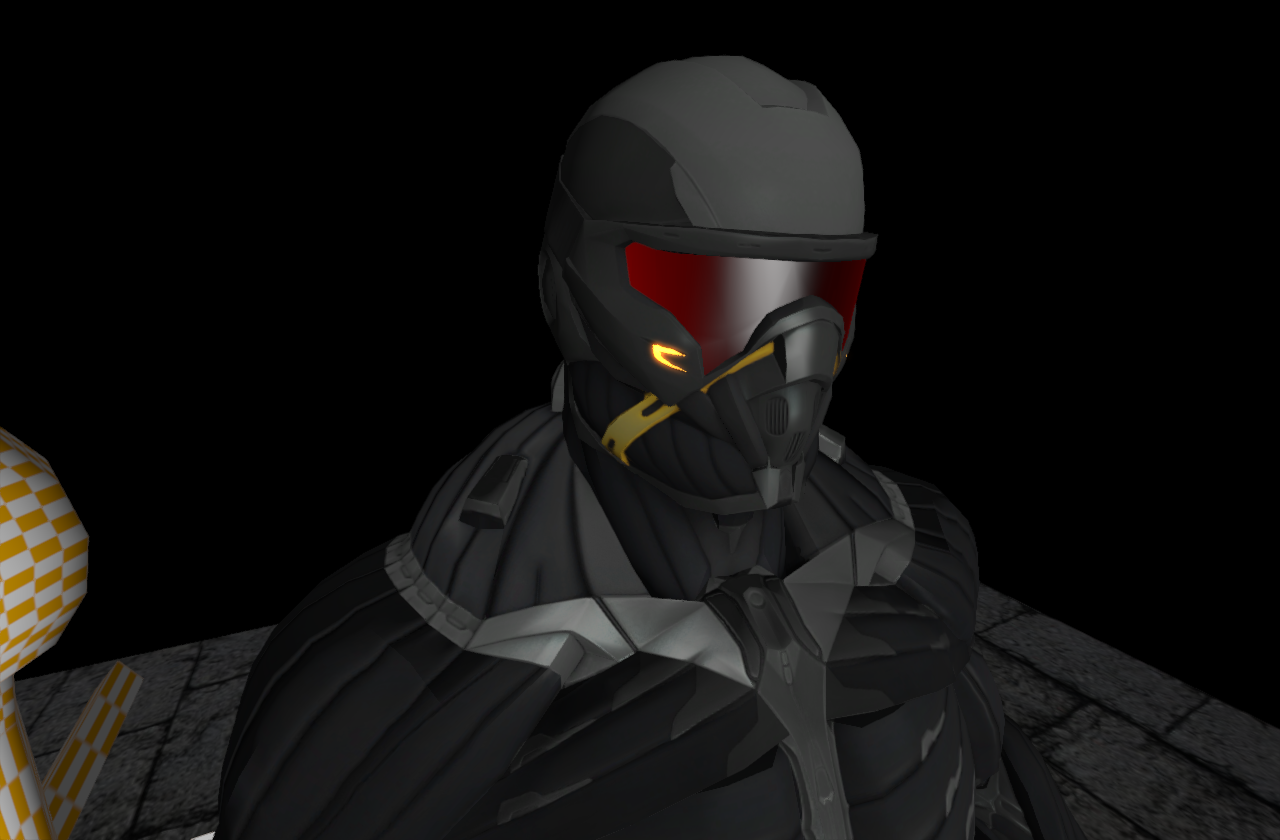
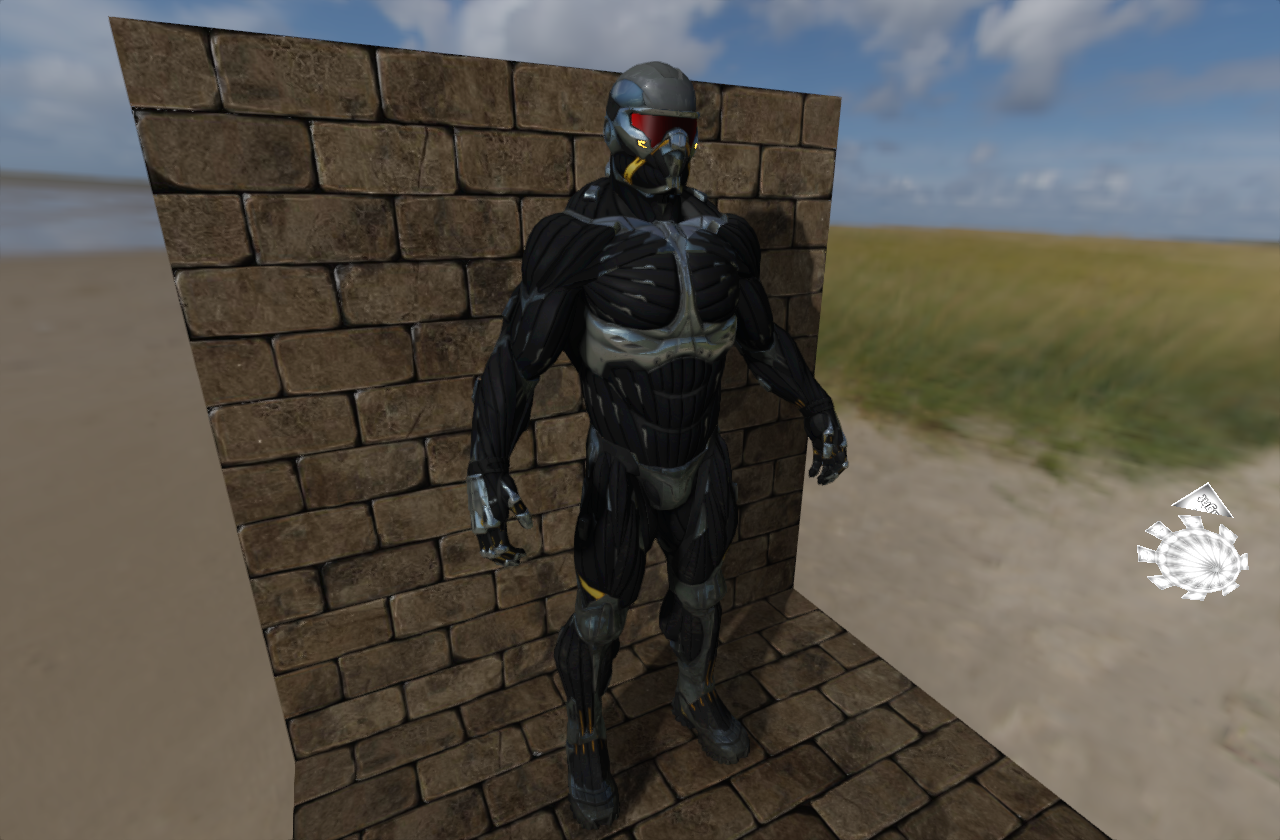
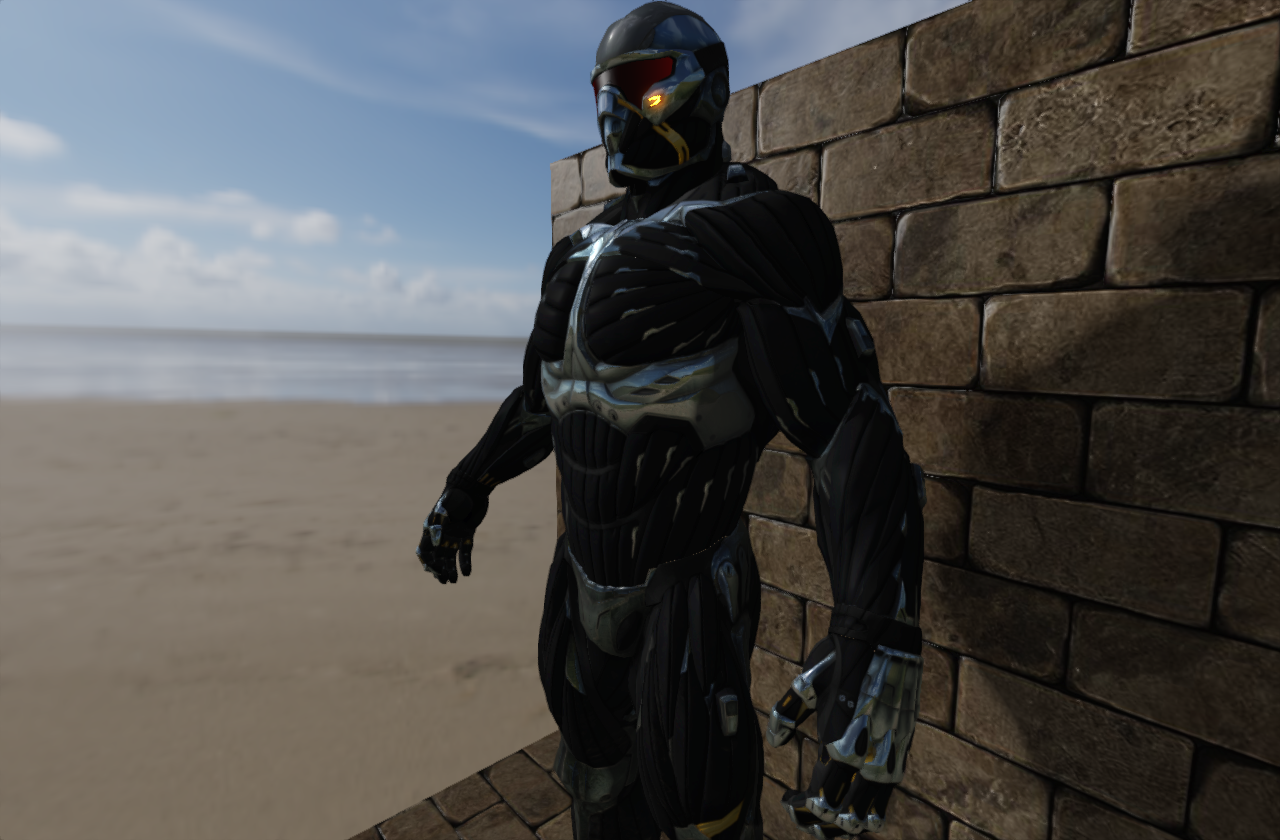
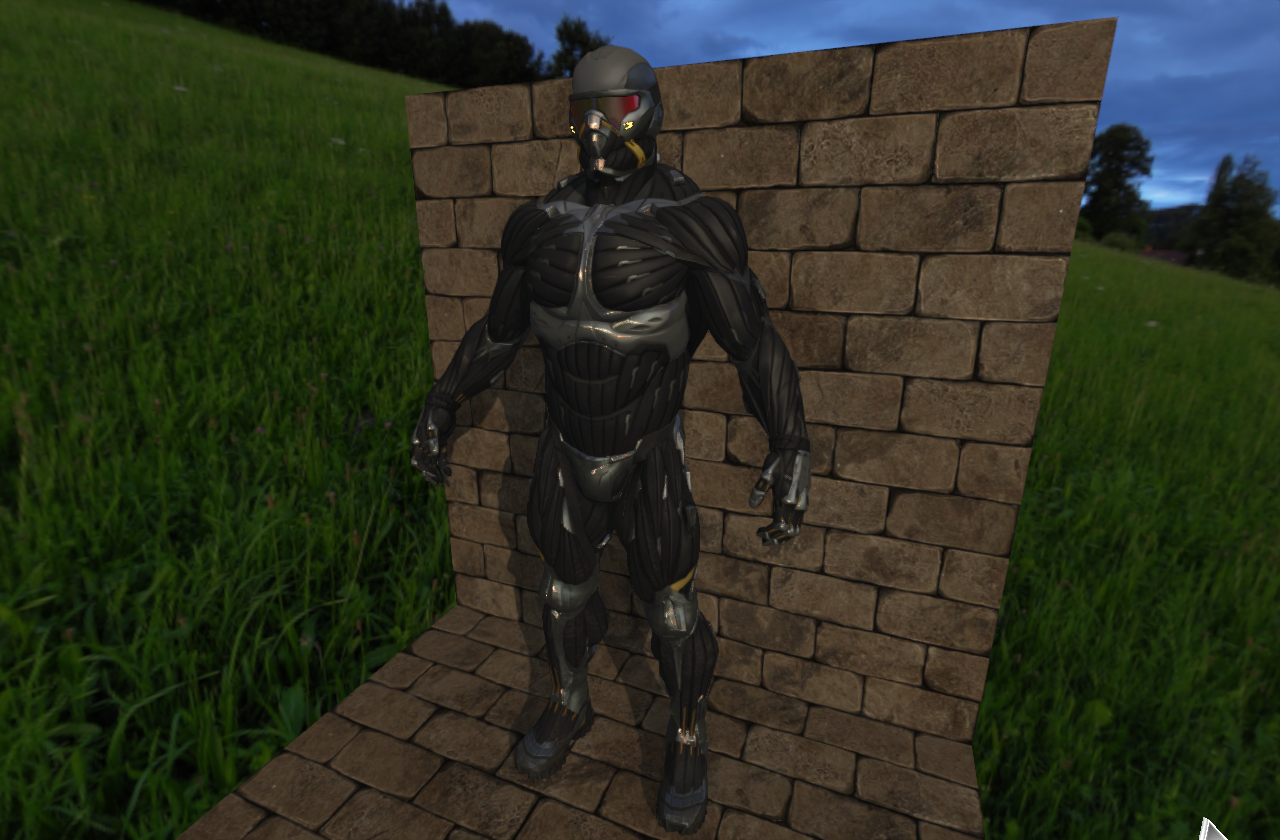
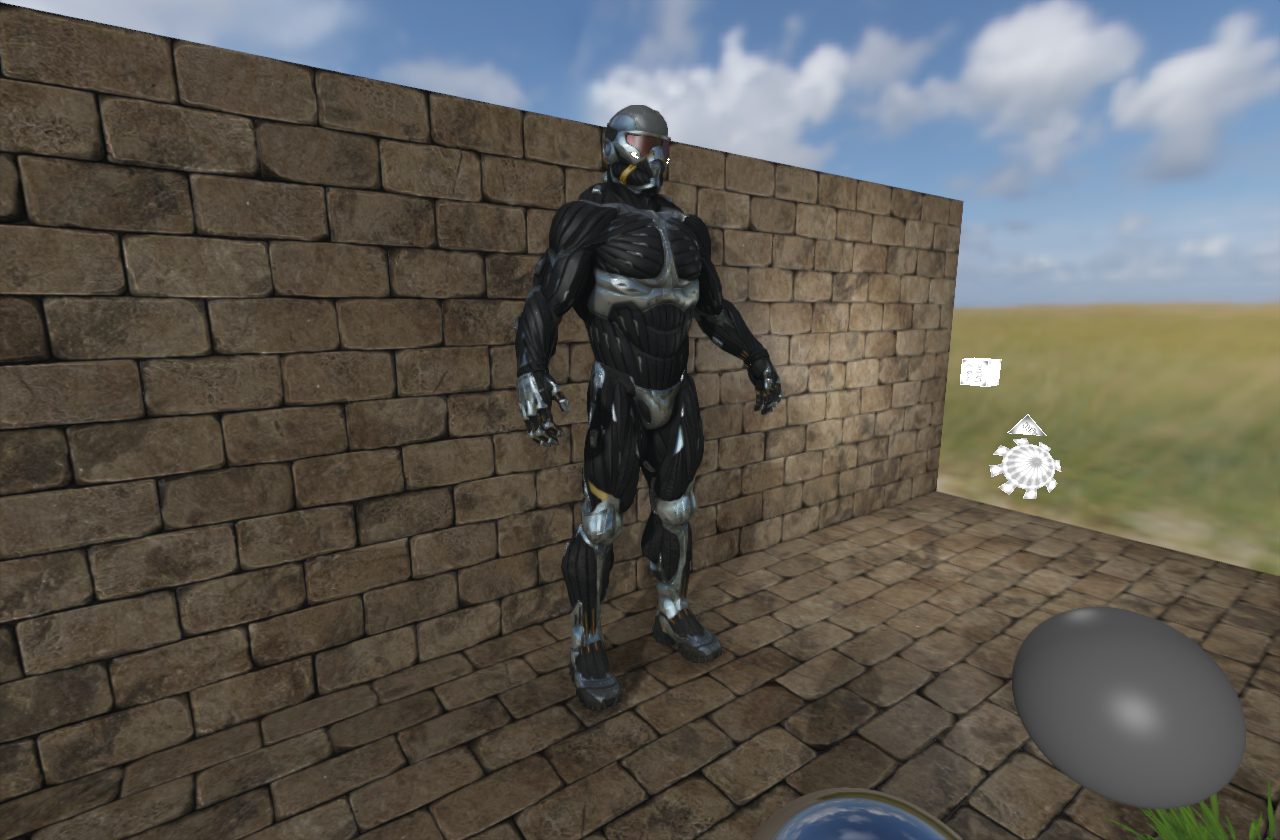
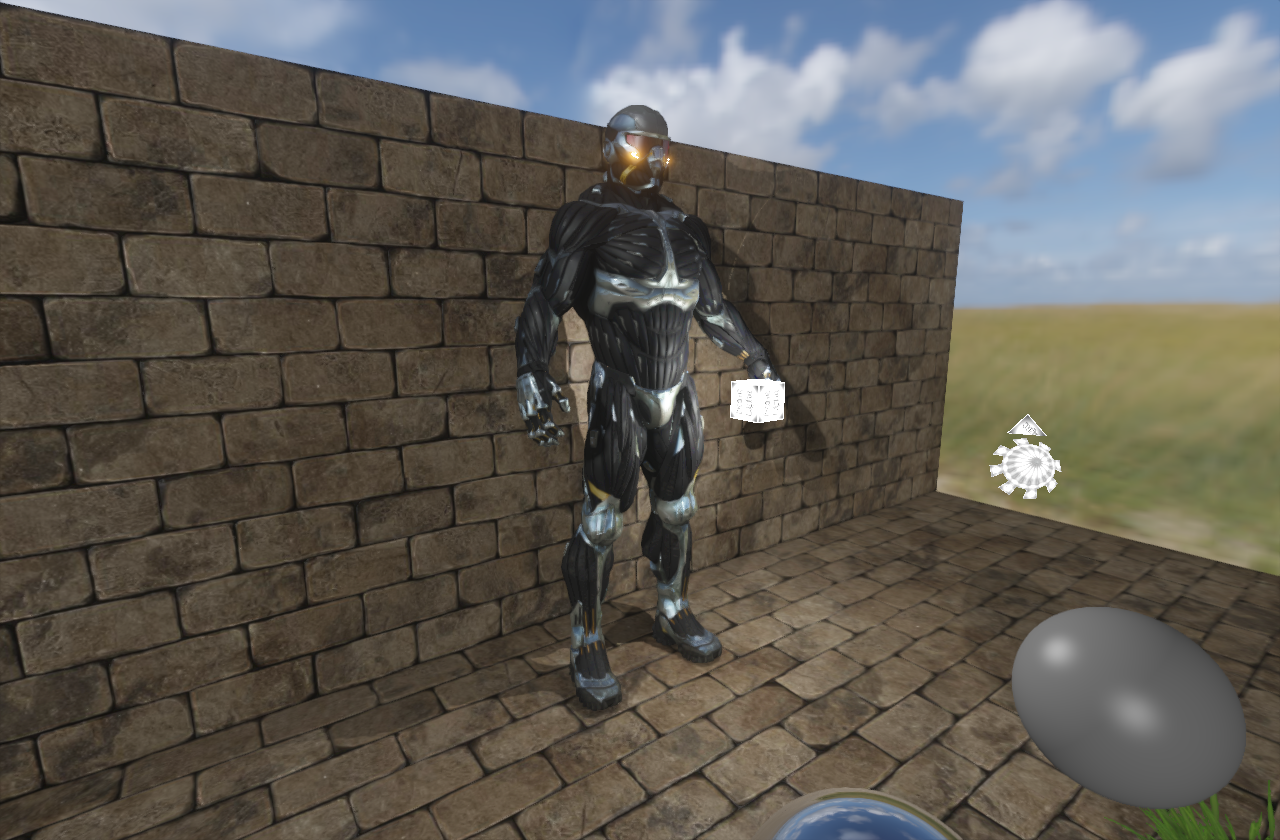
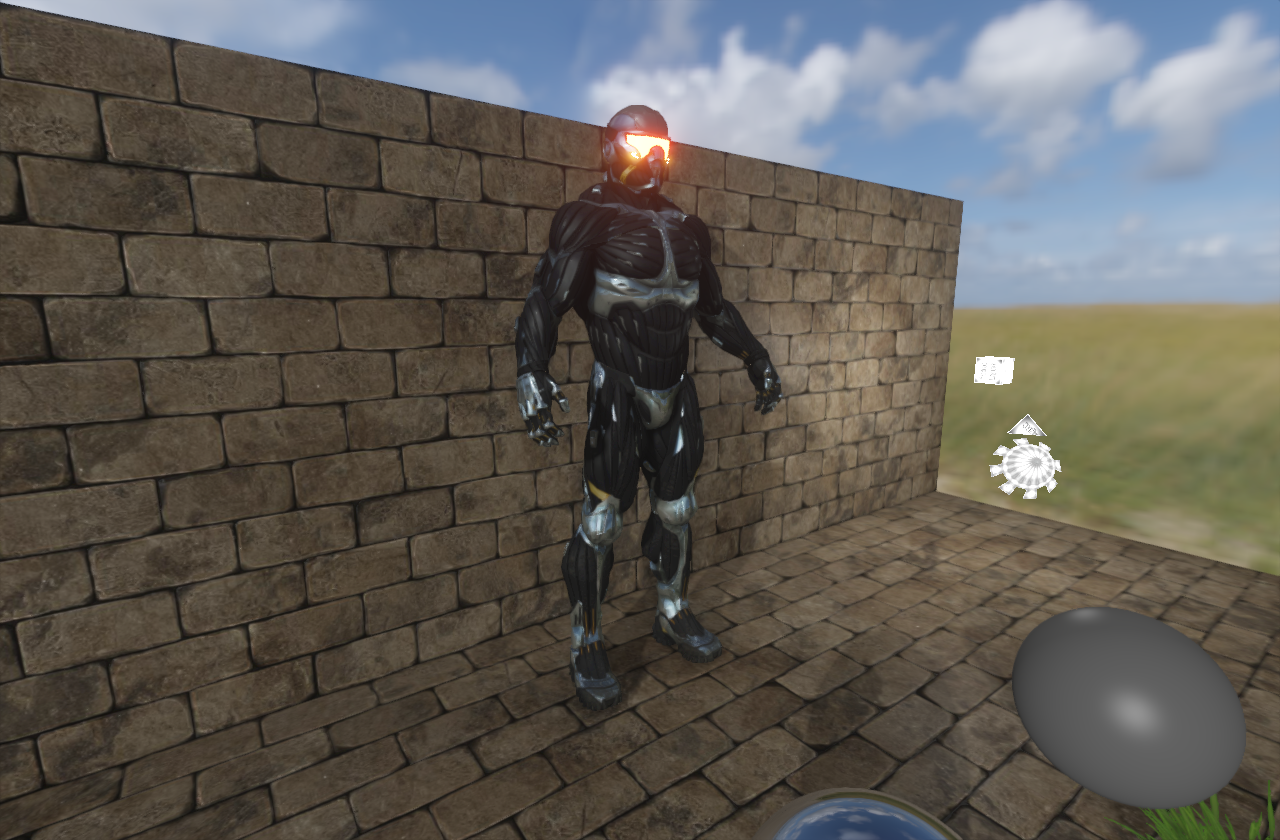
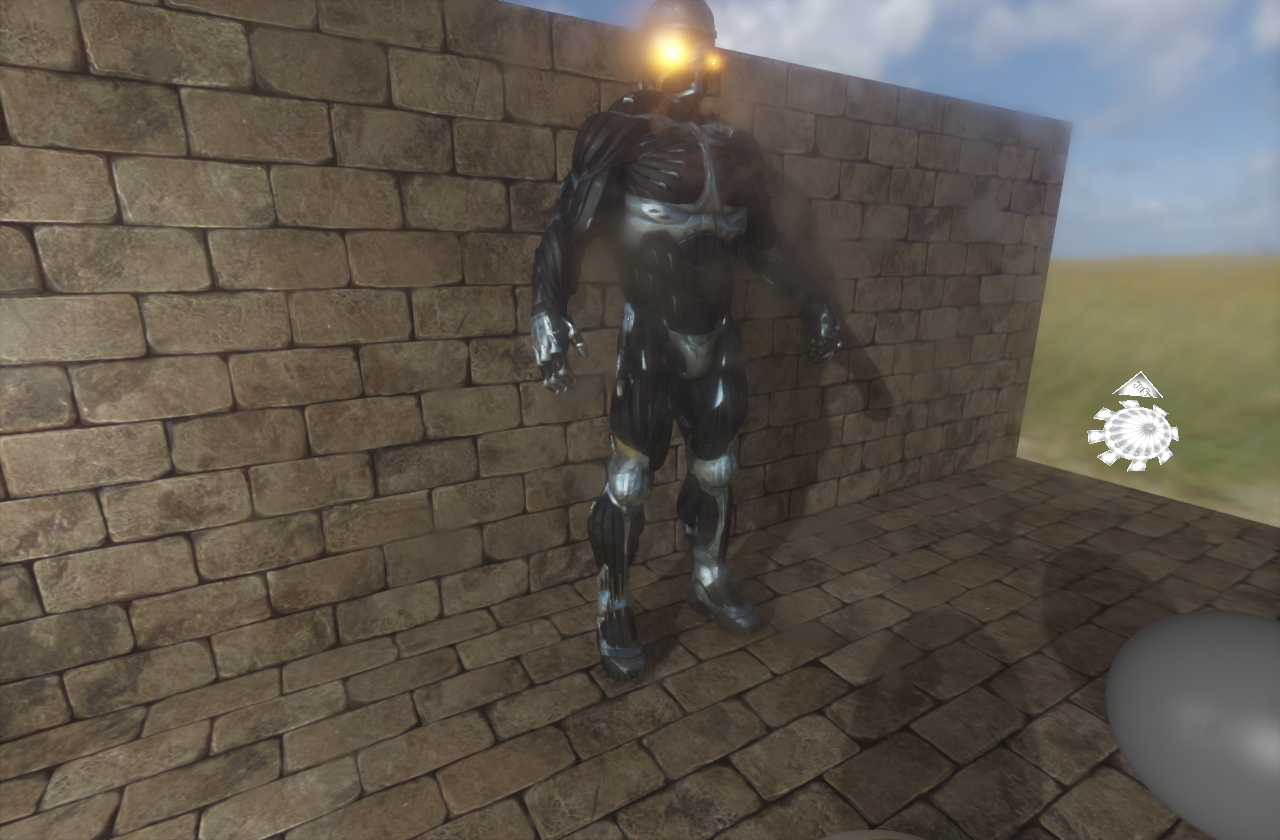
At this point of time, everything was rendered in LDR (Low Definition Range). But it was time to add first postprocess effect (screenshot 1) and of course skyboxes (screenshot 2, 3). Then I solved antialiasing with implementing FXAA and MSAA (more about that in Antialiasing section). Some more work on my own obj loader, creating intermediate mesh data format and adding nanosuit (screenshot 4).
Moving Forward to Forward Renderer (2)
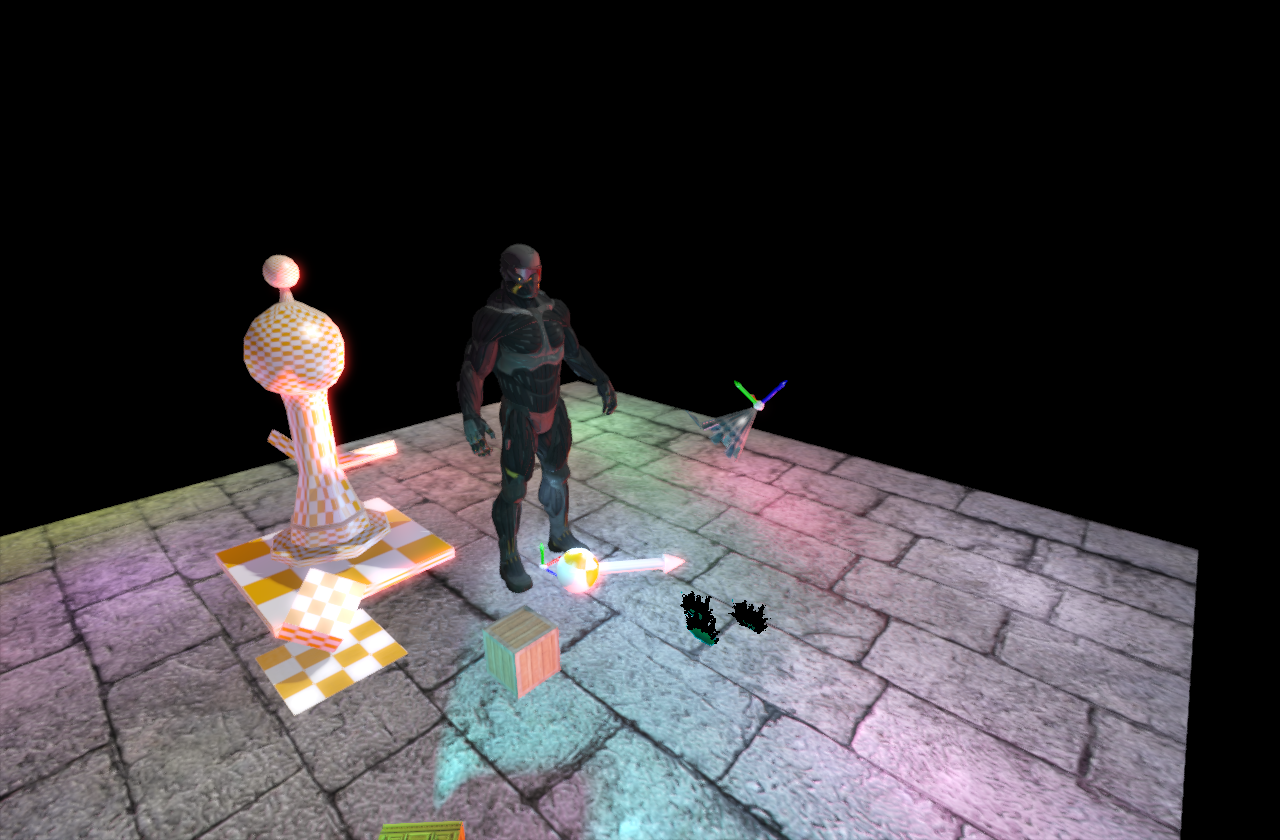
Light and Shadows
After few initial months it was time to get serious and start to implement Forward Rendering Engine with all important features - mainly lights and shadow mapping. All the common light types were fully implemented and in the future wishlist do remain the Polygonal-Light with Linearly Transformed Cosines mainly because in CG rendering using array of light emitting squares provide nice soft shadows and help to create more natural lighting in the scene. However letting these to cast shadows would eat all of performance, in the first pass I would be satisfied just with emitting light from polygons.
| Light Type | Status |
|---|---|
| Directional Light | implemented |
| Spot Light | implemented |
| Point Light | implemented |
| Polygonal-Light with Linearly Transformed Cosines | on wishlist |
| Epic's Area Lights | low priority on wishlist - probably already obsolete |
| Attenuation model | implemented |
| Inverse square falloff | on wishlist |
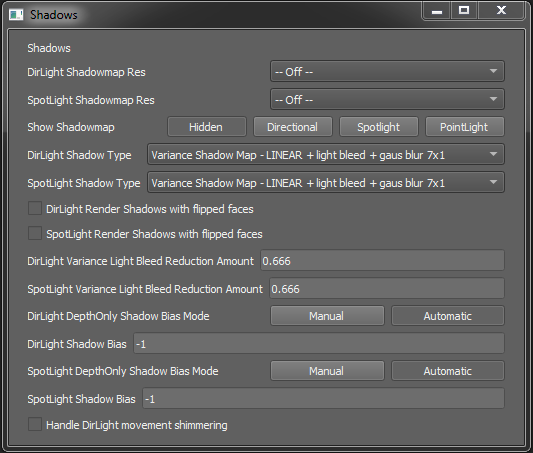
Shadows
I wanted to implement many different techniques of shadowing and be able to compare the results. Here is what I ended up with so far:
| Light Type | Shadow Type | Status |
|---|---|---|
| Directional Light Spot Light |
Raw depth only | implemented |
| Shader linear sampled depth | implemented | |
| PCF 3x3 sampling | implemented | |
| PCF 3x3 with Shader Linear sampling | implemented | |
| VSM raw(nearest) sampling | implemented | |
| VSM hw linear sampling | implemented | |
| VSM + light bleed correction & bias using partial derivations | implemented | |
| VSM + light bleed, bias partial deriv. + gauss blur soft shadows | implemented | |
| Point Light | Raw linear cubemap depth only | implemented |
| PCF - All samples (about 90) | implemented | |
| PCF - 20 important samples | implemented | |
| PCF - Poisson Disc sampling | implemented | |
| PCF - Poisson Disc random rotated per fragment | implemented | |
| PCF - Poisson Disc Randomized + Early bailing | implemented | |
| VSM | implemented only naive VSM |
Other not-yet-implemented features remaining on wishlist:
| Wished Feature | Reference / Docs / White paper |
|---|---|
| better Shadows Stabilization | - |
| VSM - better Light-Bleeding Reduction | NVIDIA GPU Gems 3 Chapter 08 |
| CSM - Cascaded Shadow Maps | NVIDIA white paper |
| PCSS - Soft shadows | NVIDIA white paper |
Antialiasing
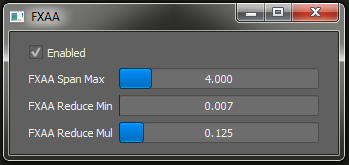
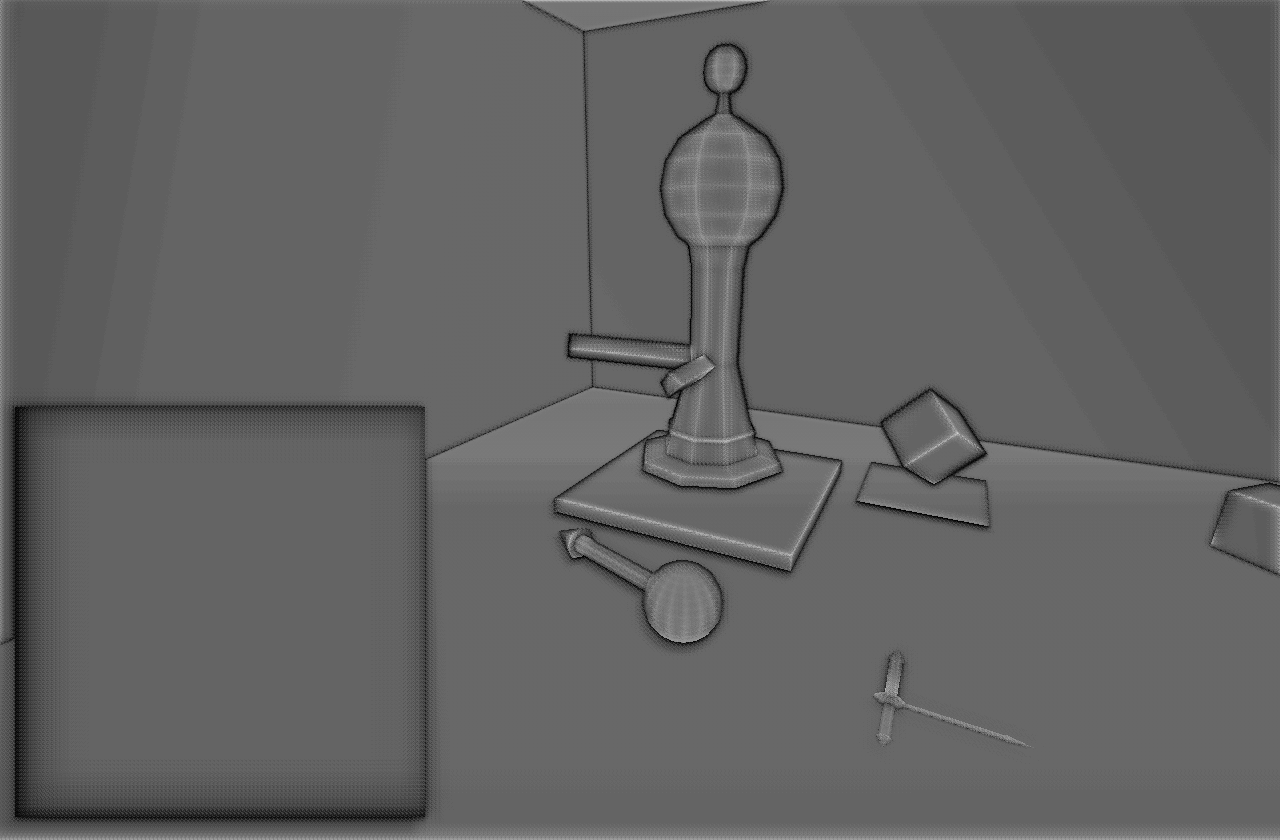
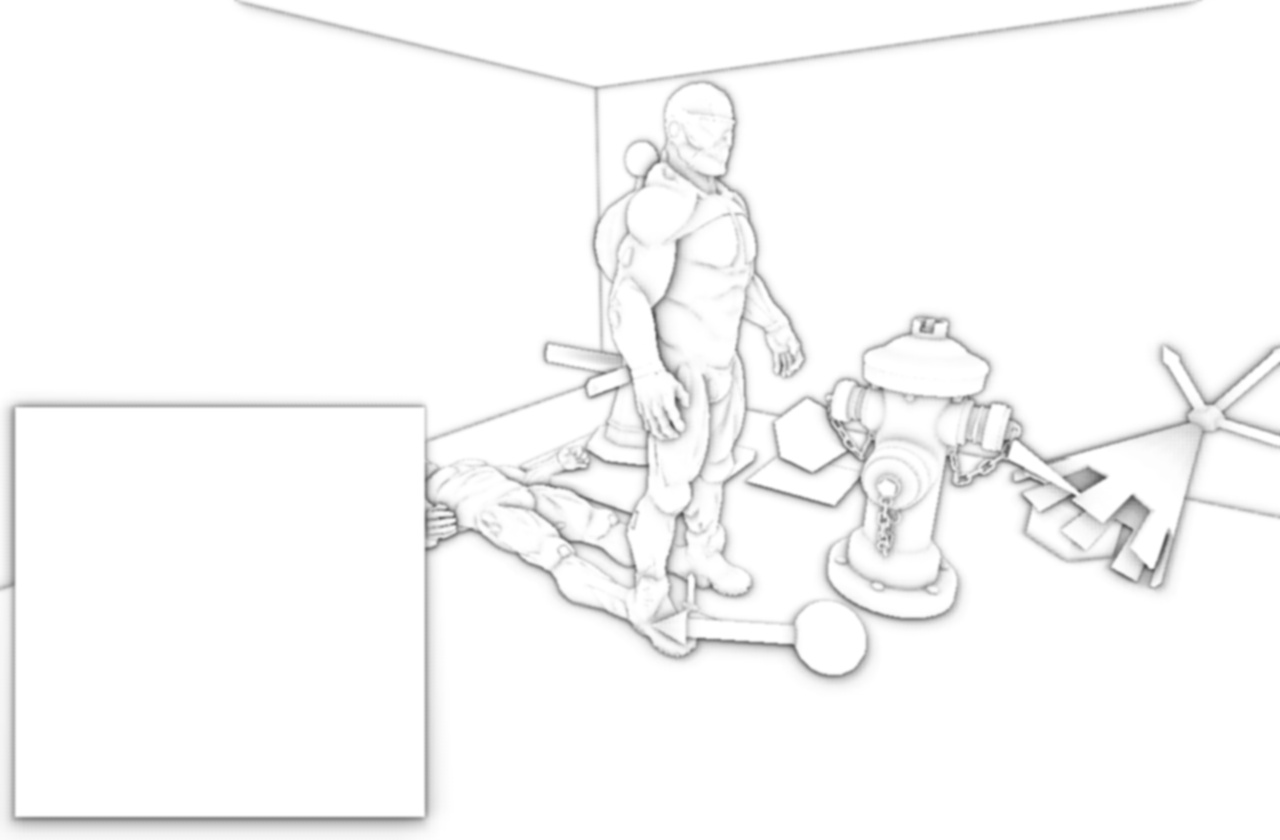
Rendering to multi sample target in OpenGL is triavial task. Therefore implementing MSAA for forward rendering is pretty simple (oposite to deferred rendering). At the end of rendering process I just glBlitFramebuffer to the window size frame buffer and then all postprocesses can continue as regular. More interesting was to implement FXAA. Some time later I finally started to add some UI. If I remember correctly, FXAA panel was one of the first. On screenshot #3 you can see the FXAA parameters which can be adjusted in realtime. Click on previews to zoom image to 100% to compare the differences.
Implemented Antialiasing
SSAO
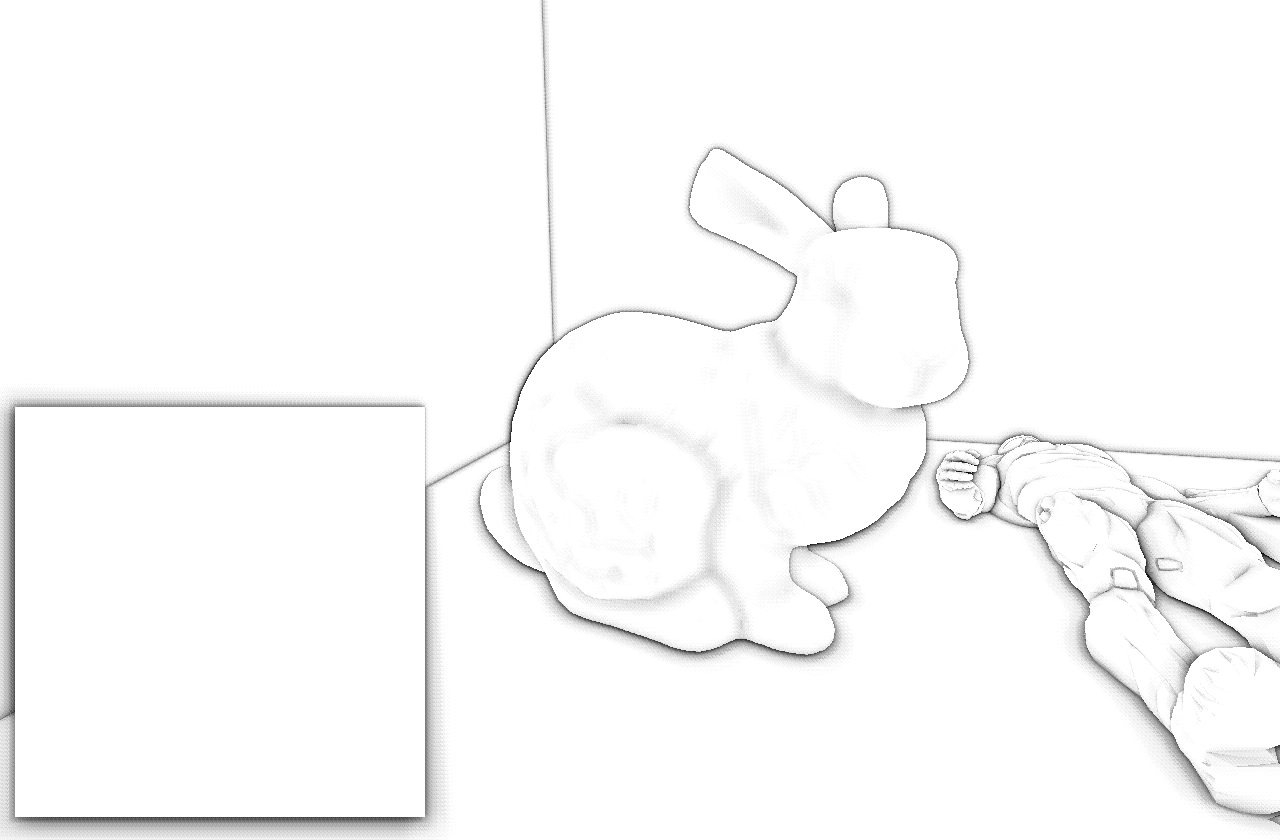
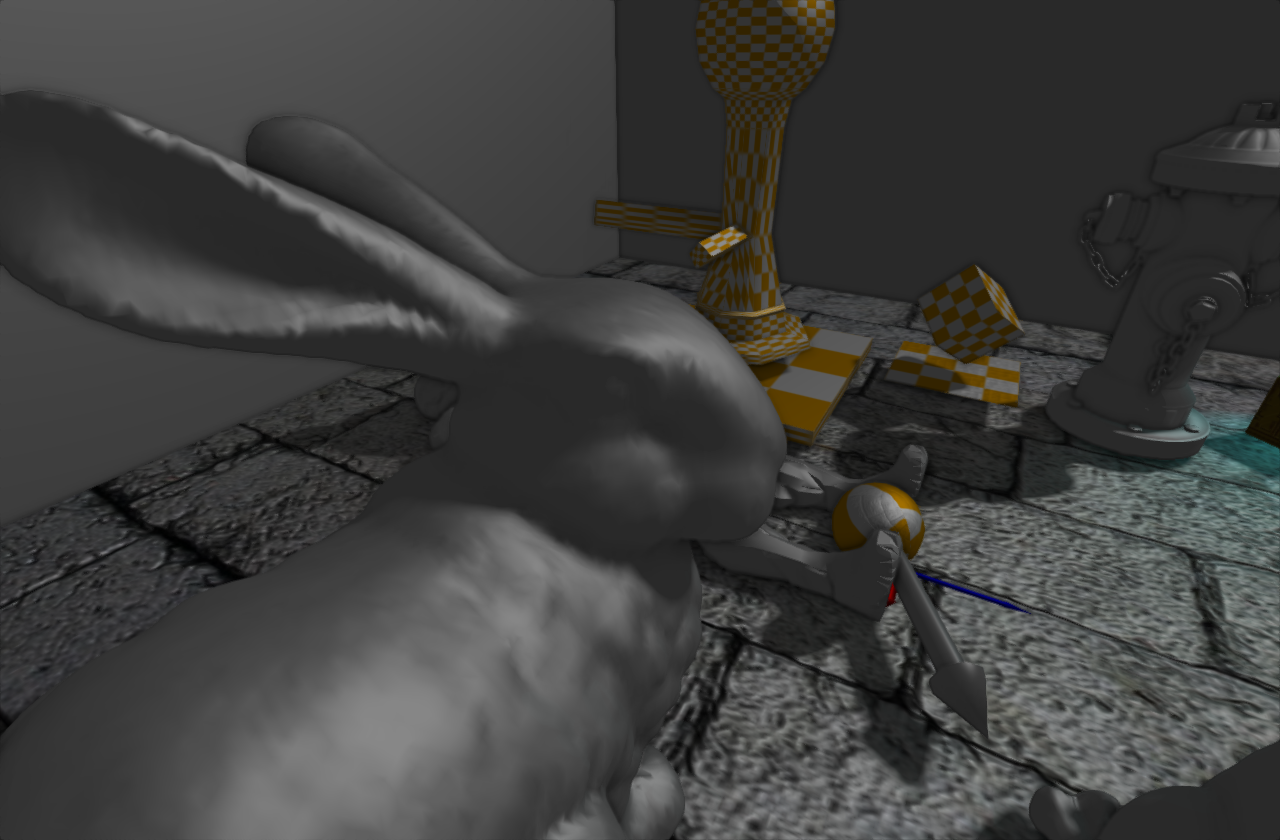
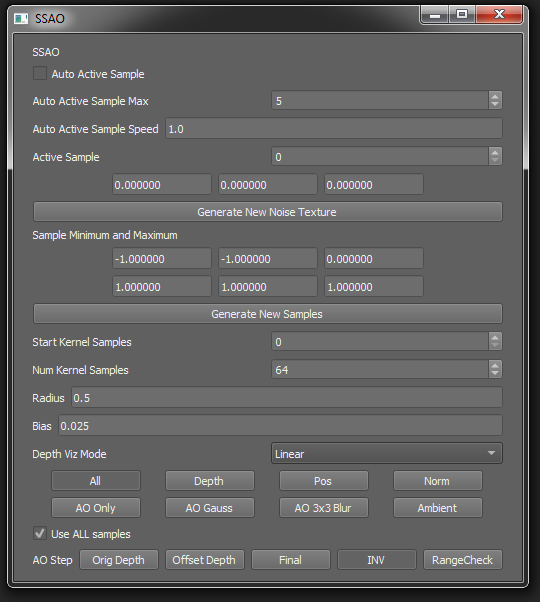
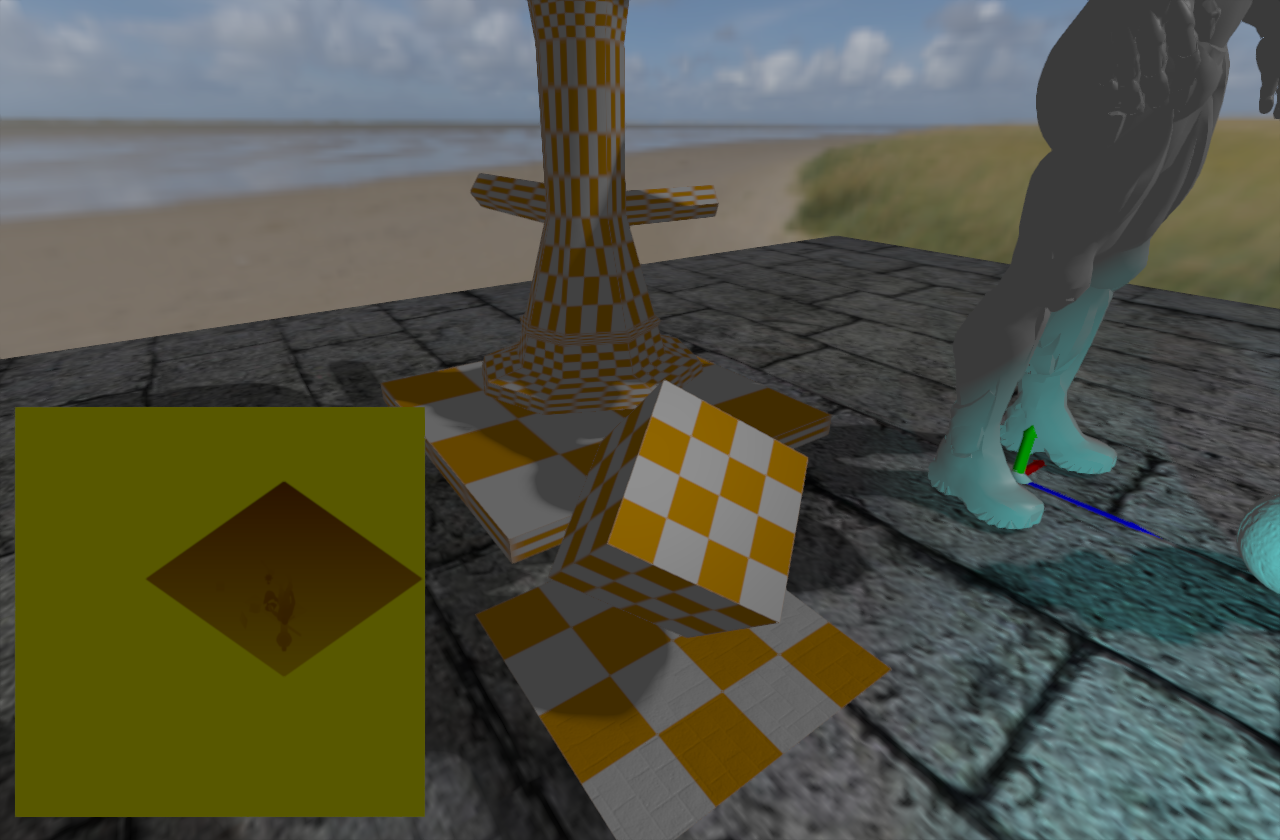
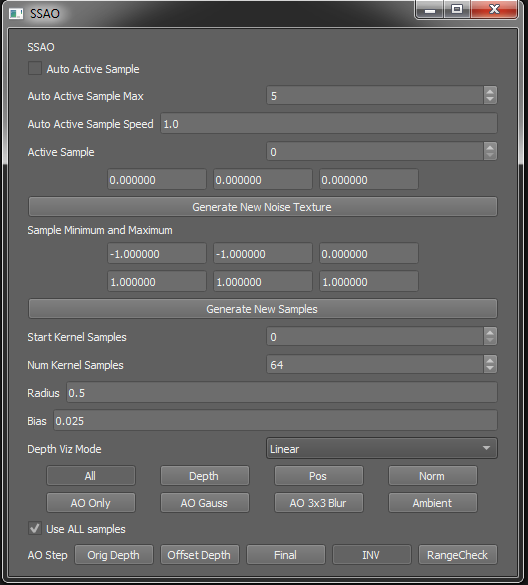
SSAO implementation was pretty painful, because I had no UI yet. So far everything I was doing was only in 1 window, with only console logs for debug. First implementation was using classic per fragment random points in 3D and comparison (The original implementation from Crytek - screenshot 1). The results were pretty unsatisfying to me so after some digging I found improved SSAO by Jonh Chapman using normal-oriented hemispheres (result on screenshot 2). During this time I've learned that RenderDoc is my best friend and had to create a huge SSAO debug panel (screenshot 3 - make sure you click on the preview to see it all). Also implementing SSAO depends on having normals, depth and other buffers for all objects already rendered -- that means start to implement deferred renderer. Still I wanted to see SSAO in Forward Renderer so I'm rendering the objects again to get the buffers I need to calculate SSAO.
SSAO
HDR and Tone Mapping
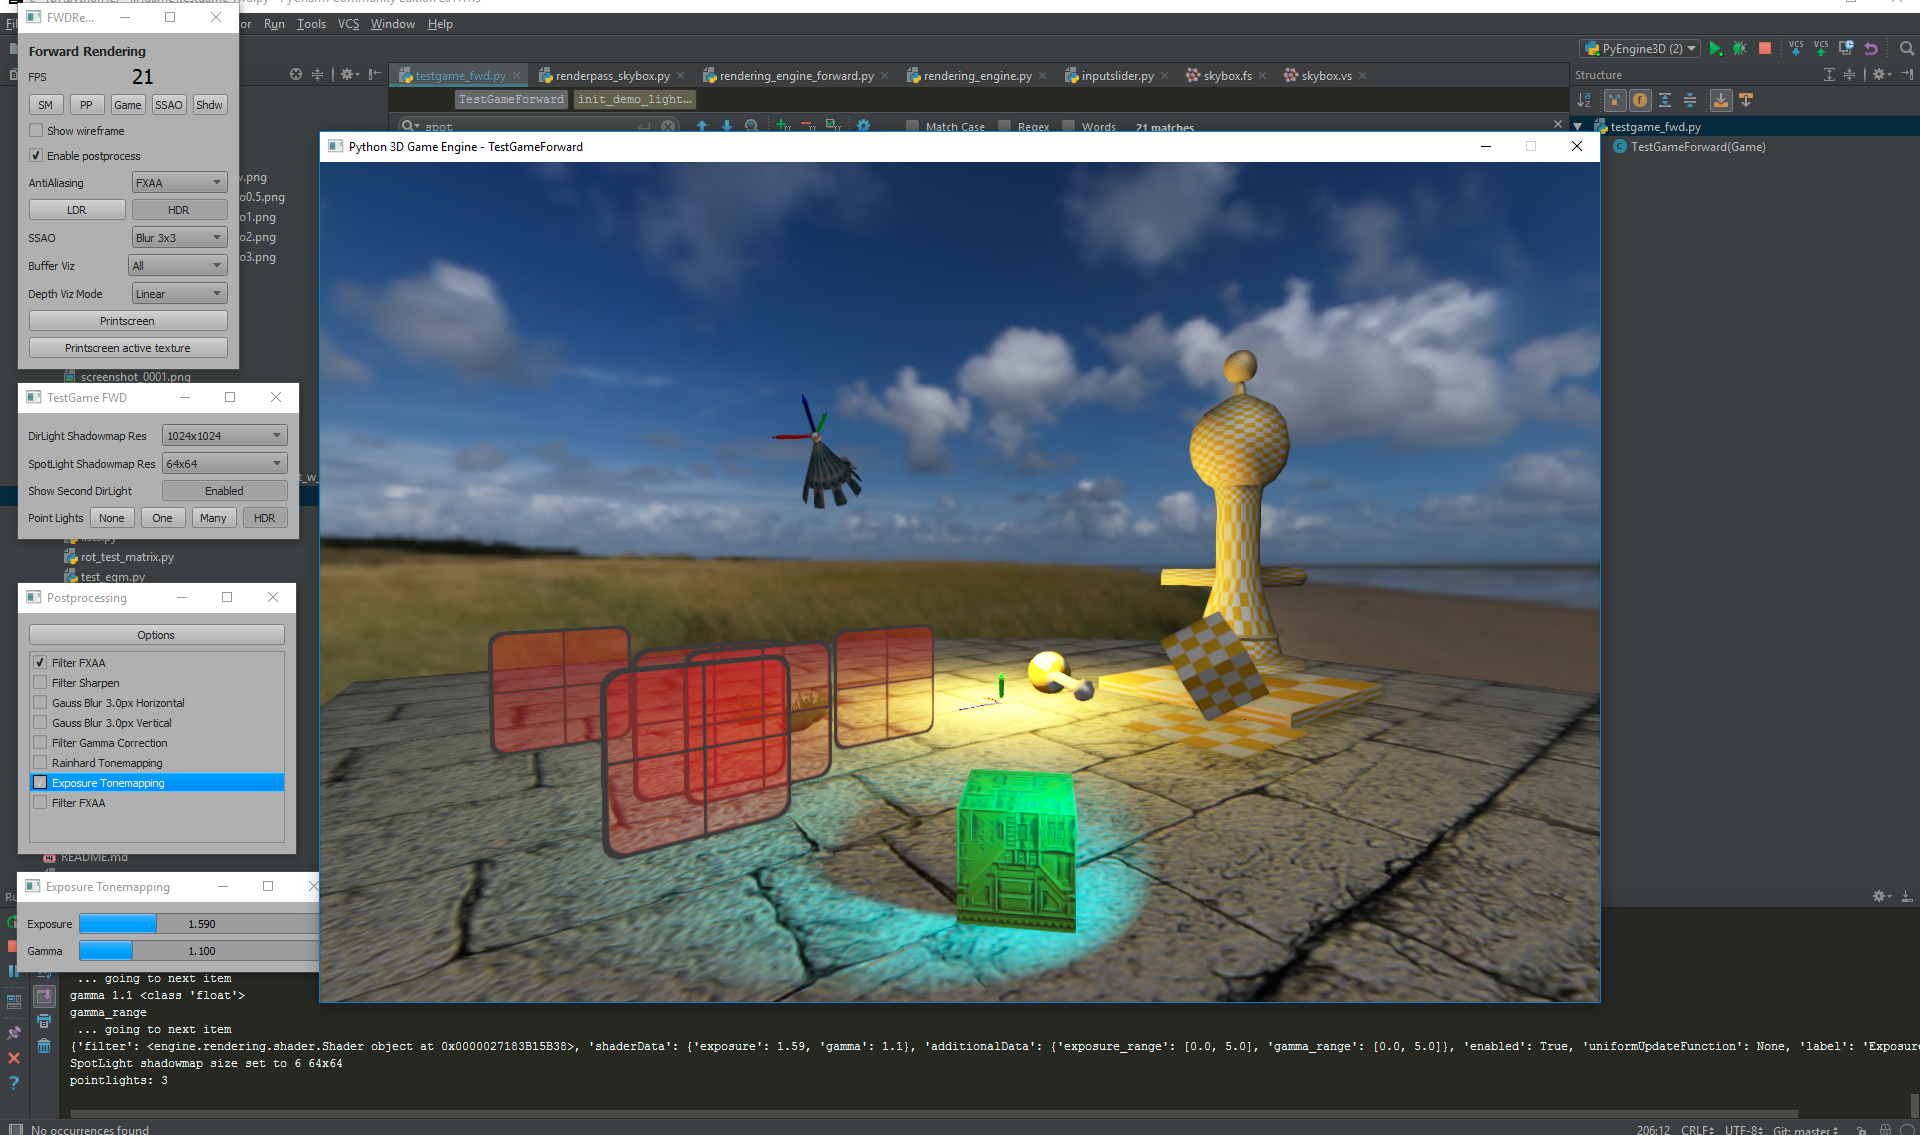
Slowly I got to a point where LDR Rendering (Low Definition Range) wasn't enough and I've added support for HDR buffers. Since usual display is still LDR I've implemented these tone mapping algorithms, except the last one:
- Gamma Correction (2 versions implemented)
- Reinhard Tonemapping
- Exposure
- Auto Exposure based on Histogram - remains on wishlist
Wrapping up Forward Renderer
At this point I ended up with pretty solid forward renderer even with cutout queue and basic transparent distance-sorted queue and I was able to experience first performance issues, because forward rendering renders each object for each light type over and over again which leads to significant performance loss while having multiple lights in the scene. In my case I went "crazy" with 2 directional lights, 9 point lights + some spotlights :). Of course this can be solved by Deferred Render (which I implemened later) or using Forward+ Renderer (that one remains in wishlist after implementing support for SSBO). The demo drops from 43 fps down to 13fps when the super colourfull pointlights are all on (as it is expected with forward rendering).
Forward Renderer Demo

Deferred Renderer
Since SSAO needed at least simple G-Buffer, I took the implementation further and extended it into fully configurable G-Buffer - the base for deferred rendering. Here I started to refactor most of the glsl code, improved live-reload of shaders with the most important goal: reuse written shader code as much as possible. Also UI panels got some love (more about UI later) because the definitelly proved important during SSAO debugging, and all of the vizualisation helpers, buffers displaying and debug tools.
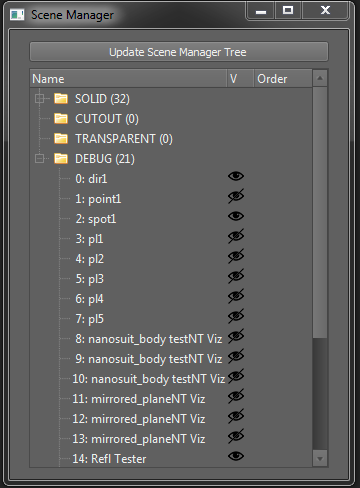
UI panels - First version

I've managed to find some old screenshot of the first version of UI panels I started to use for debugging. I've started with Scene Manager window which writes out every single Mesh Renderer component in the queue and clearly displays how the queues are sorted. I've also added simple visibility toggle to be able to quickly debug things.
If you compare those two screenshots, you can see, how postprocessing has improved. I've created much simplified list which can create automatically generated property windows showing only the update uniforms to control the effect. I've spent noticable amount of time to generate the "debug ui" as easy to use as possible, because I didn't wanted to be bothered to create every panel one by one by hand manually and I knew I will end up with at least 6+ demos and multiple rendering engines and I wanted them to run all the time. Also I wanted to spent my free night time after work as much efficient as possible.
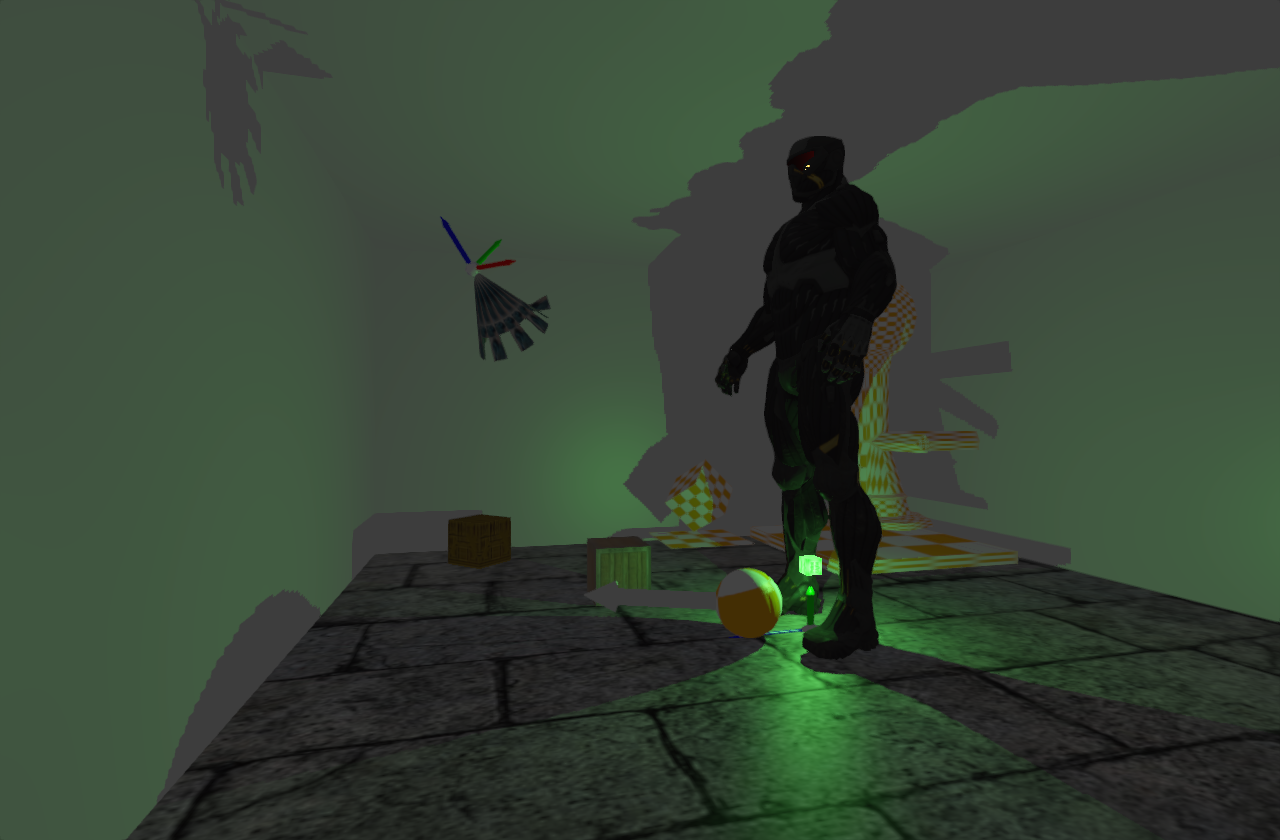
Deferred Renderer: Lights
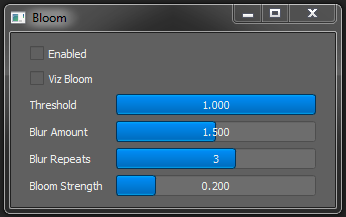
Then I started to rewrite bunch of code around lights, because you need to handle them differently in the deferred rendering. Following screenshots show up the first G-Buffer visualization and first naive bloom (which I replaced as soon as possible because it's ugly and I am wondering why some of the people can still do it this way even in 2019).
Time to test more lights, implement more shadowmapping techniques and after some time looking at custom gray skin and re-generated a little bit darker skin. Also I've added support for collapsible panels and styled them accordingly (inspired heavily by Unreal Engine 4).
The architectured proved to be pretty solid with my implementation of render passes, postprocessing passes and overall rendering and management of the scene (although only with simple queues). However I would improve the post processing to be much more user friendly if I were to polish the code right now. Time to get the quality of the rendered images few levels up!
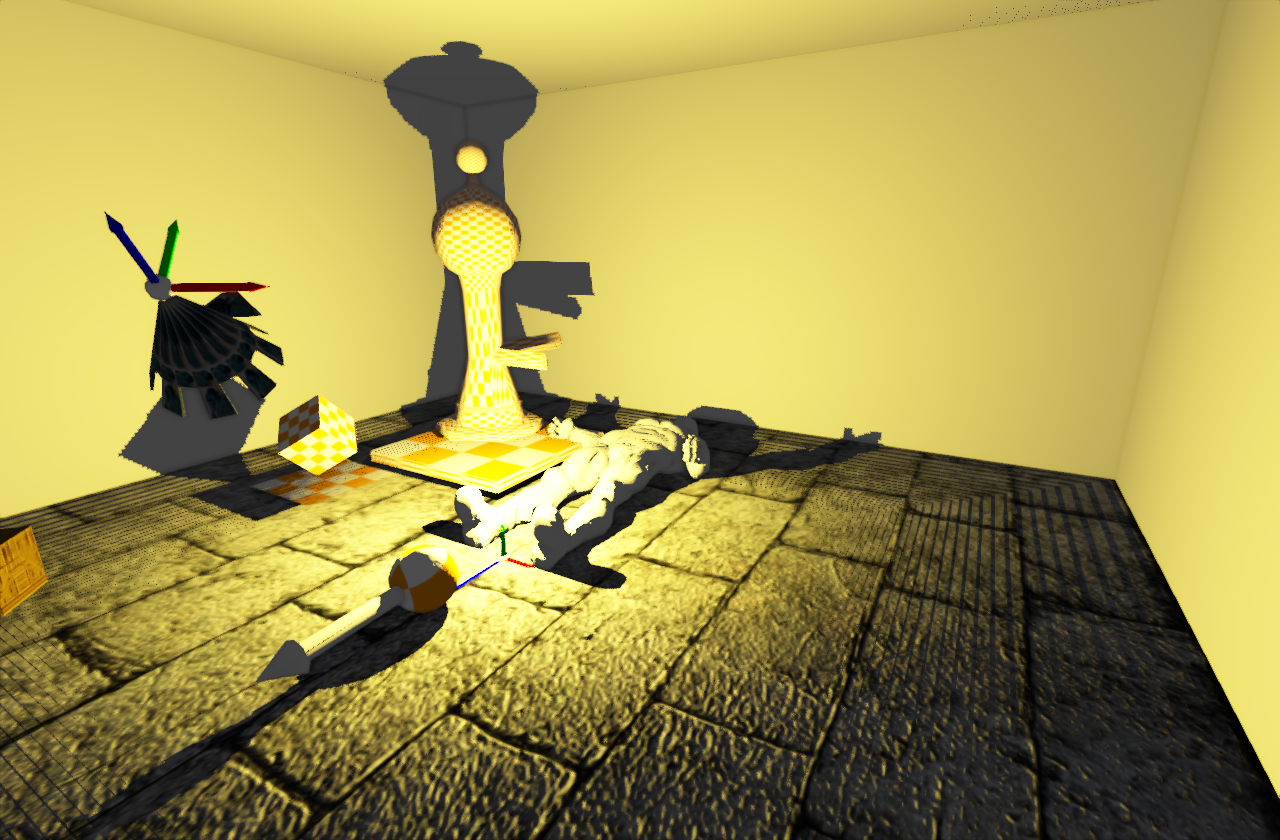
Improved Shading Model with Reflections
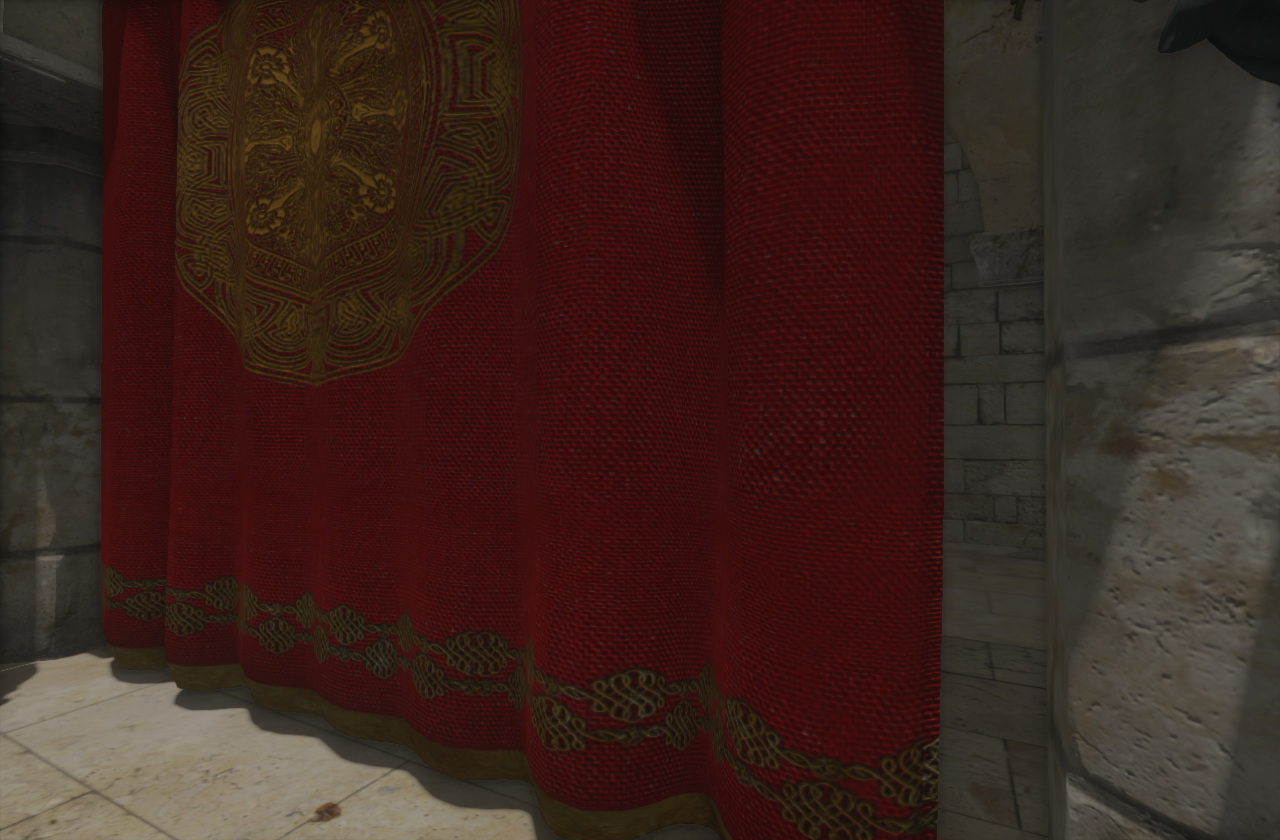
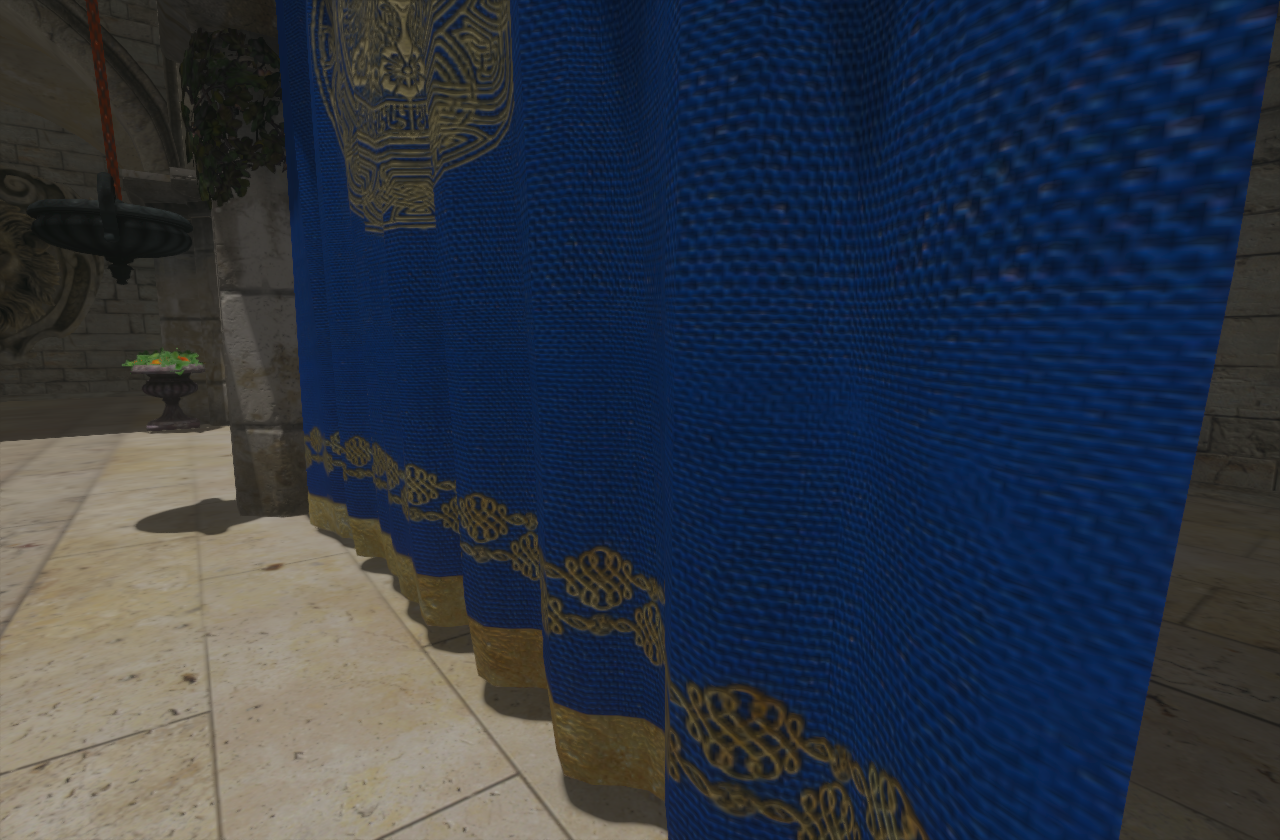
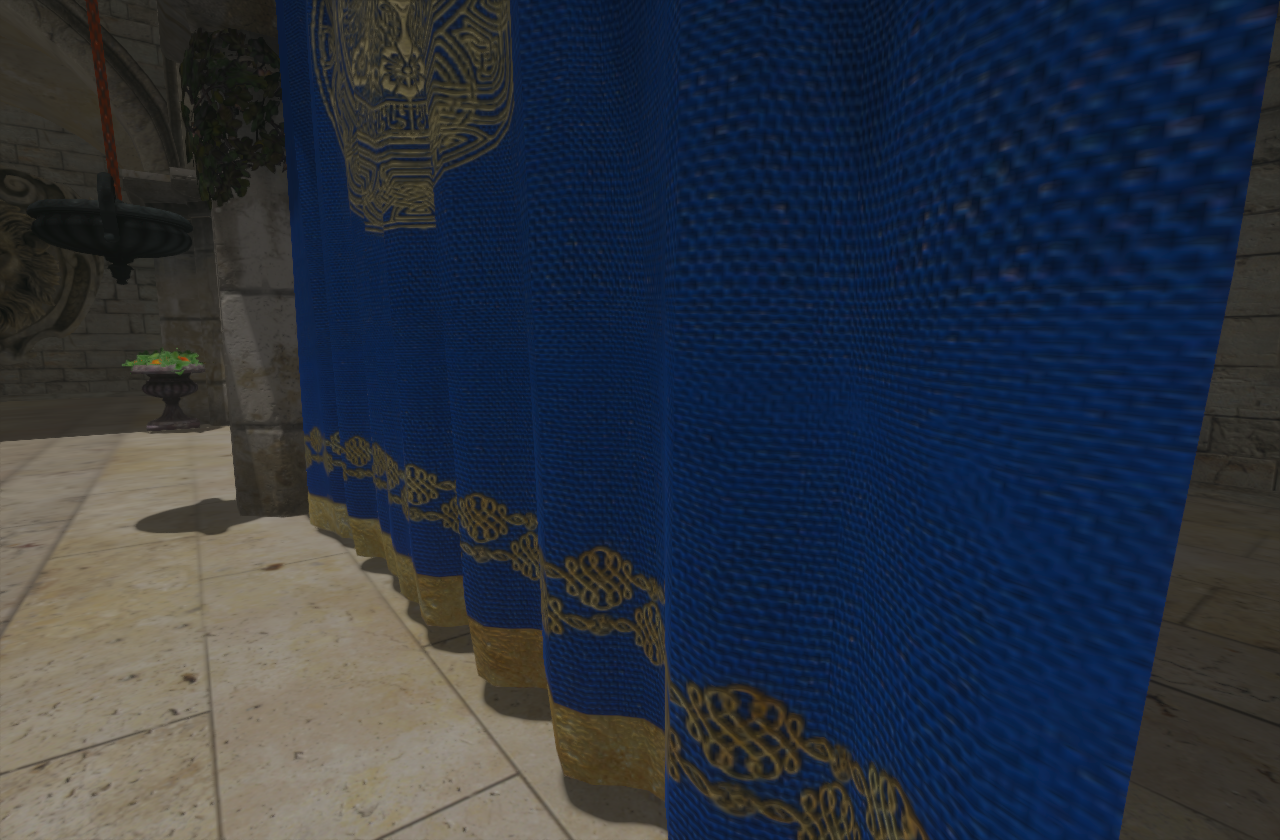
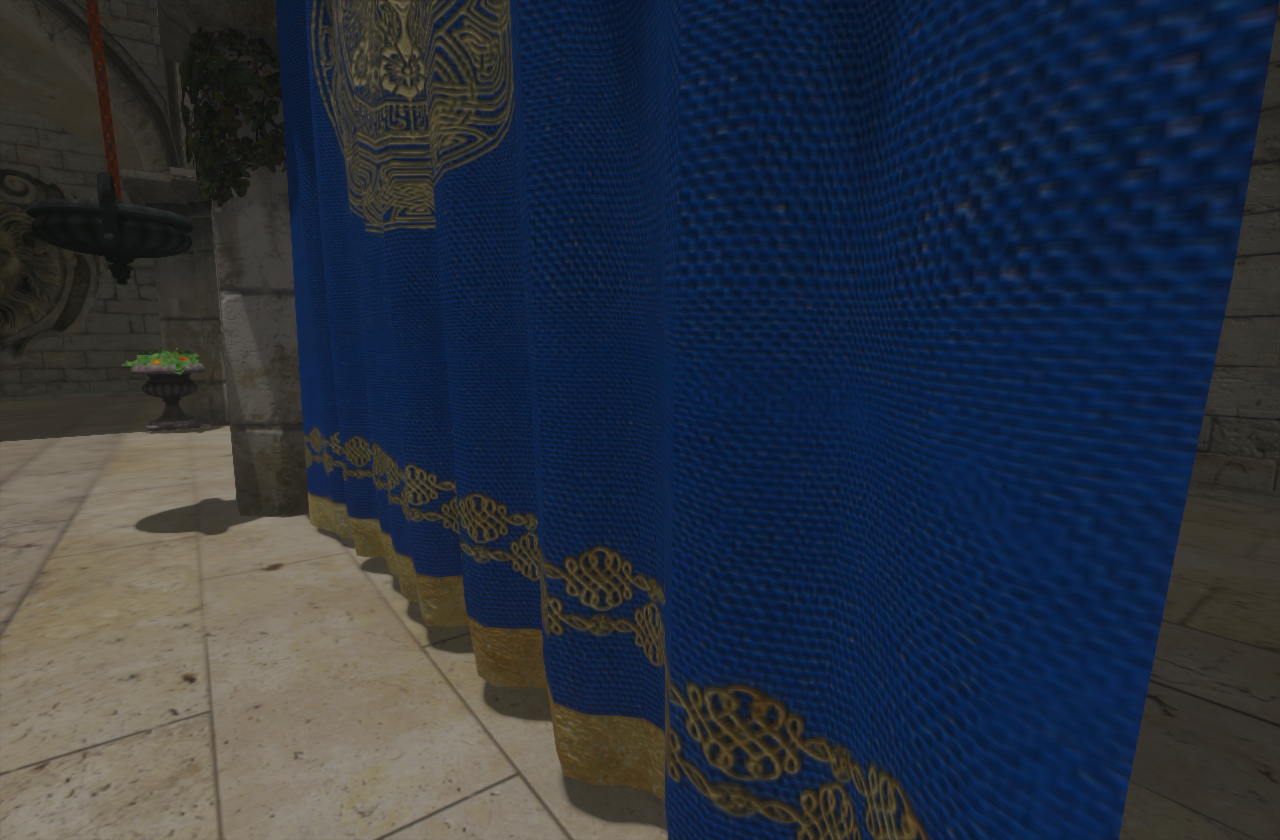
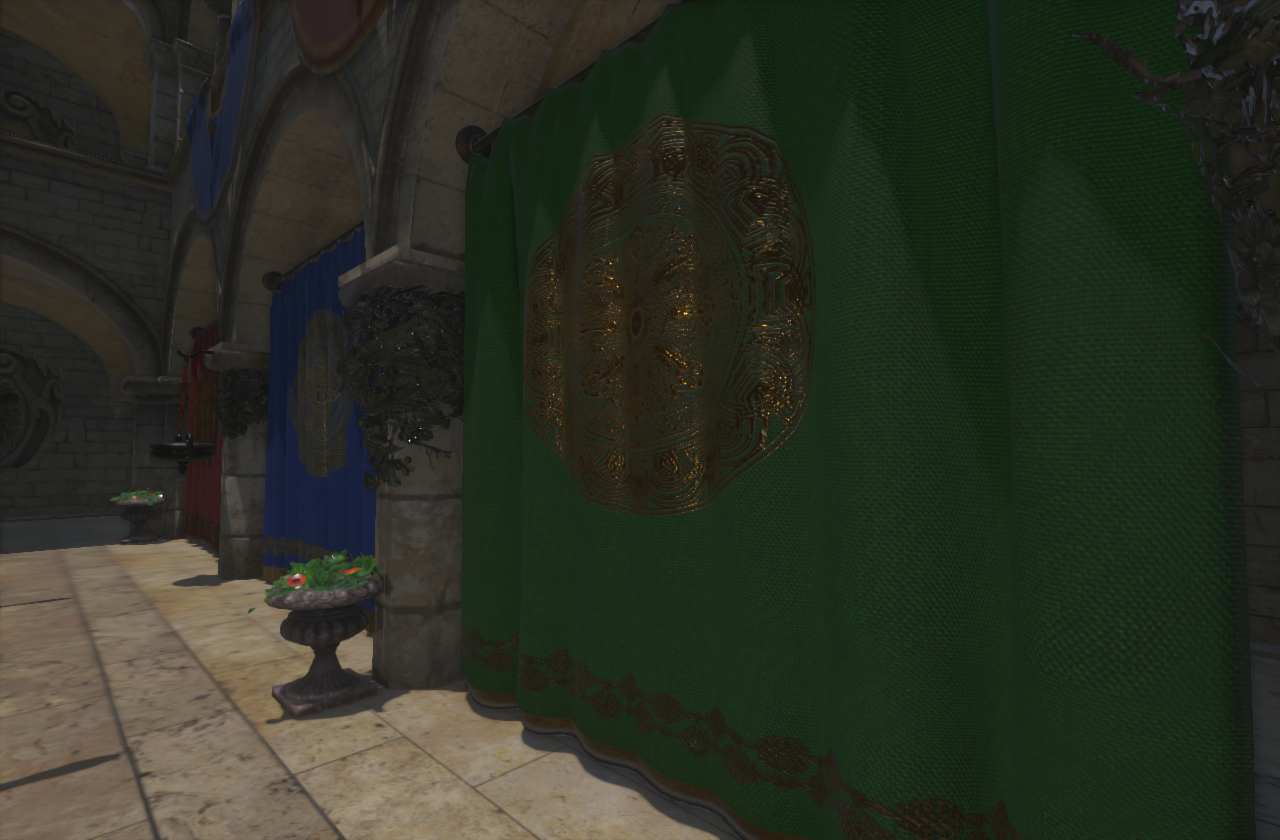
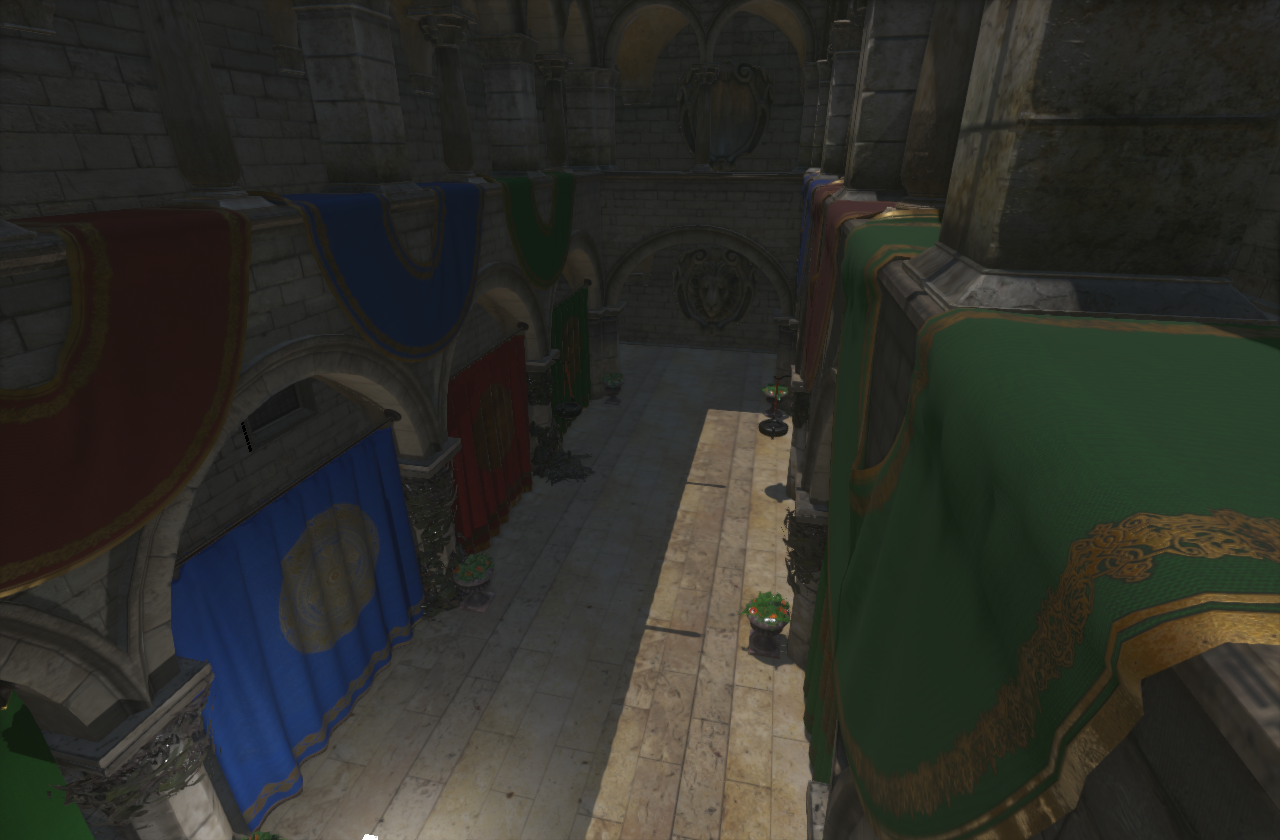
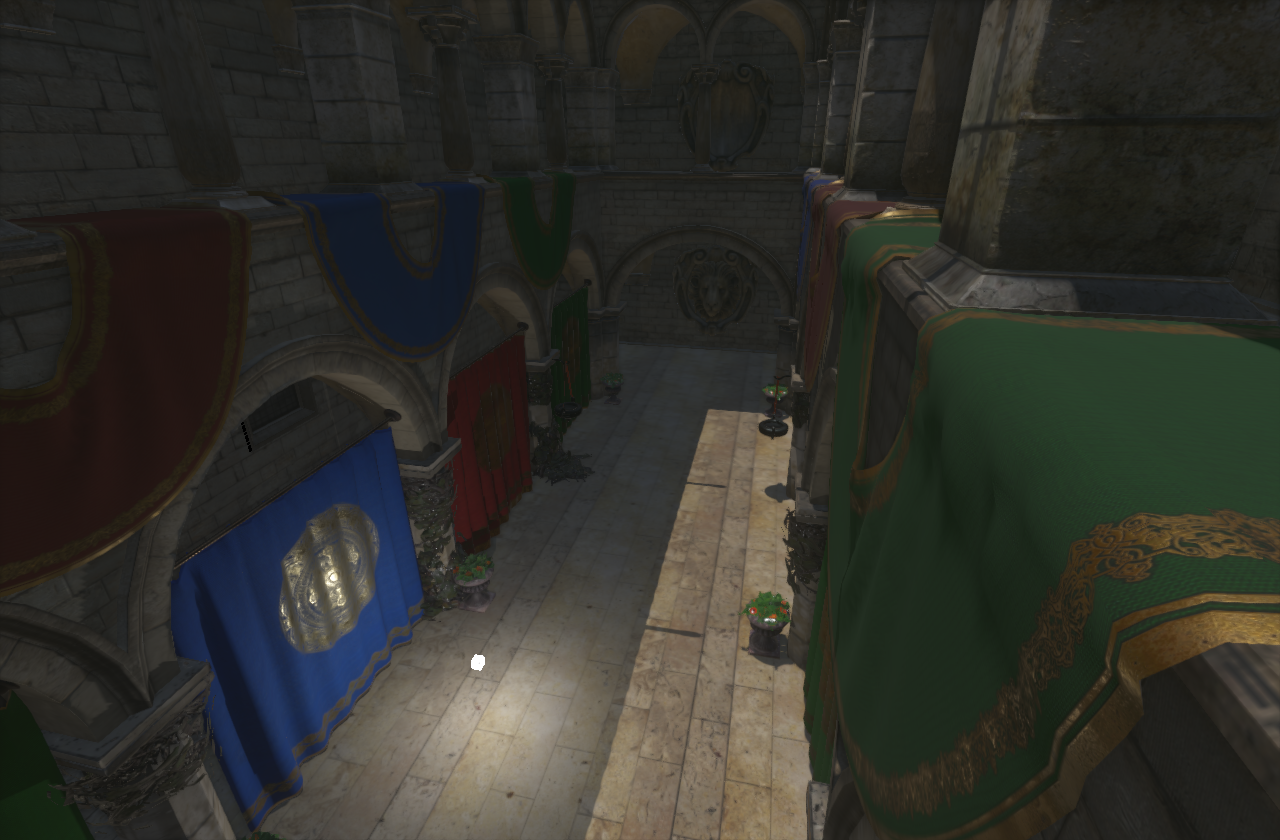
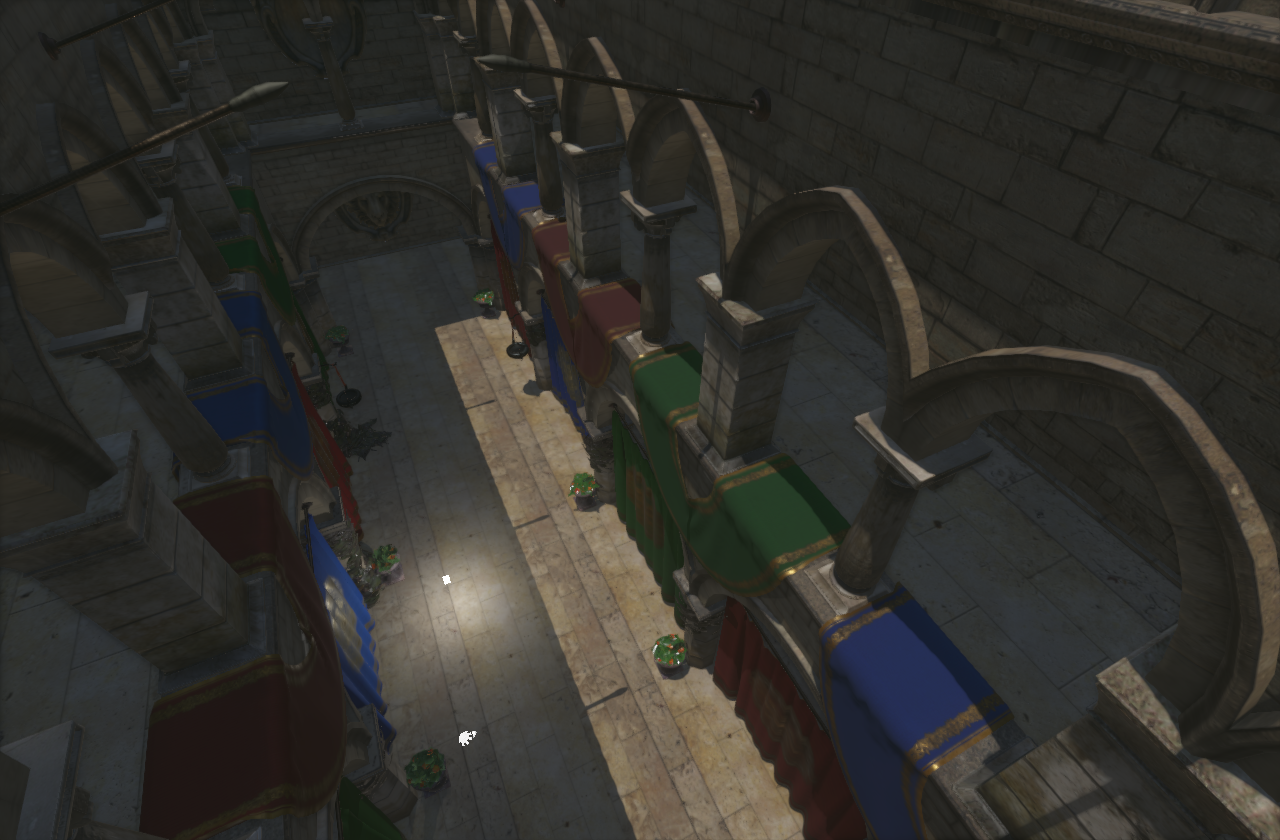
Since all the lights and shadow were working correctly, it was the right time to start fiddling with ambient light and add reflections (still in the old Lambert - Blinn-Phong shading model: diffuse, specular, normal). To get that I've extended the G-Buffer configuration to store Specular Tint, Specular Intensity and did that also for Reflections. To get a better artistic control, I've added also an Specular Multiplier to the lights itself which is completly physically incorrect, however it allowed me to use low intensity directional lights creating high specular reflections which could add nice touch to the rendered image. I've also added separate Exposure Correction to the skybox so I can get propper sunrise from the HDR equirectangular maps.
Improving performance
Ok now it was time to seriously test out what is the engine capable of. Let's load up the sponza scene which everybody uses. Few days spent on fixing obj loader, parsing .mtl files and create definition of materials and here we go:
Nice! ... As a screenshot.... what you don't see, is that I was running 2 fps at home on my NVIDIA GTX 970. I wanted to cry (engine, tell me why :).... tried to make a joke there :P). About time to implement a few optimalizations.
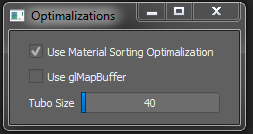
First off, let's fix and refactor all uniforms and shader class which I was delaying because I was afraid of it (yes, old code you wrote on your own can be nasty :D). At the end it wasn't so bad and I ended up with queues sorted by material (something inspired by Unity's dynamic batching), lets update only uniforms and texture samplers which actually change.
If I remember correctly, it was at this point of time, when I took C++ GLM library and also found glmpython library. However, glmpython was (maybe still is) too far to be complete and even have some bugs. So I did spent 14 days in a row and with the use of parseme library did write a complete set of types, functions and operations covered by tests which generate 18289 lines of C++ code in about 600kB file: a python wrapper for GLM library.
Also I've implemented support for OpenGL's Uniform Buffer Objects and started to use them for transforms on Mesh Renderer Components (updating them again, only when necessary).
And the result? Sponza Scene on full screen 1920x1200 running 60 fps!
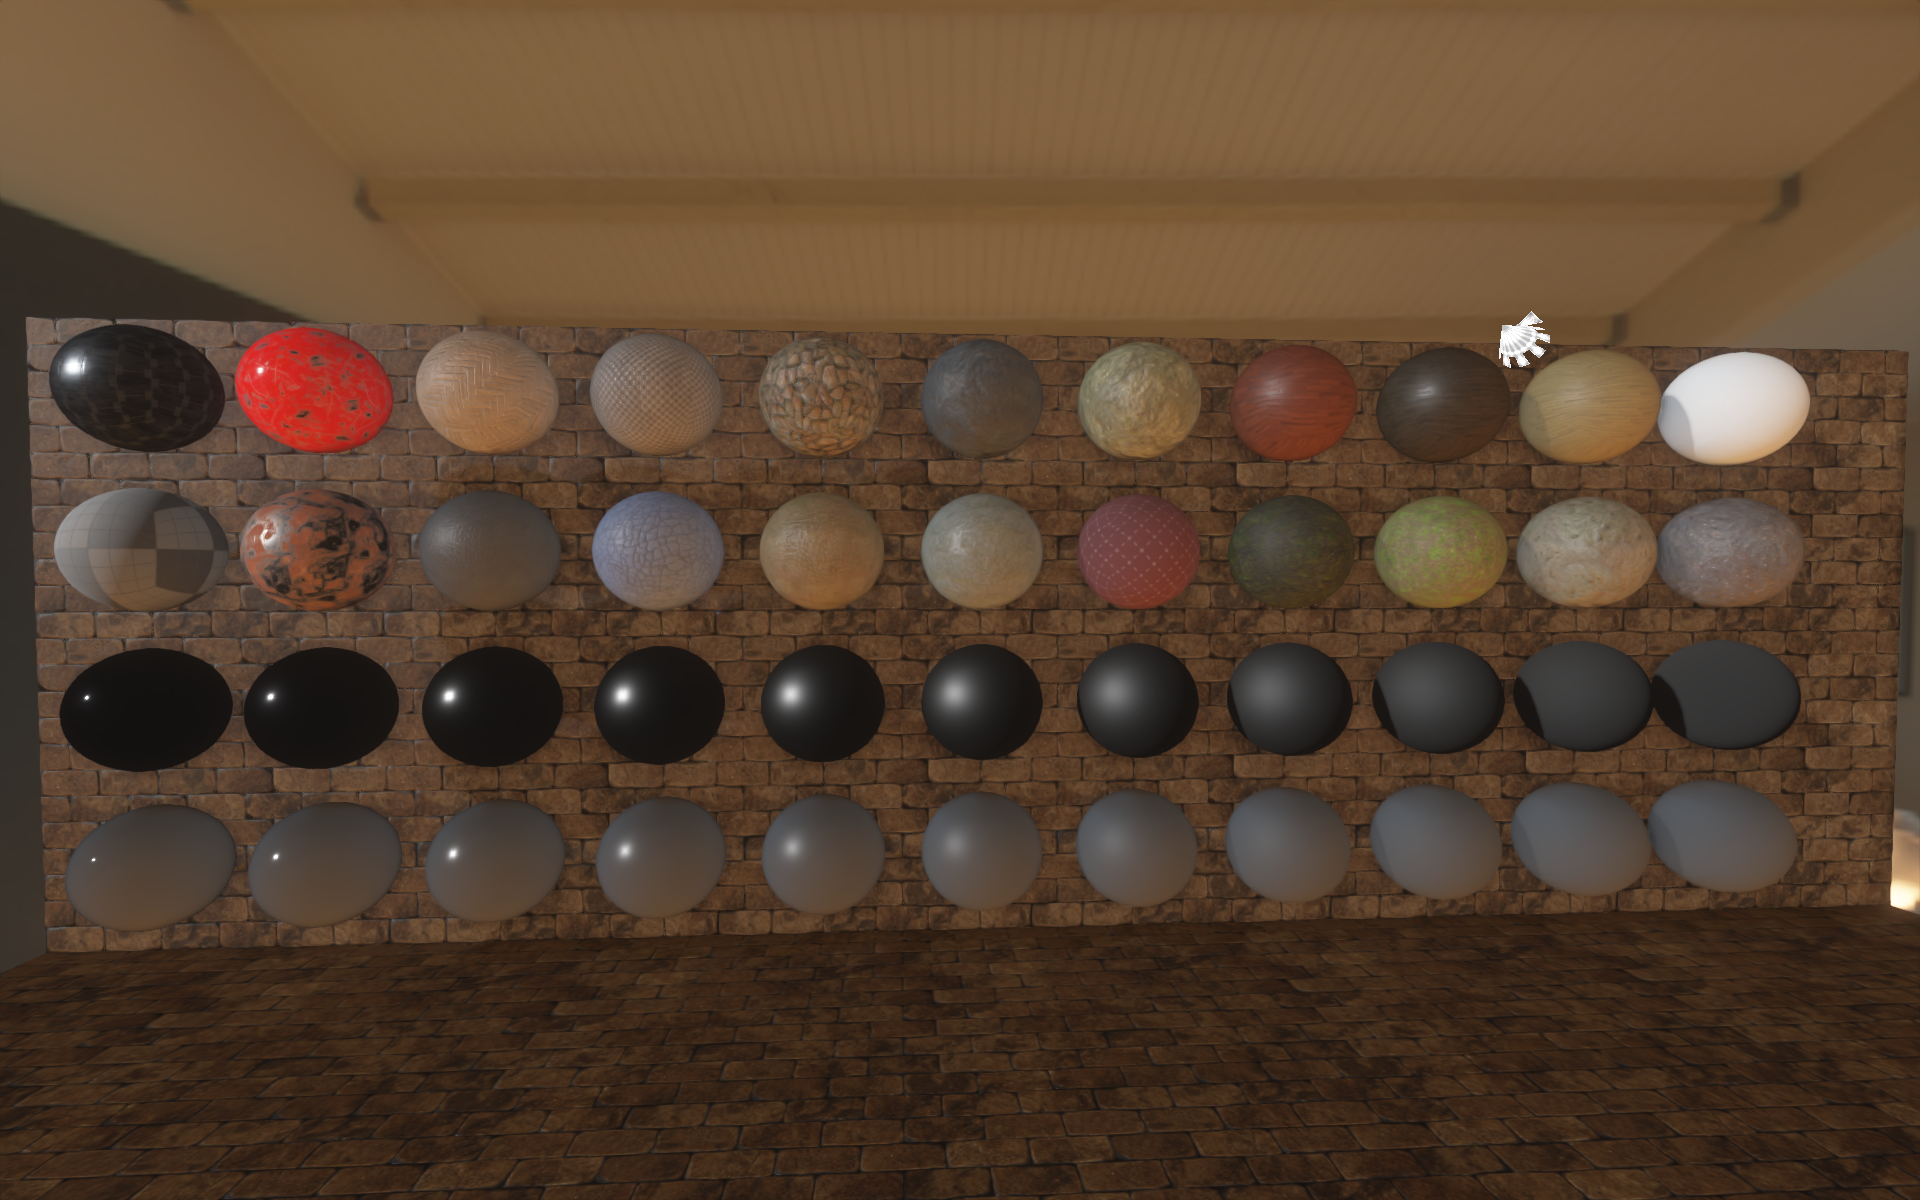
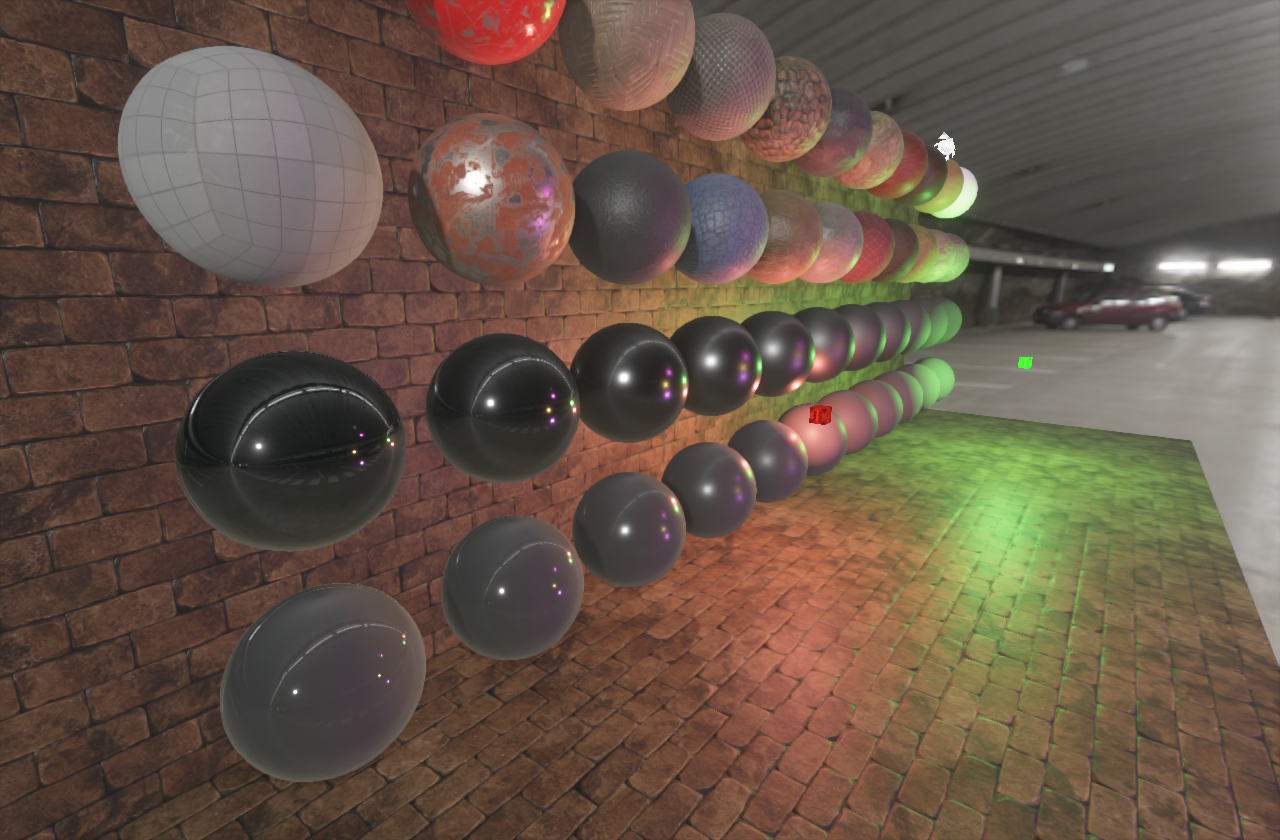
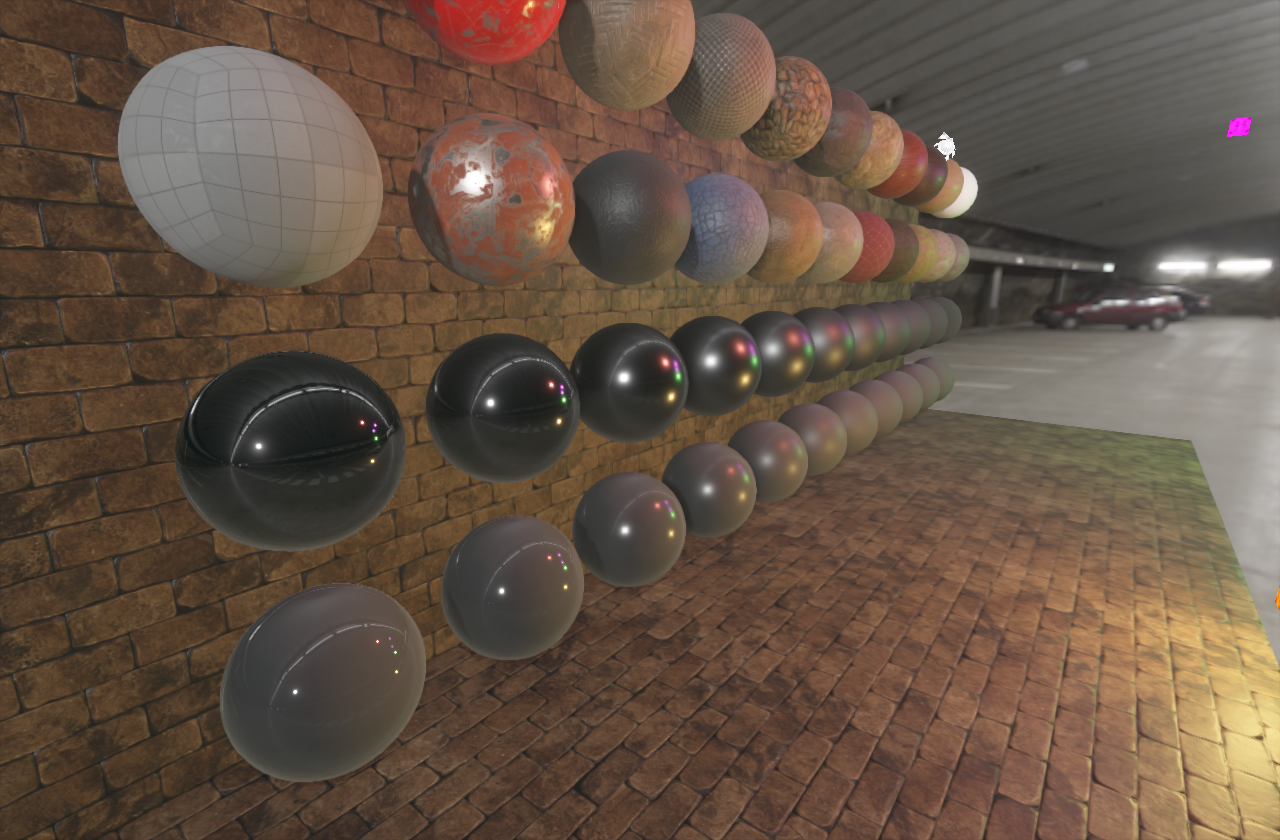
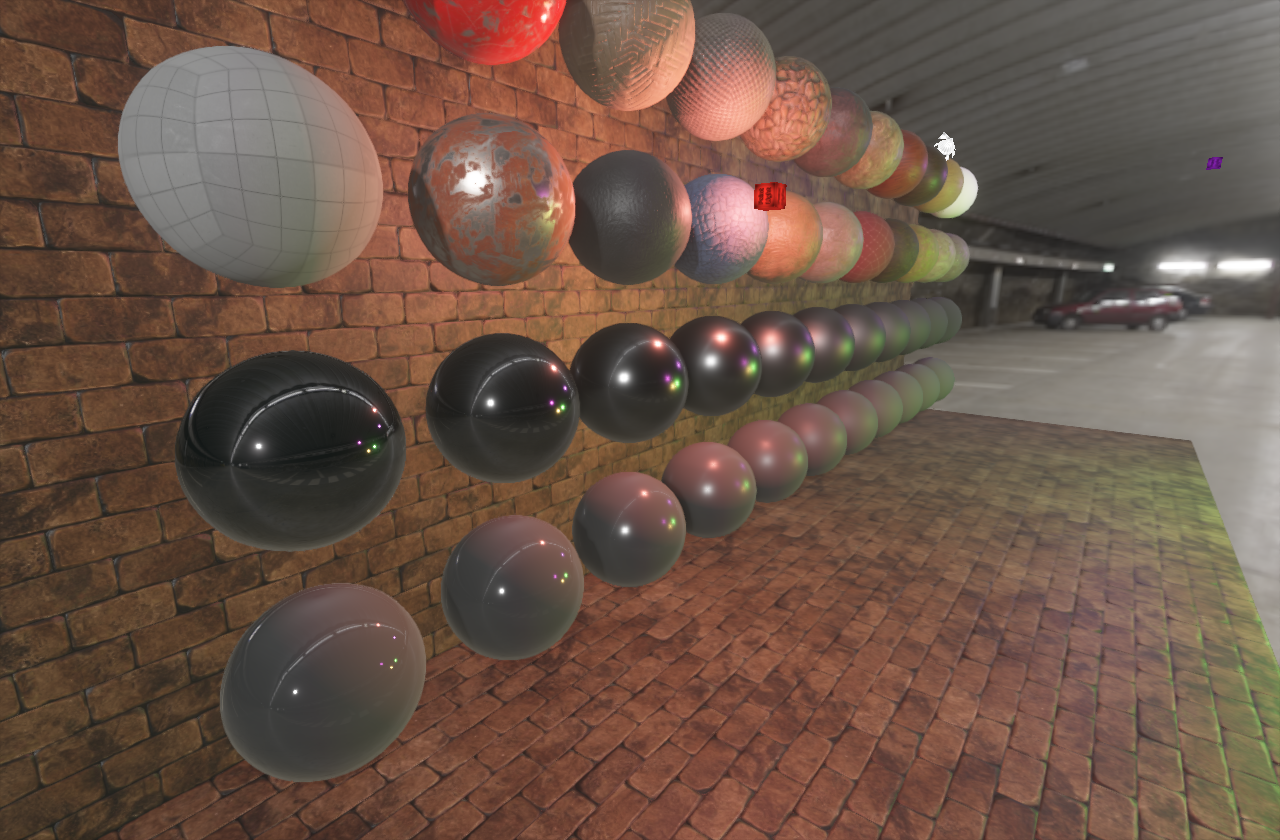
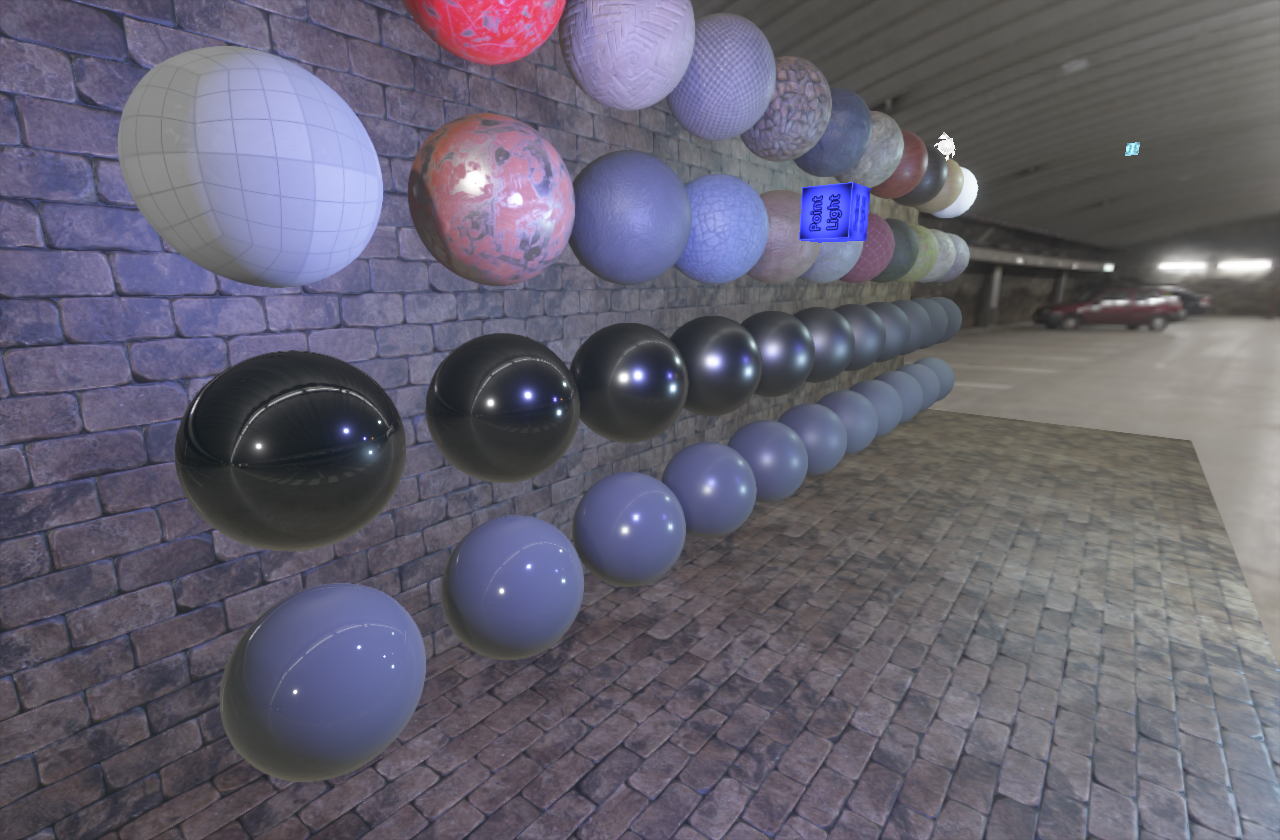
Multiple Shading Techniques
I have also started to fiddle with different shading techniques and of course, I wanted them to be switchable in real time. For some time I already knew different shading models like Oren-Nayar and why are they used. And of course there was still the major goal for the renderers to get to full PBR Image Based Lighting. Also as you can see in the last screenshot, I've improved the performance quite a bit by spending countless of hours refactoring and cleaning up the architecture.
Phong vs Blinn-Phong:
Lambert vs Oren-Nayar Original vs Oren-Nayar Unity5:

Lambert vs Oren-Nayar Improved vs Oren-Nayar Fakey from Warhammer 40k:
The implemented Oren-Nayar techniques I've tested are: (1) Original Implementation, (2) Full, (3) Improved, (4) Unity5, (5) Fakey method from Warhammer 40k. Here is a comparison gif:
Natural Bloom
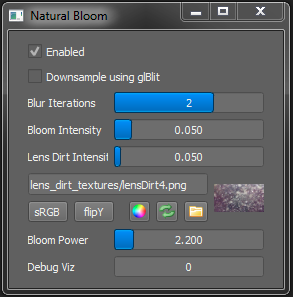
The usual cheap bloom effect done by extracting thresholded brighter pixels wasn't good enough. I wanted something beautiful what can be seen in Doom (2016). The technique I used is briefly described in Doom (2016) - Graphics Study in section "Downscale and Blur". Basicly that's what I'm doing in my rendering engine. Somewhere I read that "real light is not thresholded neither should be bloom" so I stick with that. On wishlist is to implement downsamling by compute shaders to save a bit of performance ;)
Natural Bloom results:
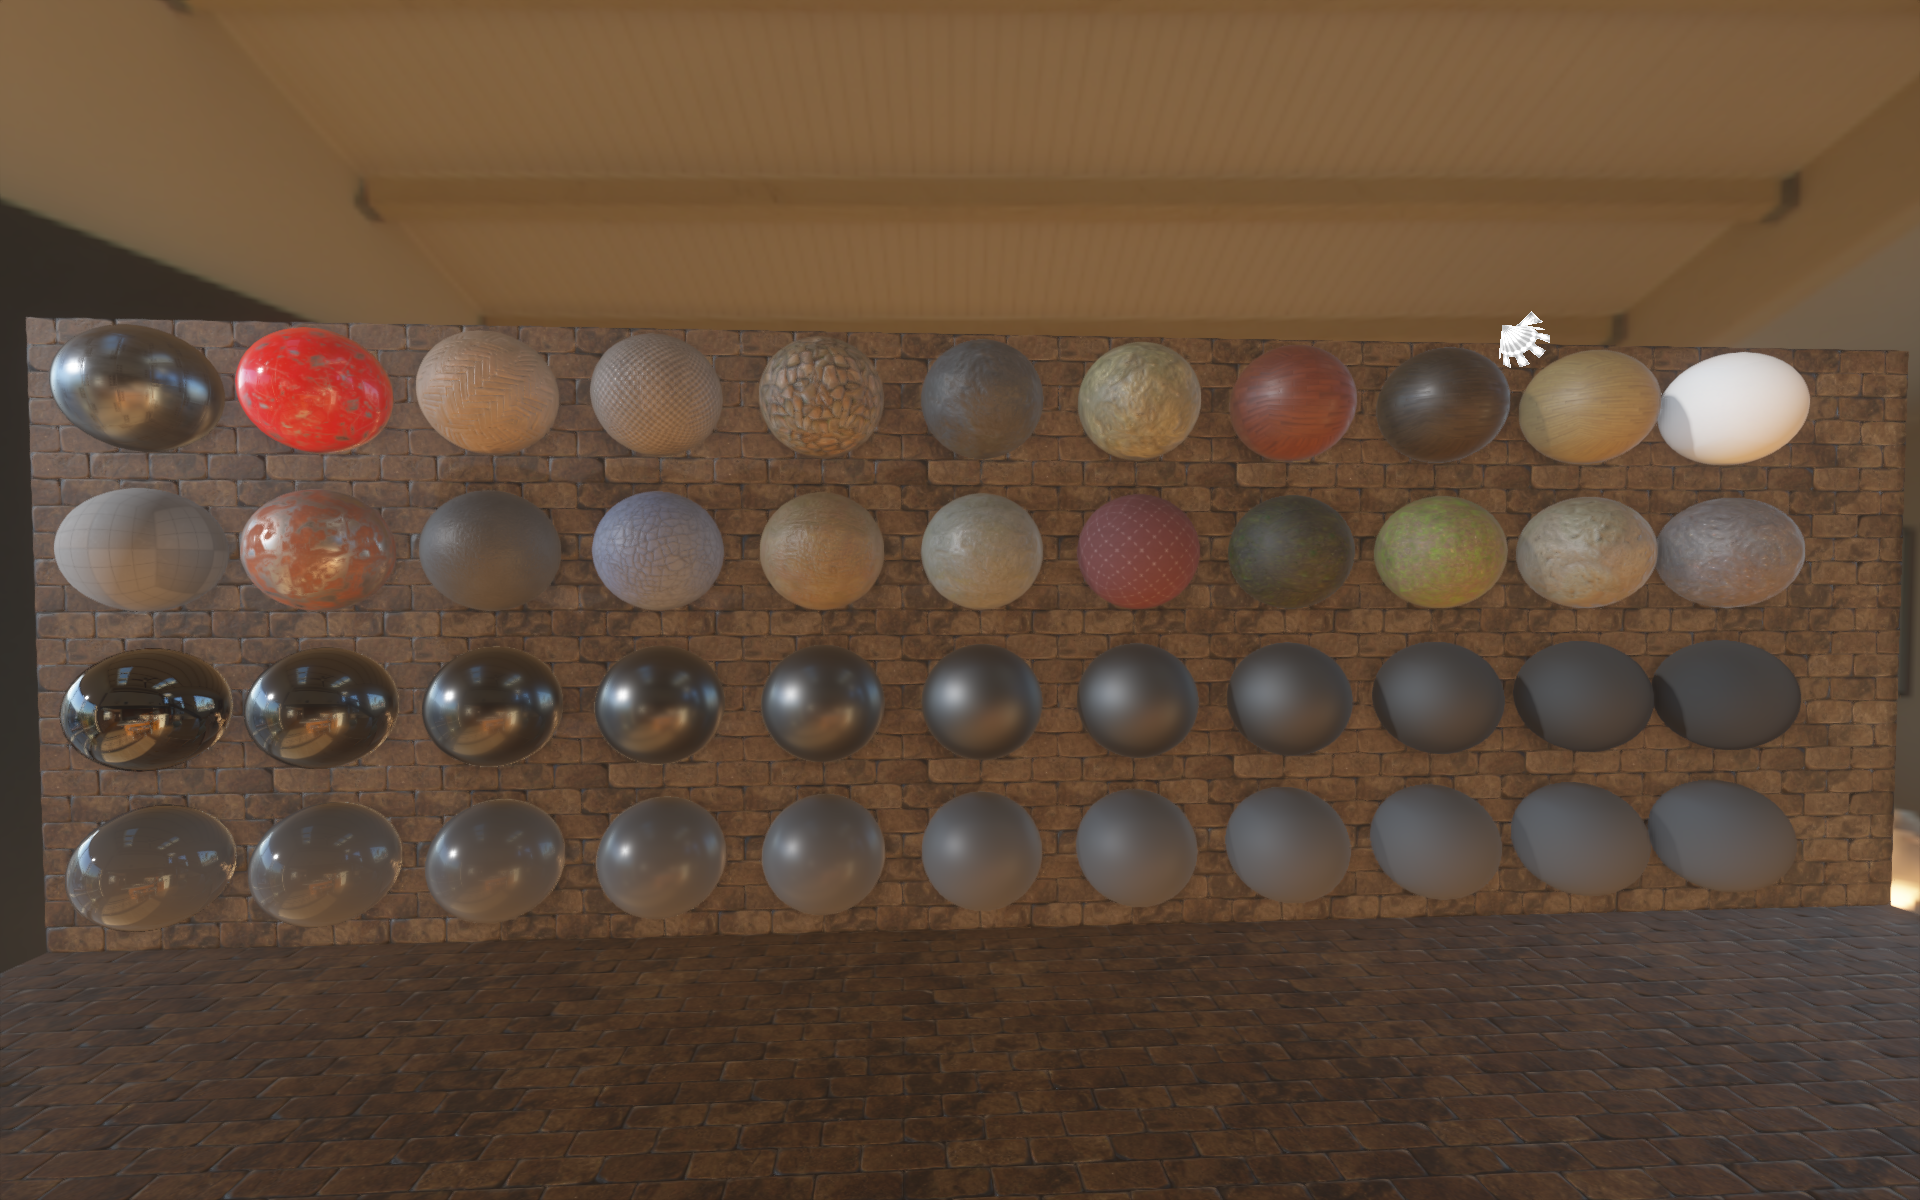
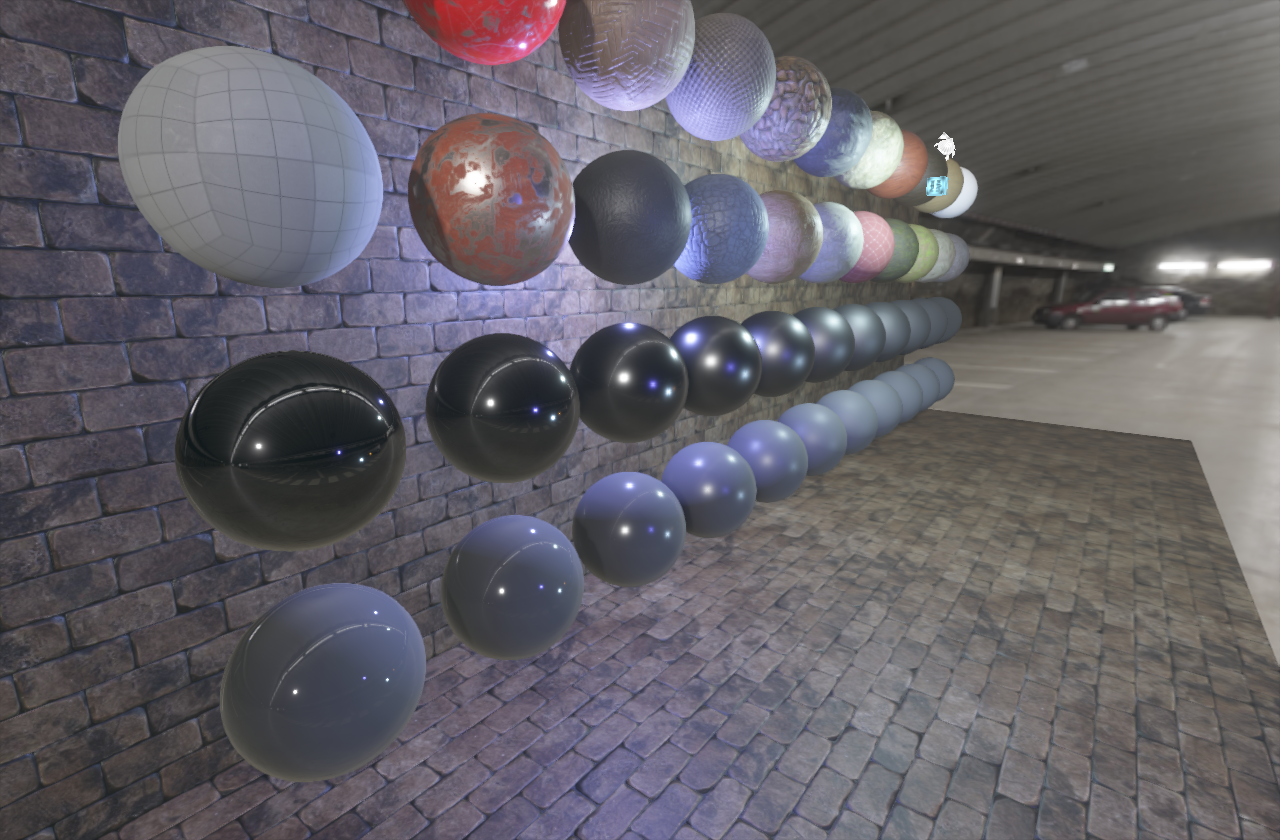
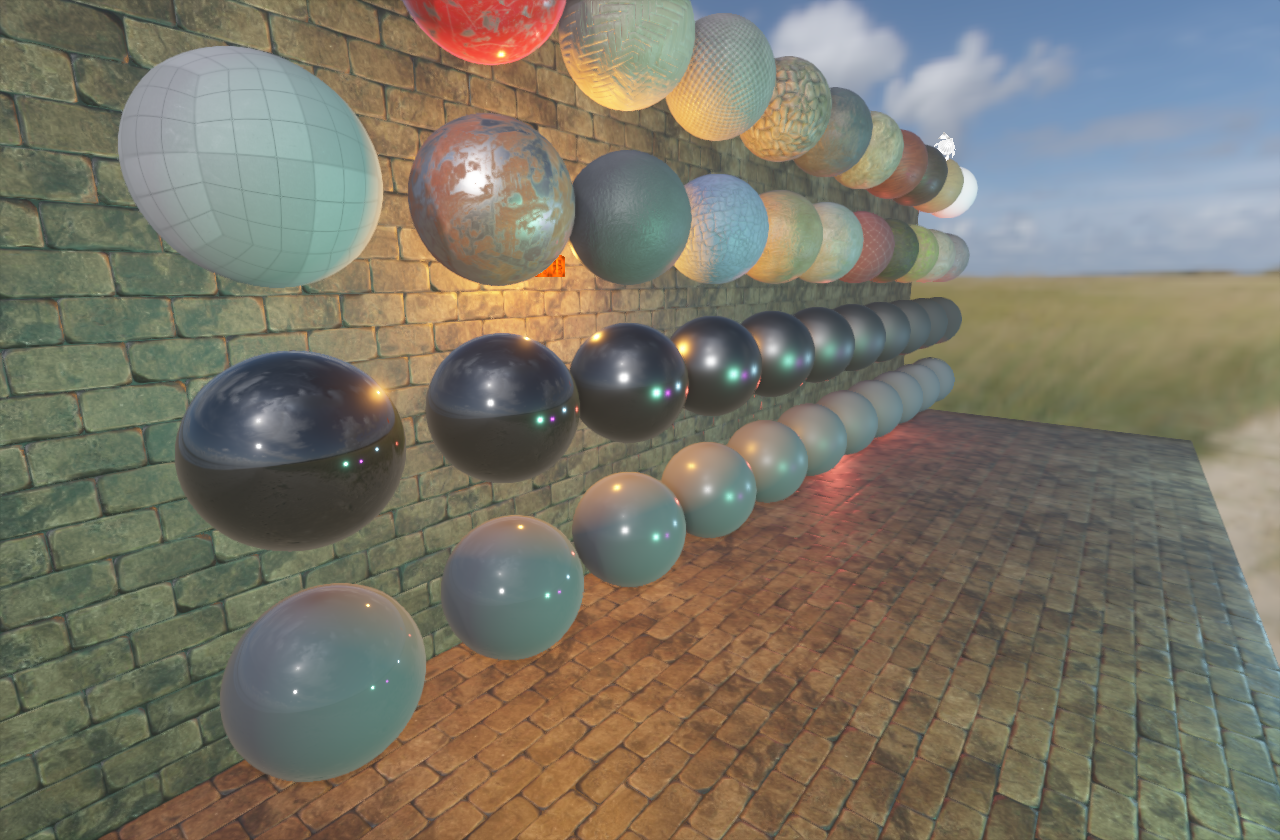
Physically Based Rendering with Image Based Lighting
Even though I've never wrote this before, this was one of the most easiest tasks to do. All the hard work was done by Disney and then optimized by Epic Games with use of Split sum approximation. Everything is described in the white paper from Epic and we all can be really gratefull to them for sharing these equations with the rest of us. The whole implementation with polishing (and with studying) took me about 1 week (30 hours).
PBR and IBL dev screenshots and results:
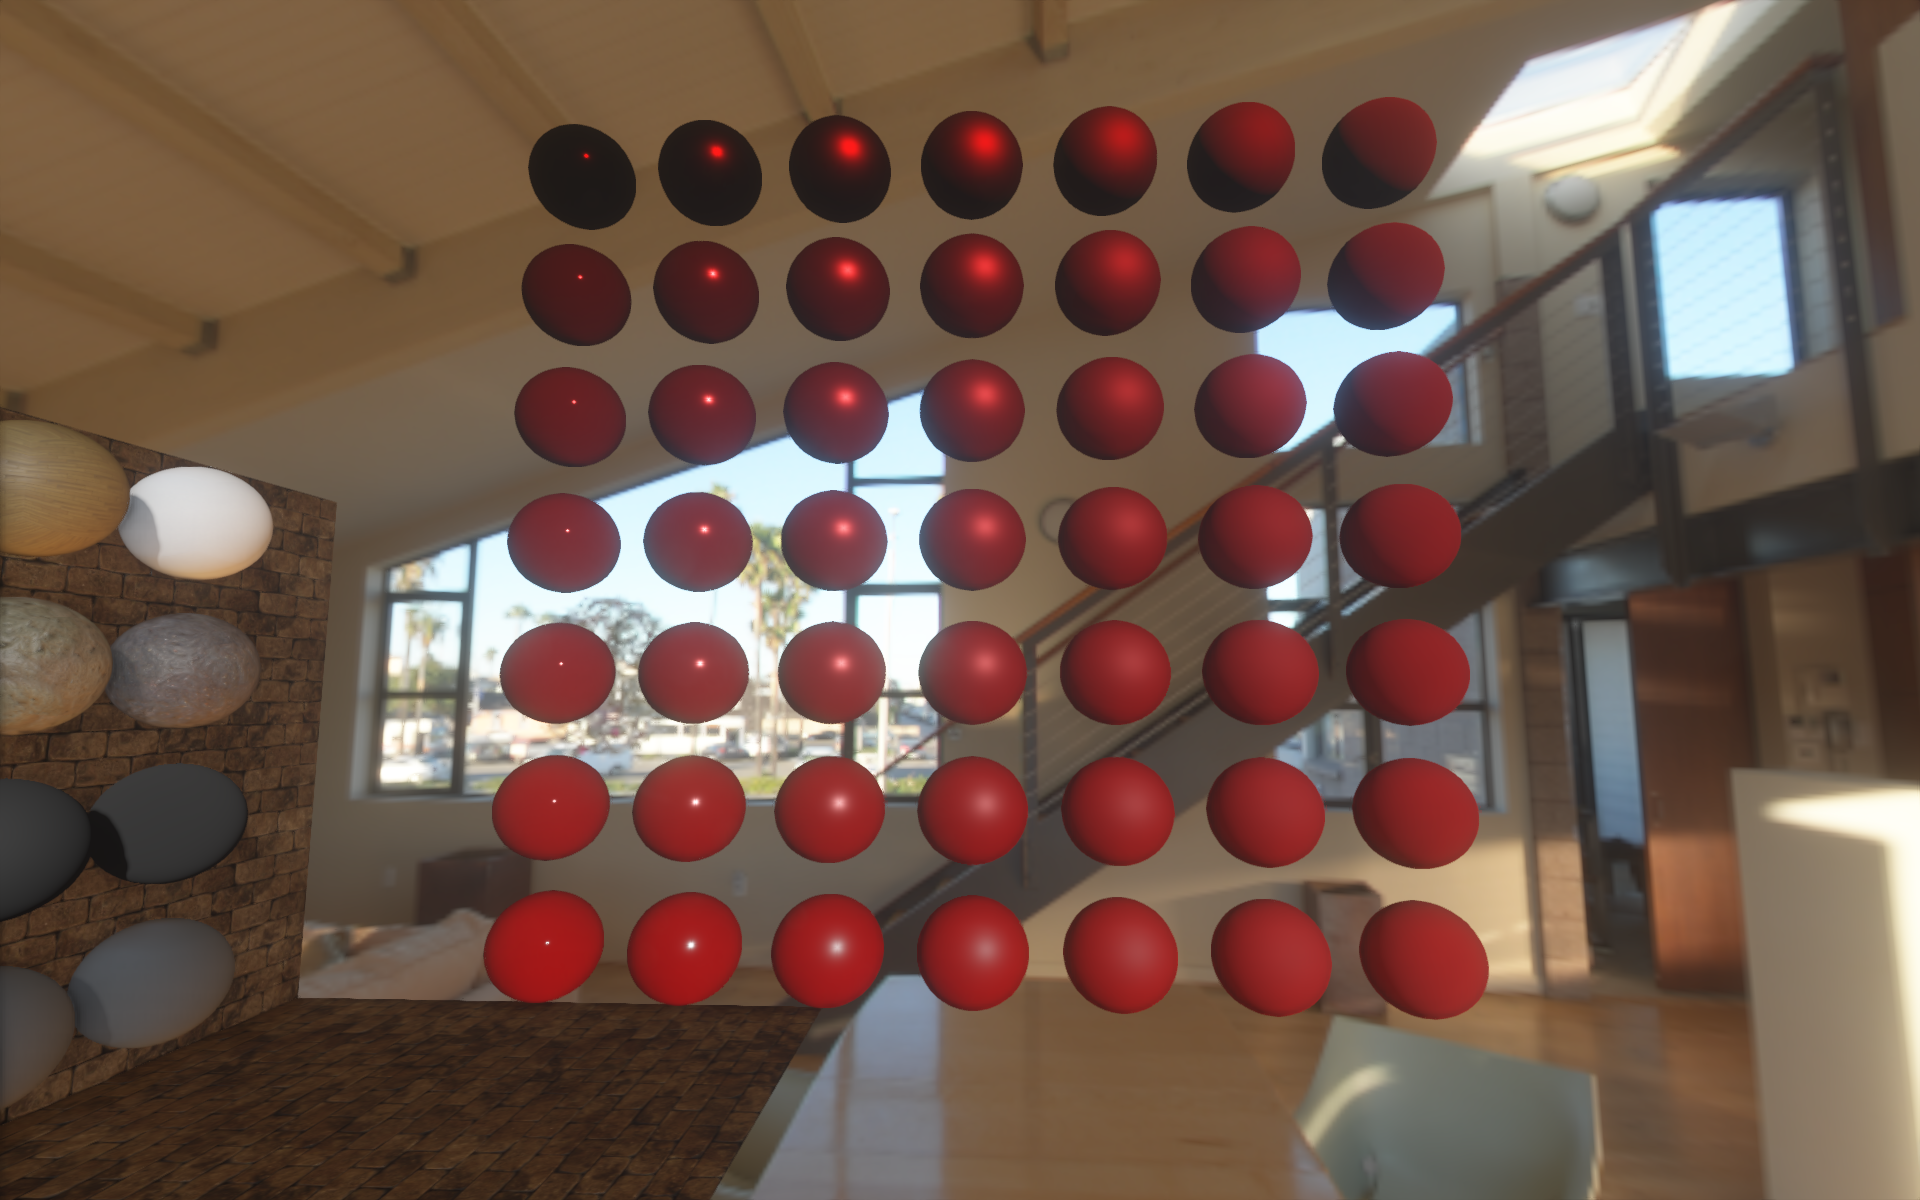
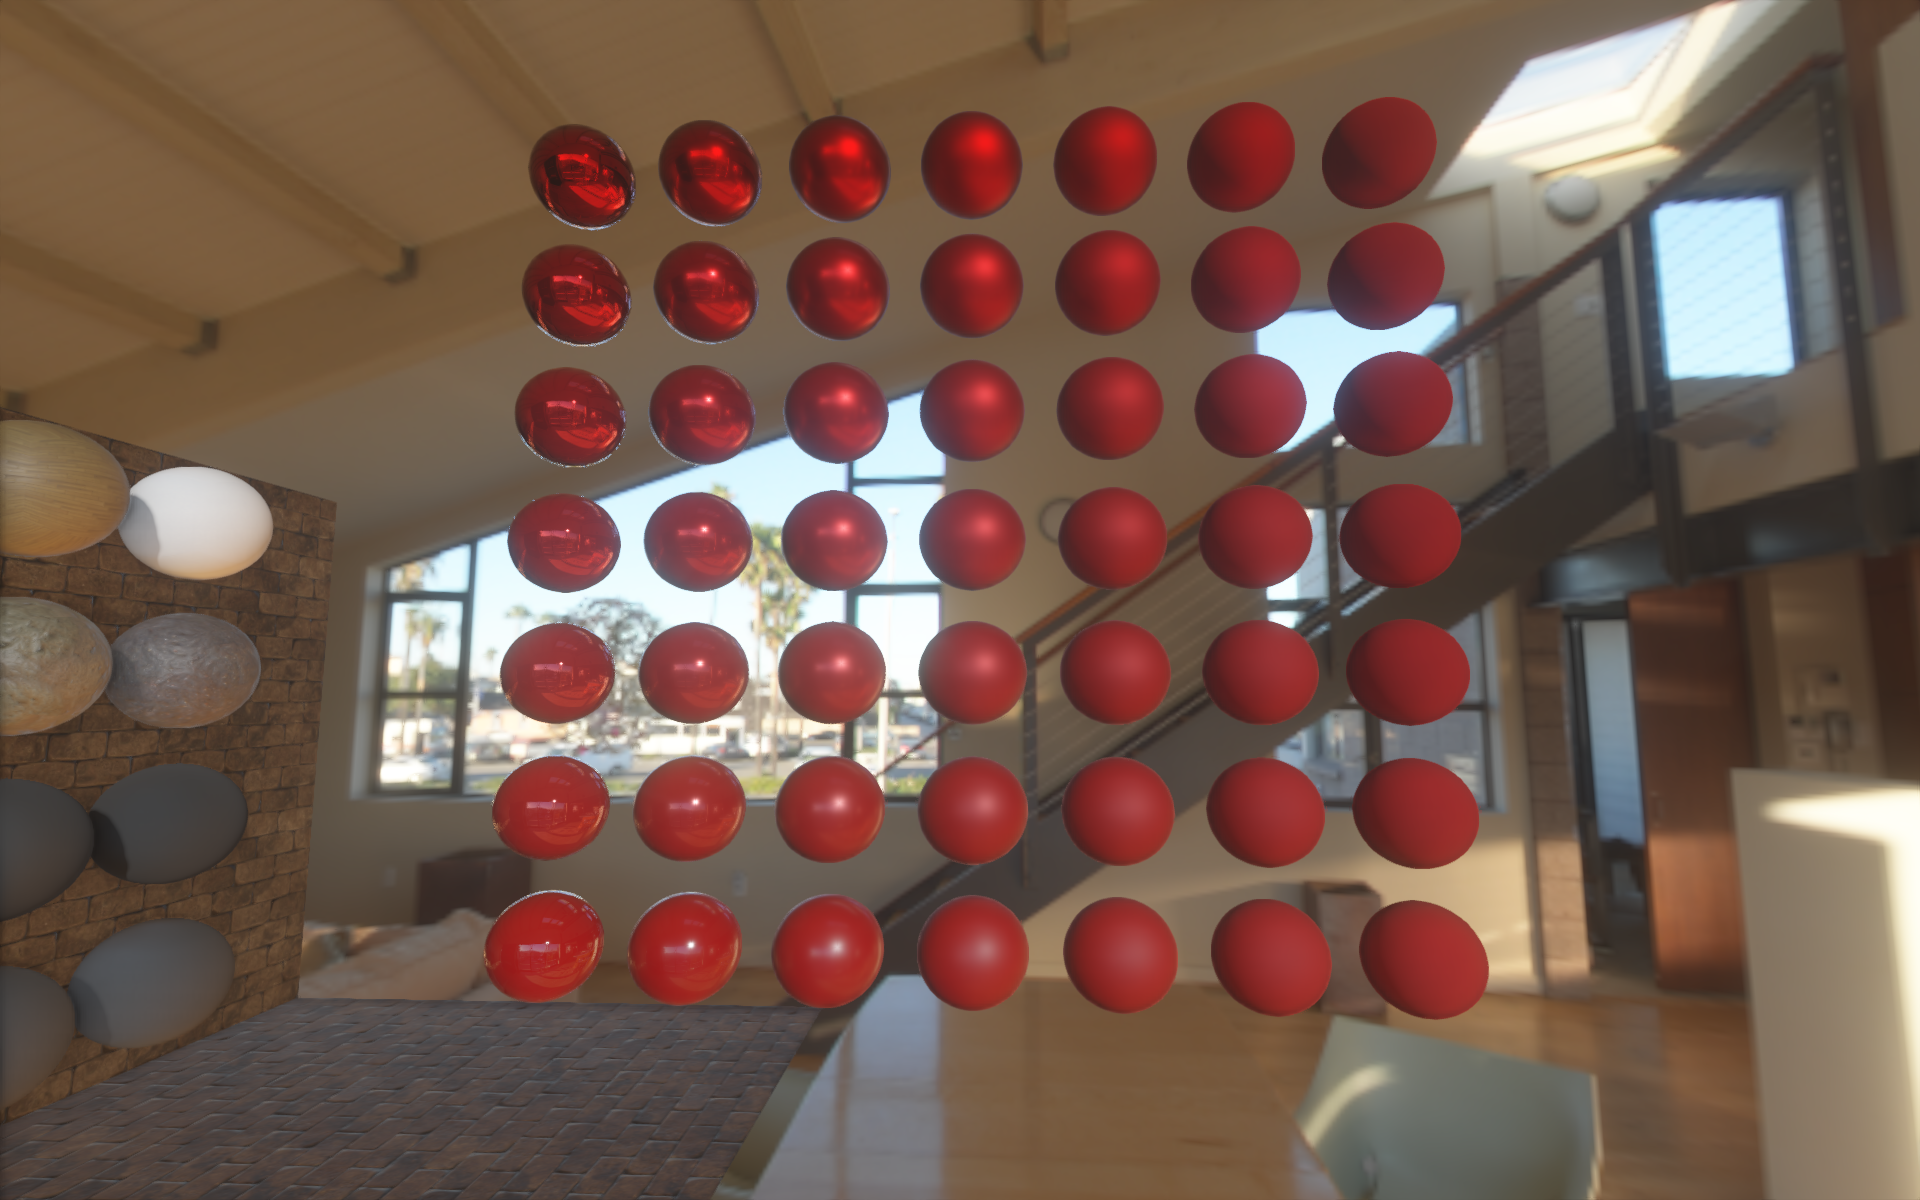
PBR and IBL dev screenshots and results:
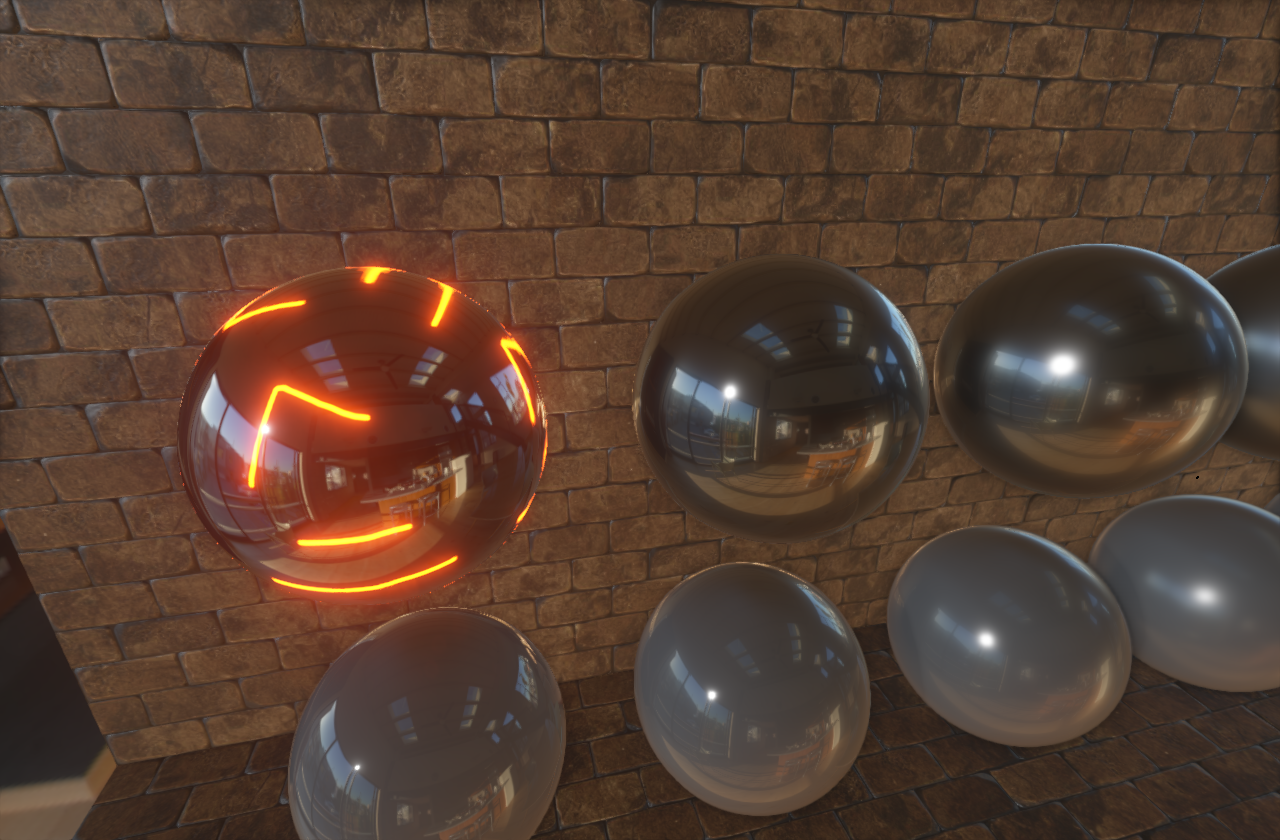
PBR and IBL with simple emissive mask
PBR and IBL Sponza
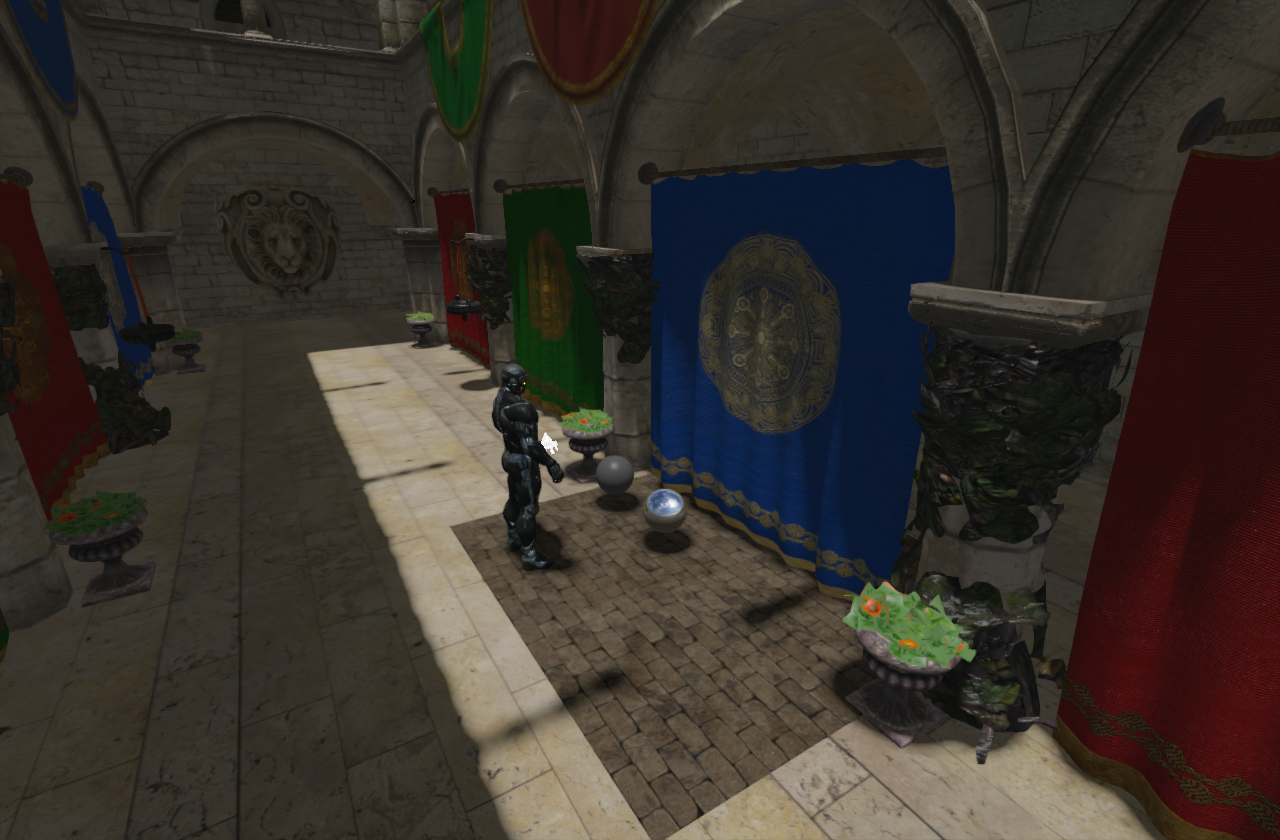
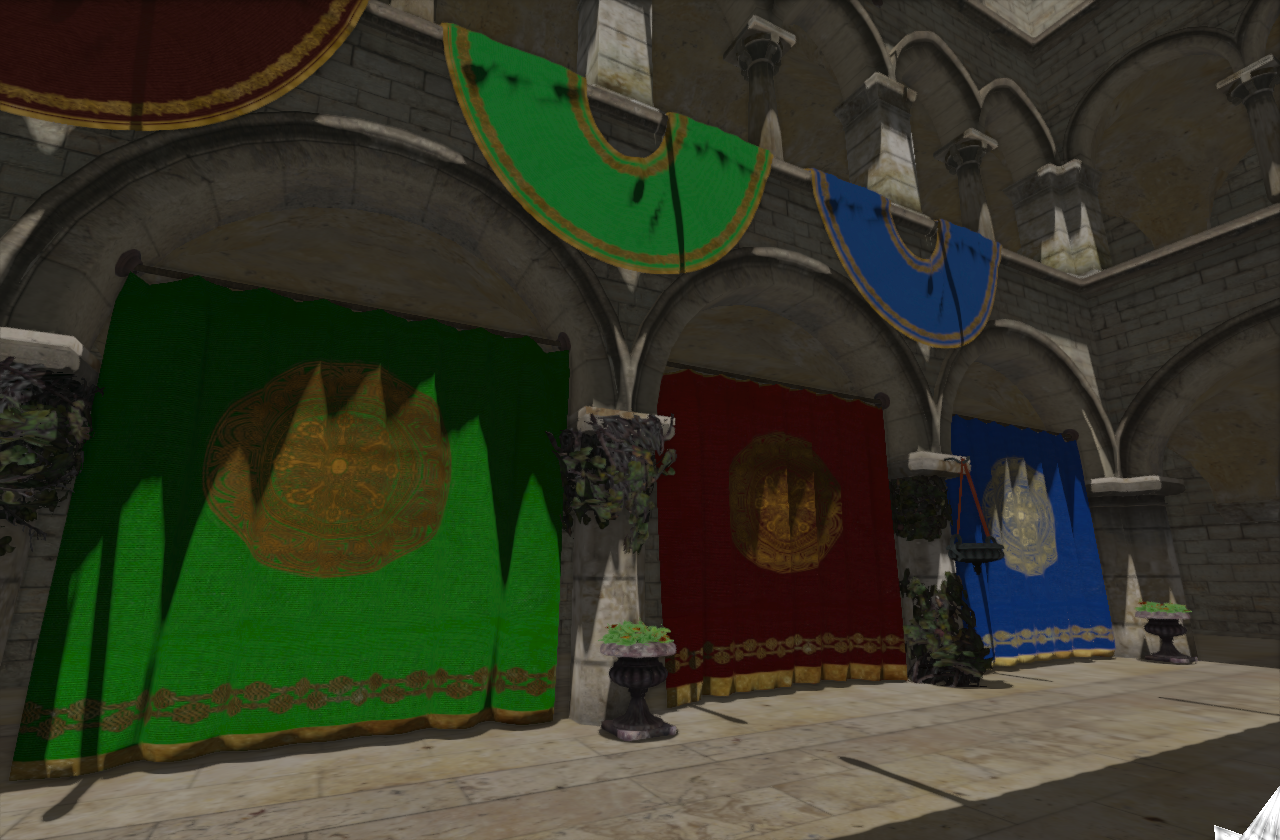
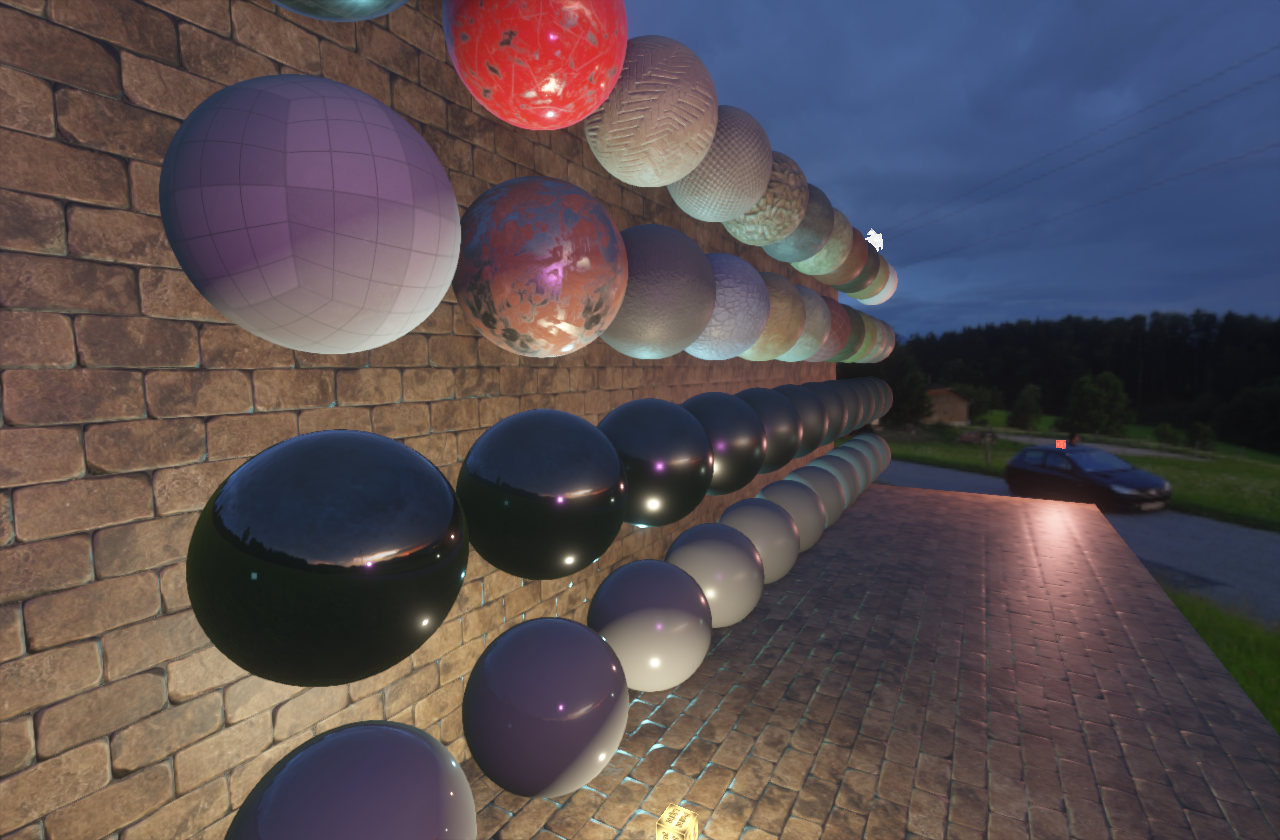
More fun with lights and different skyboxes


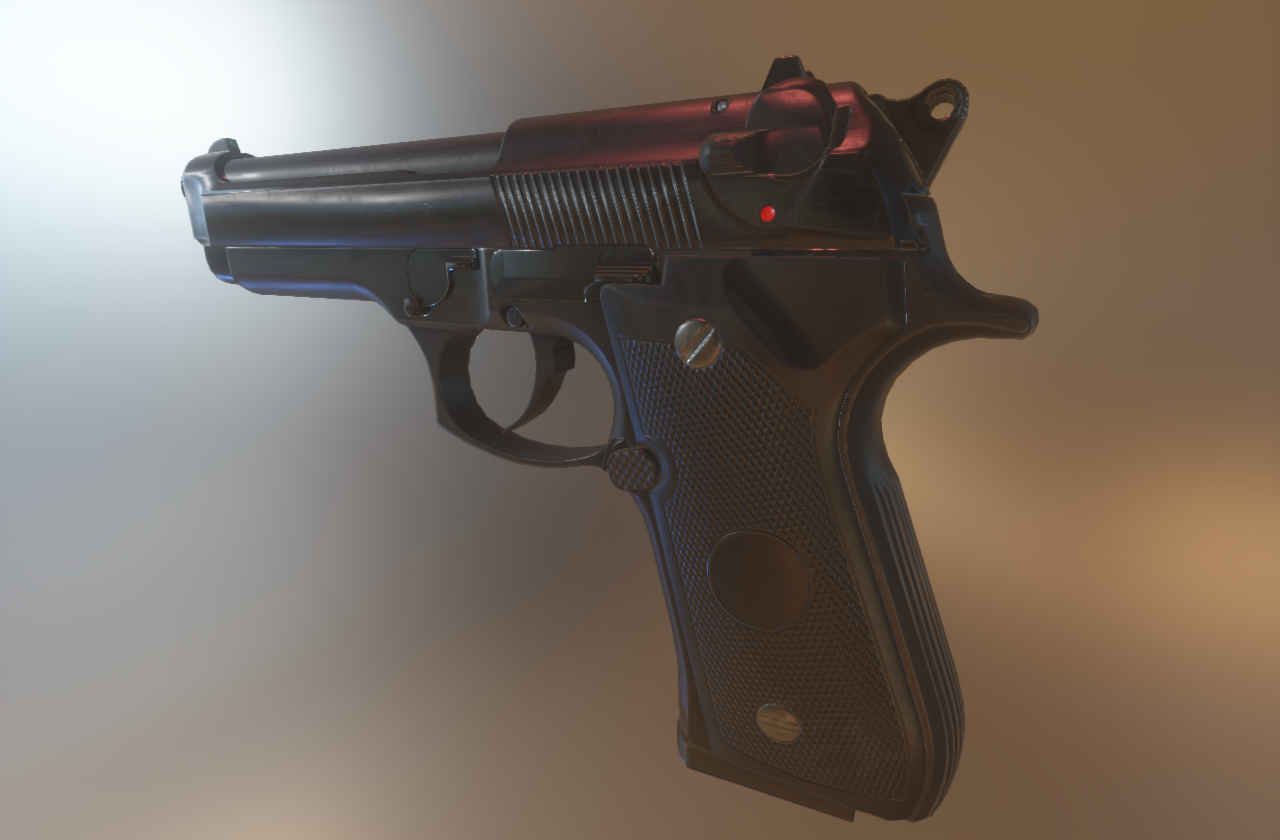
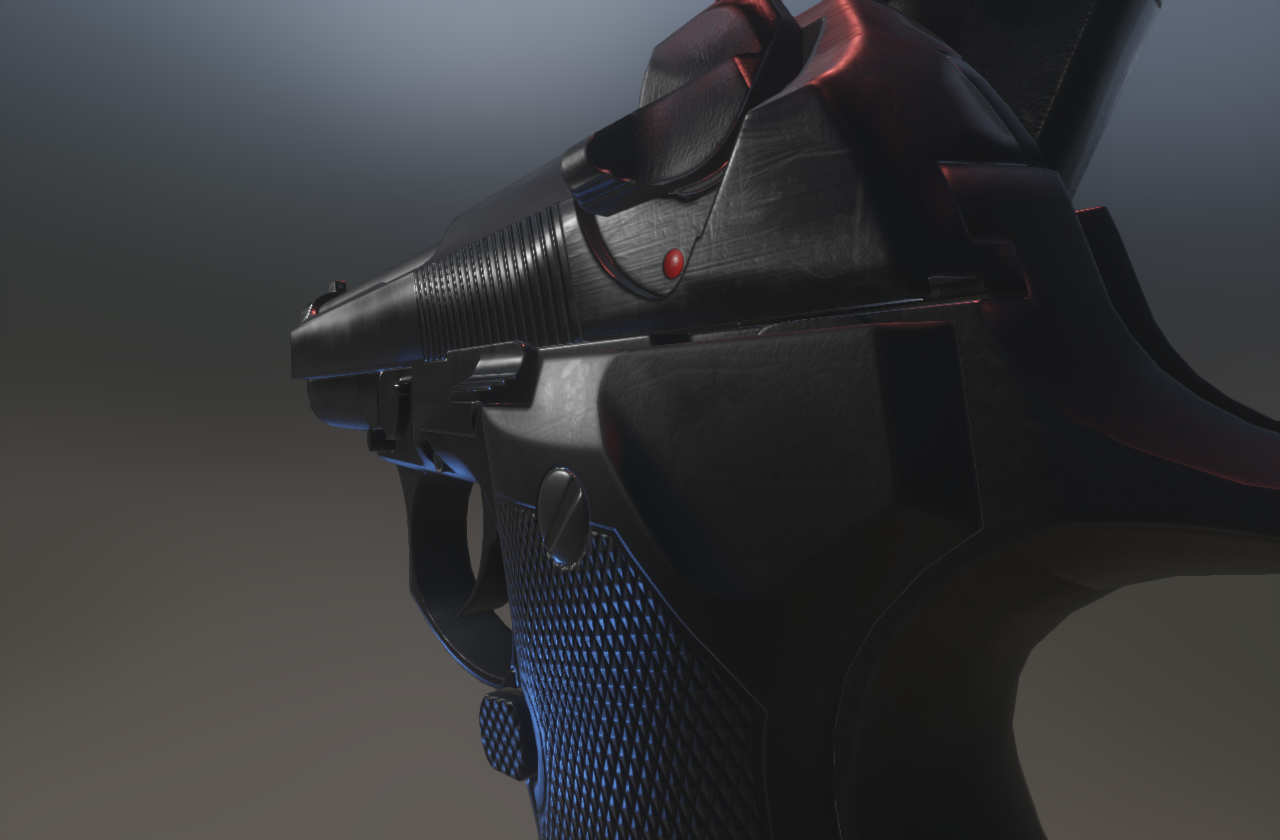
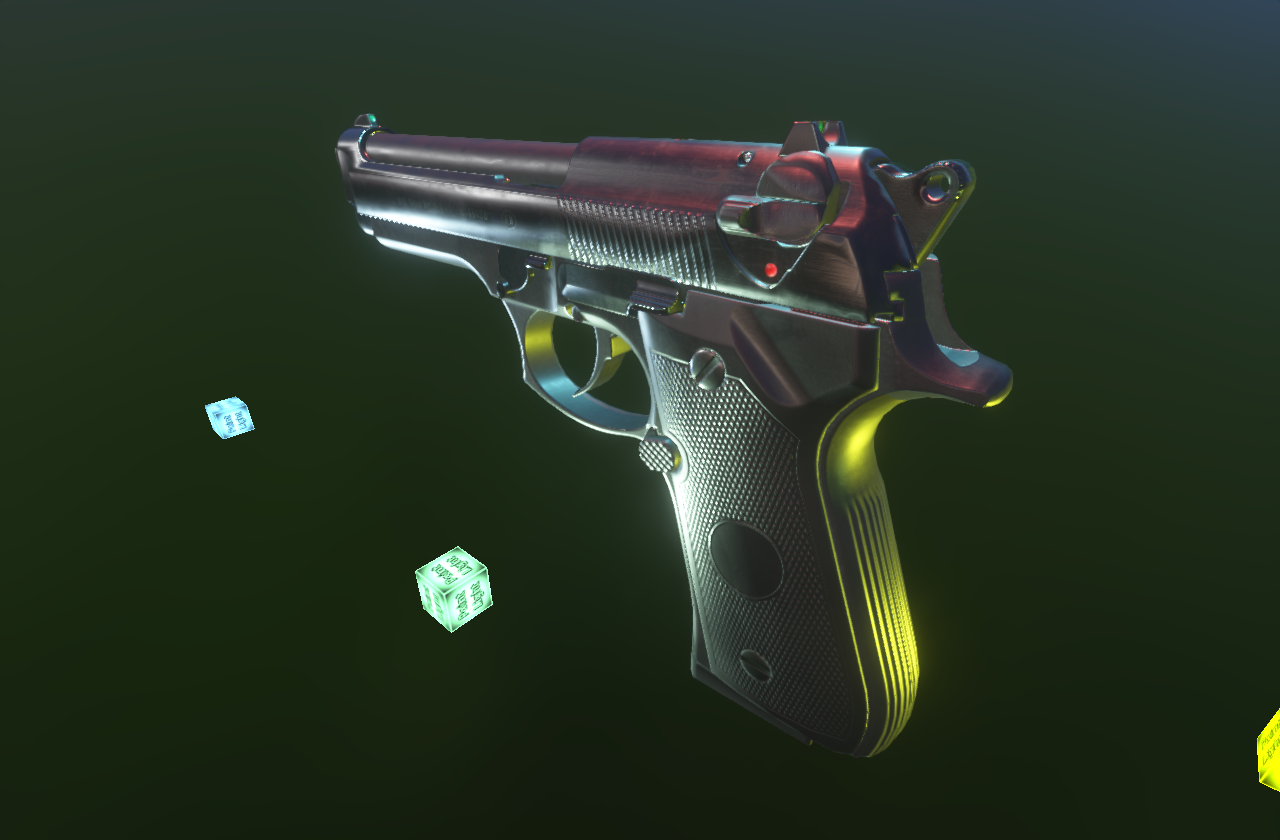
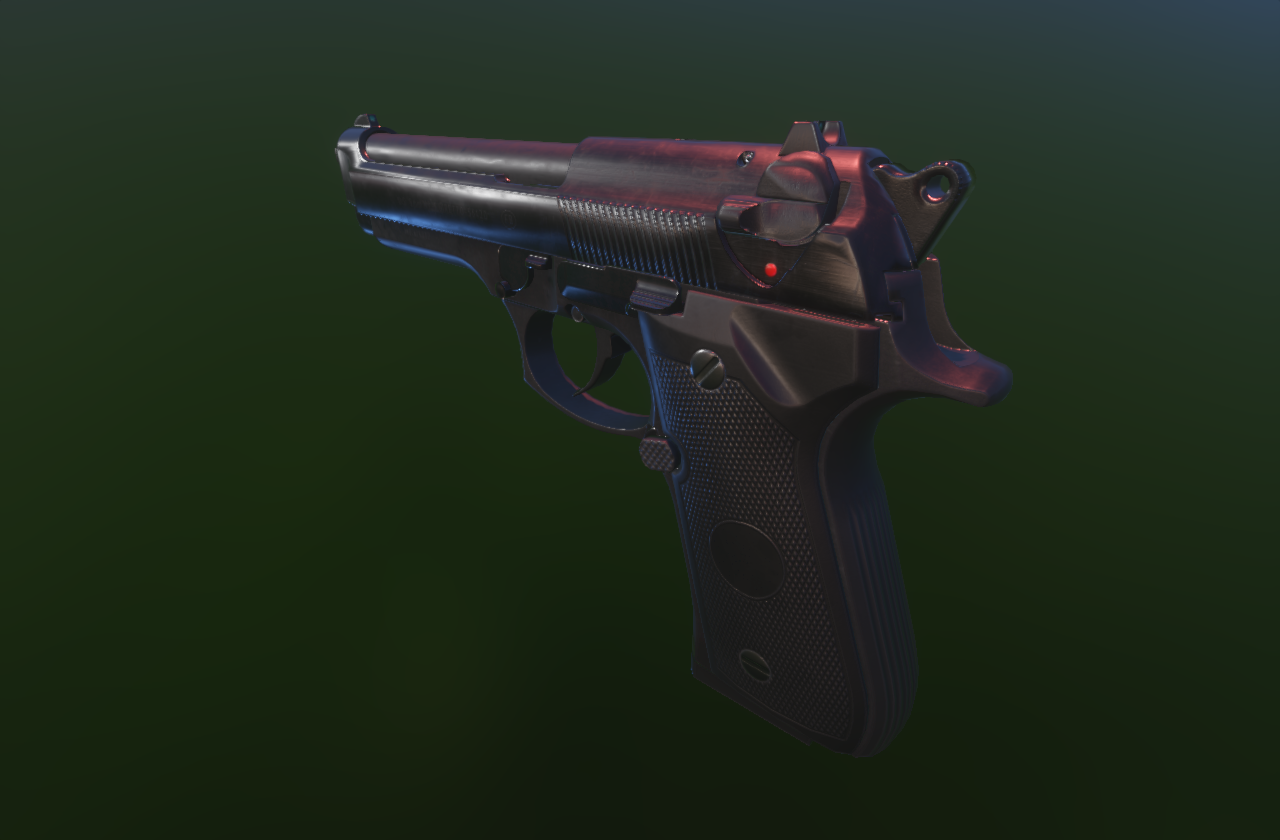
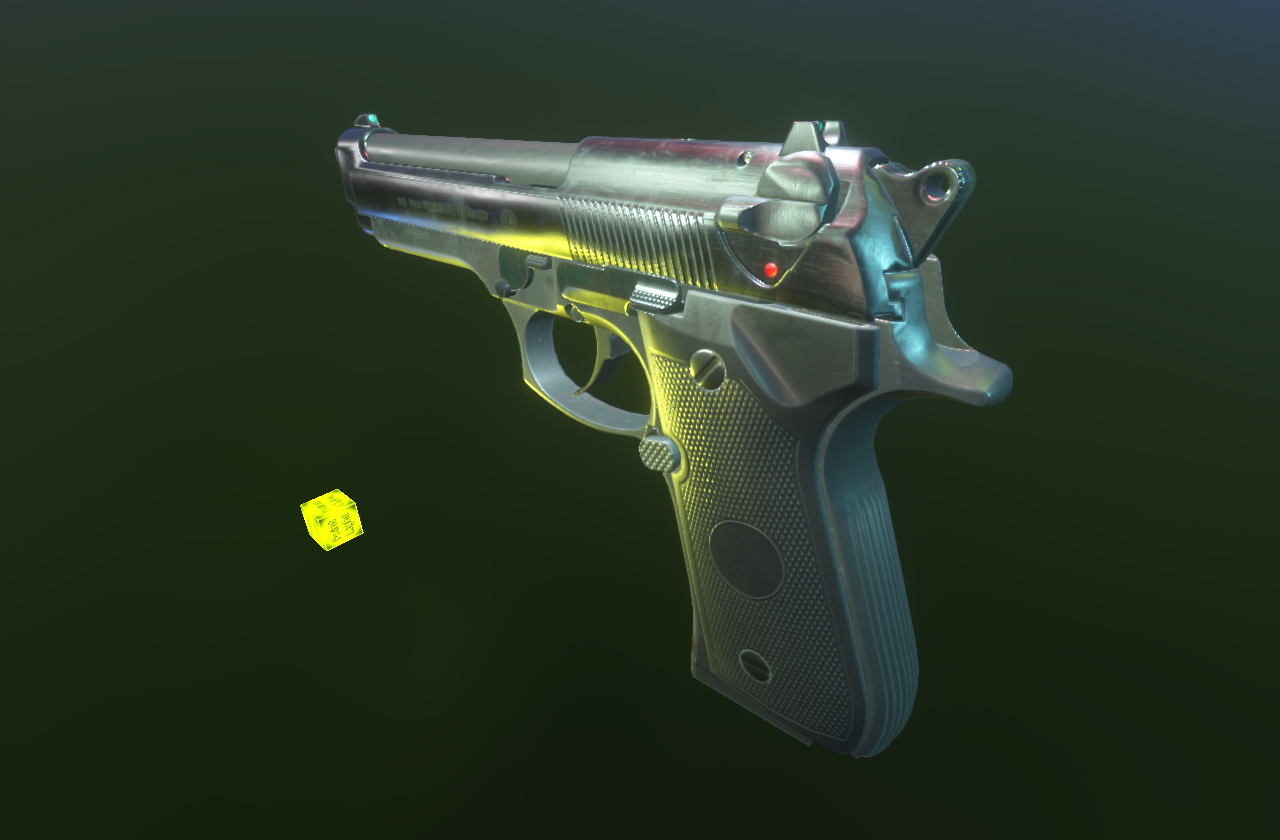
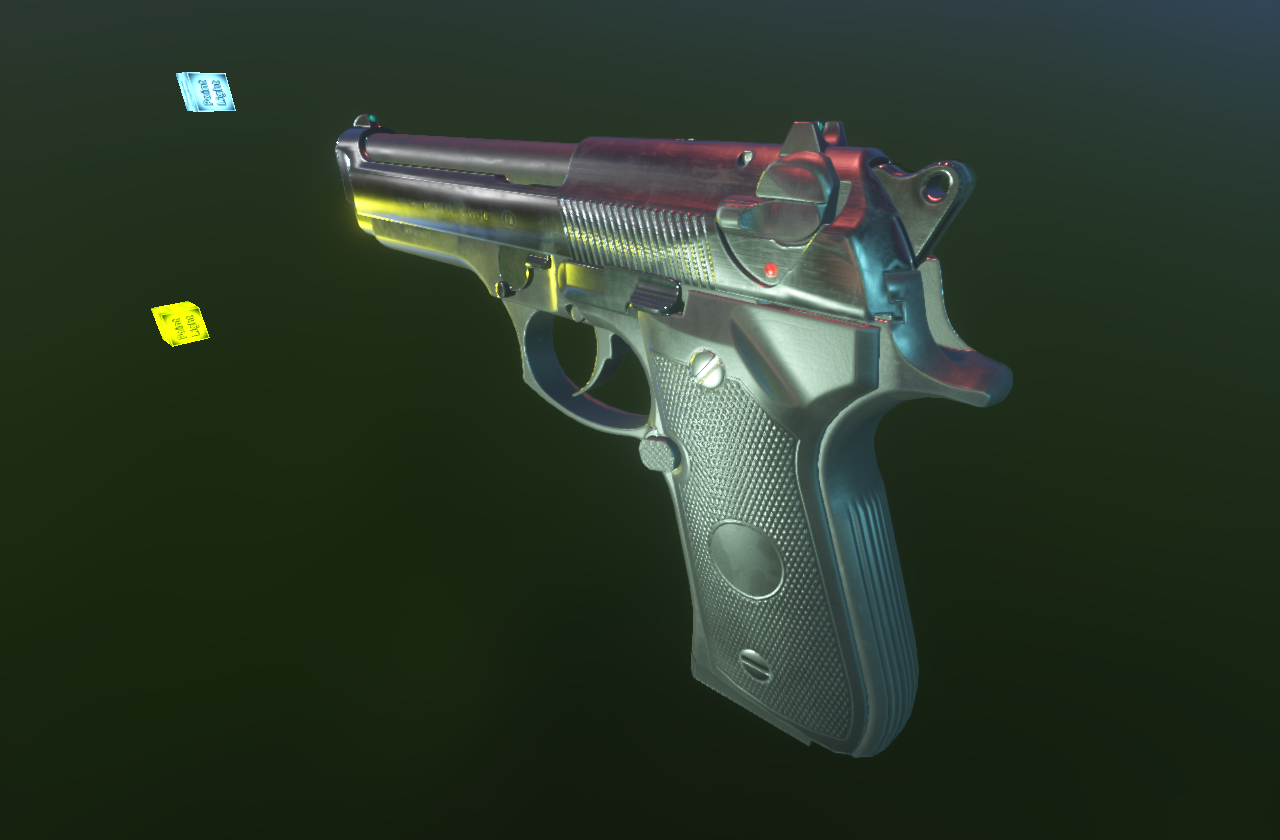
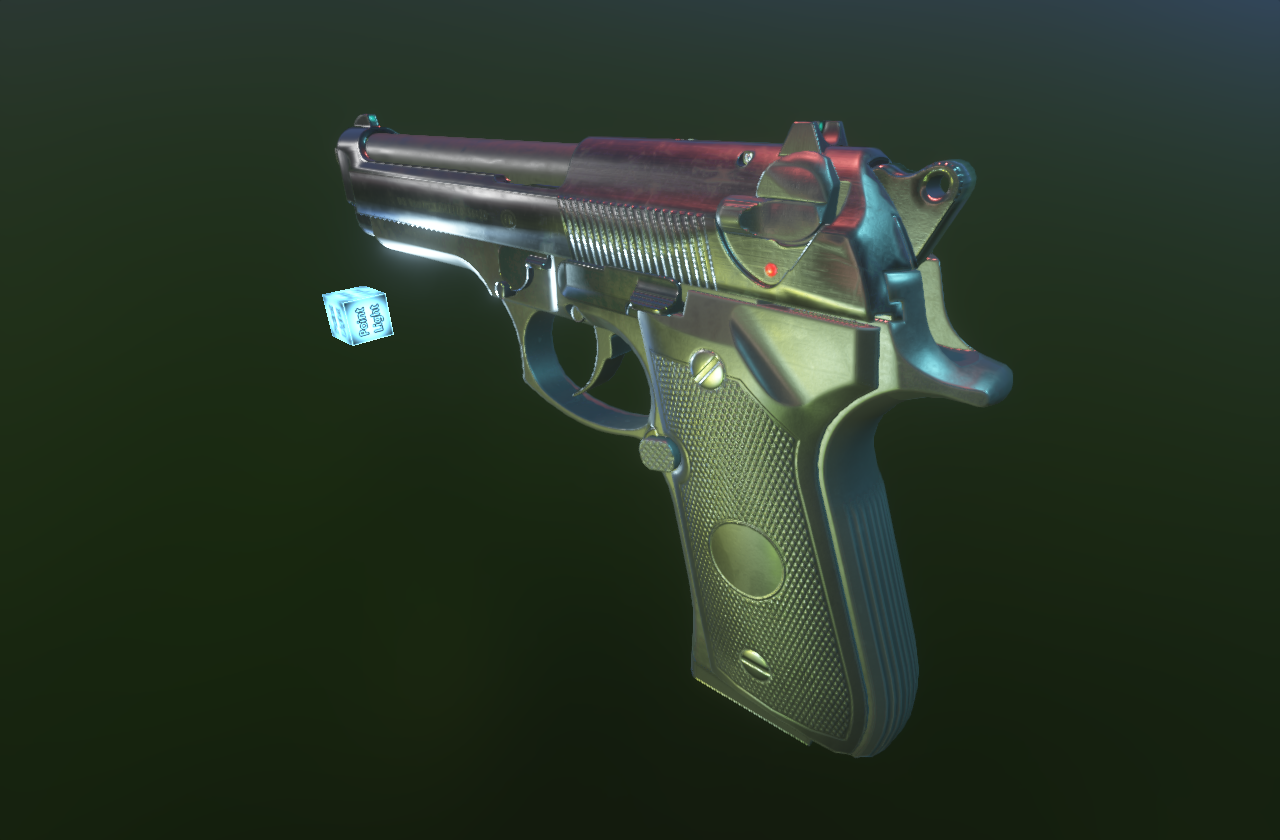
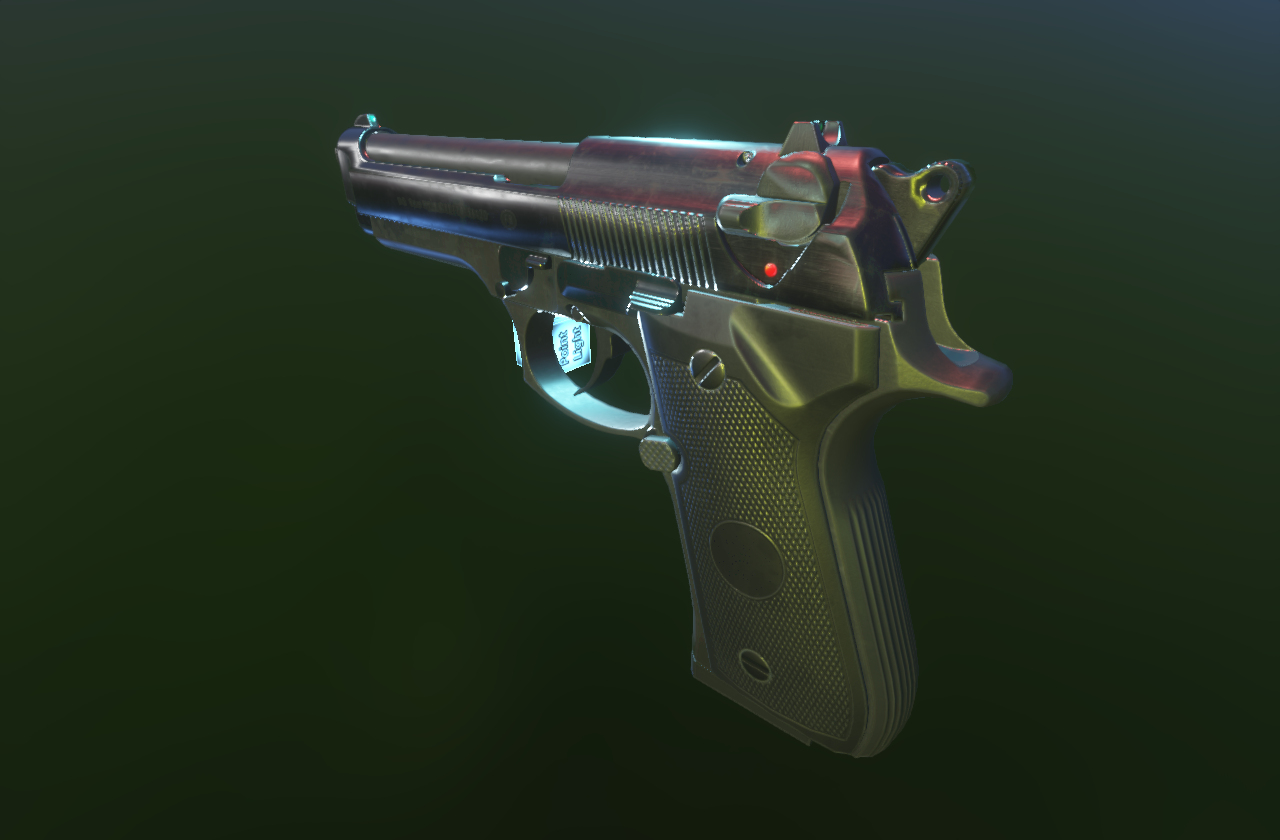
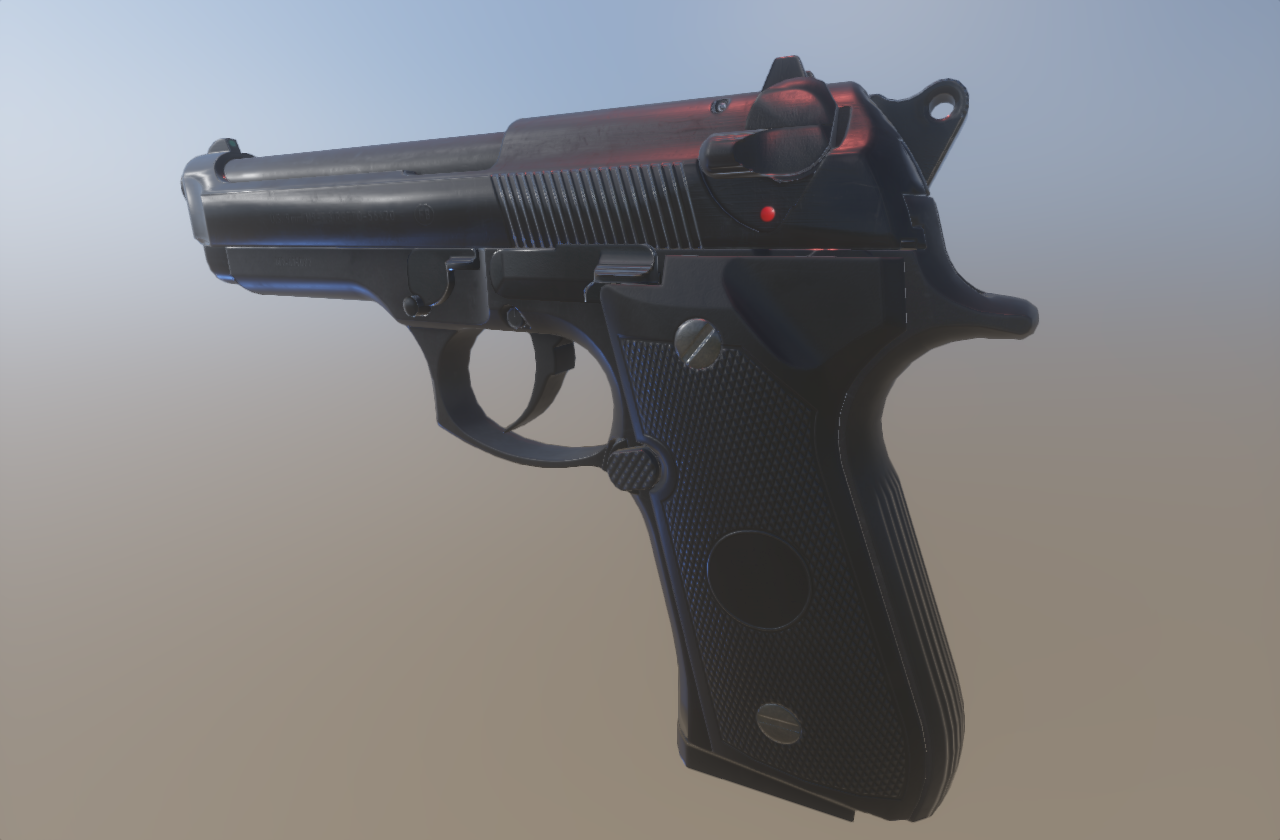
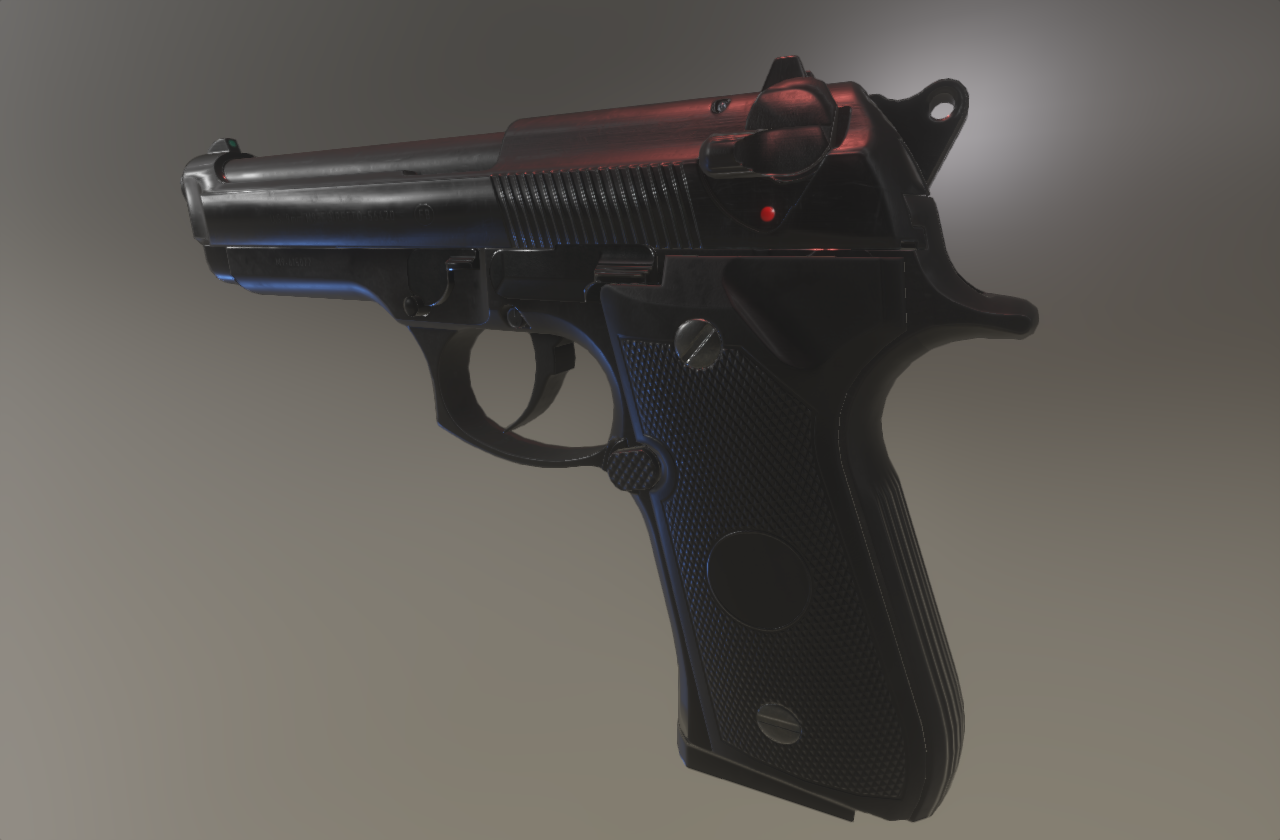
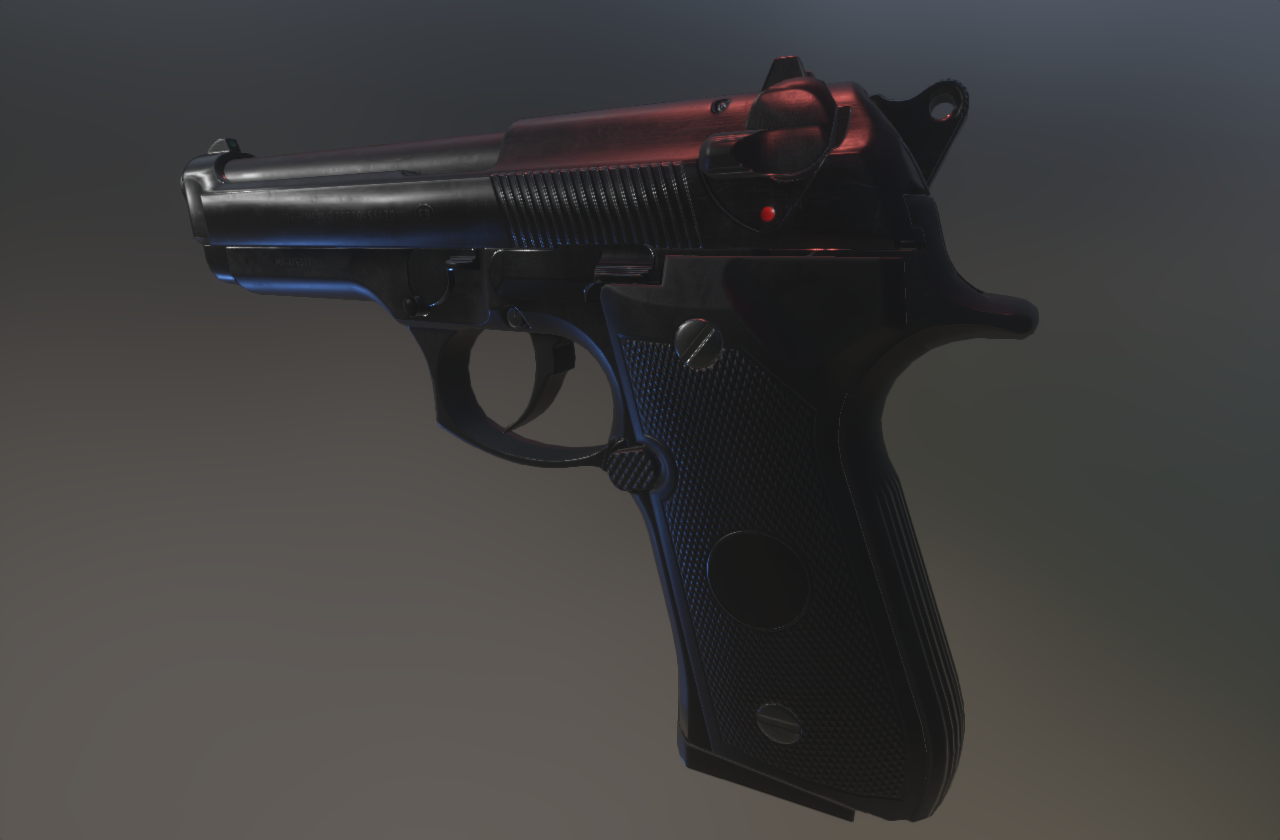
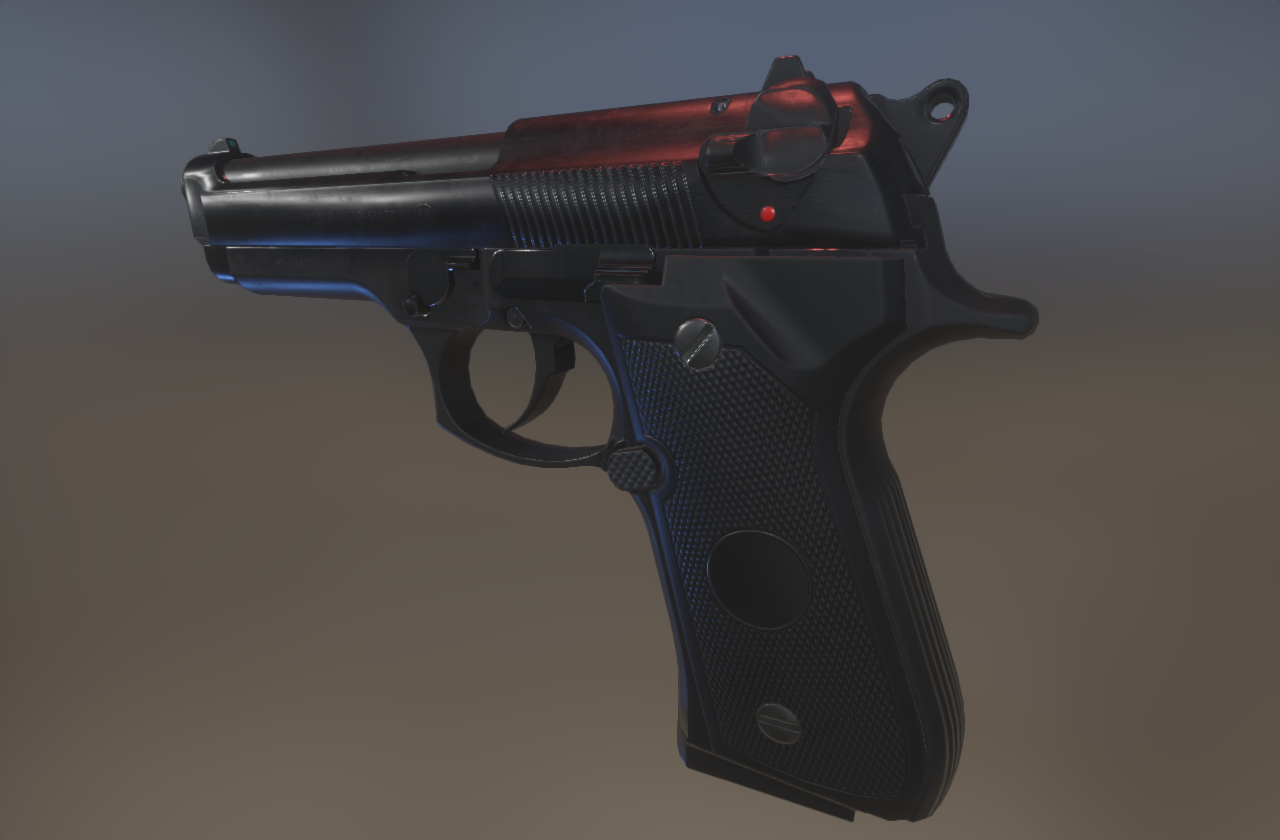
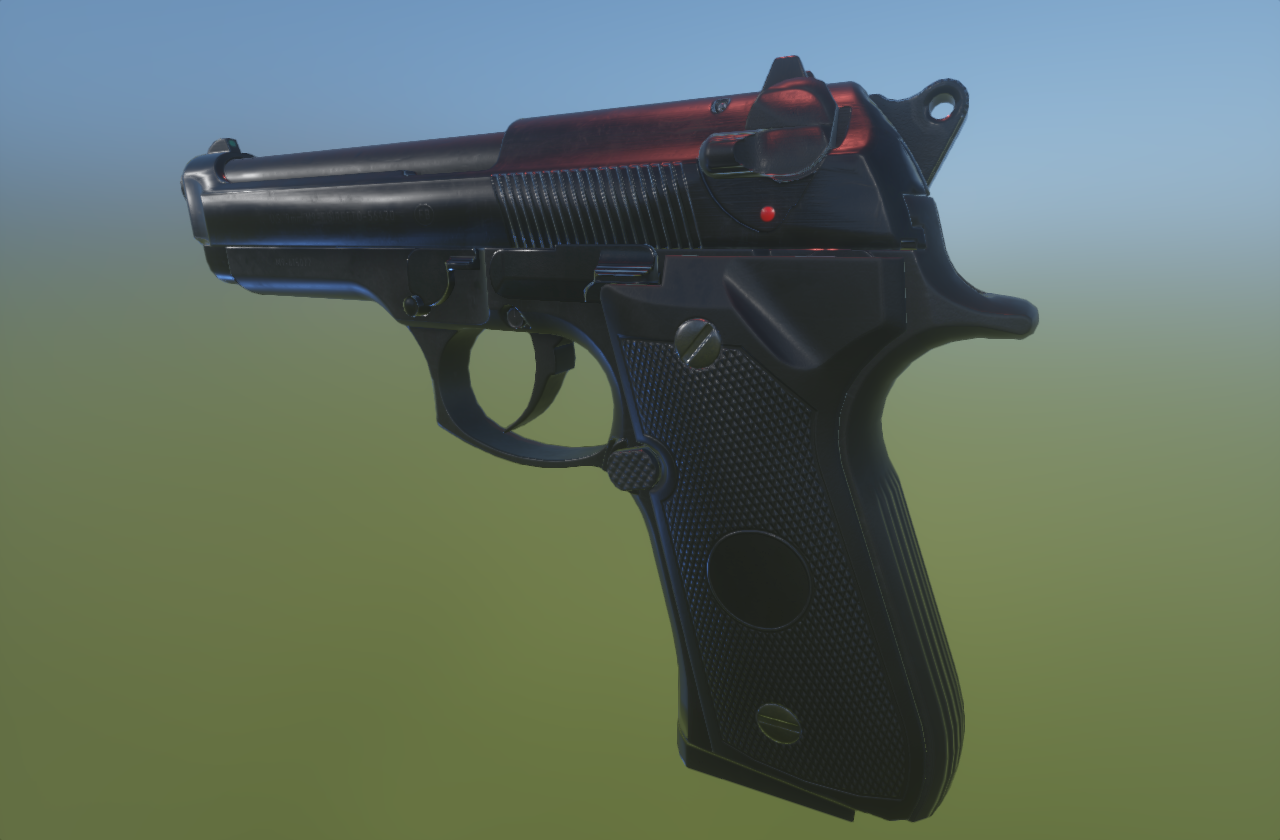
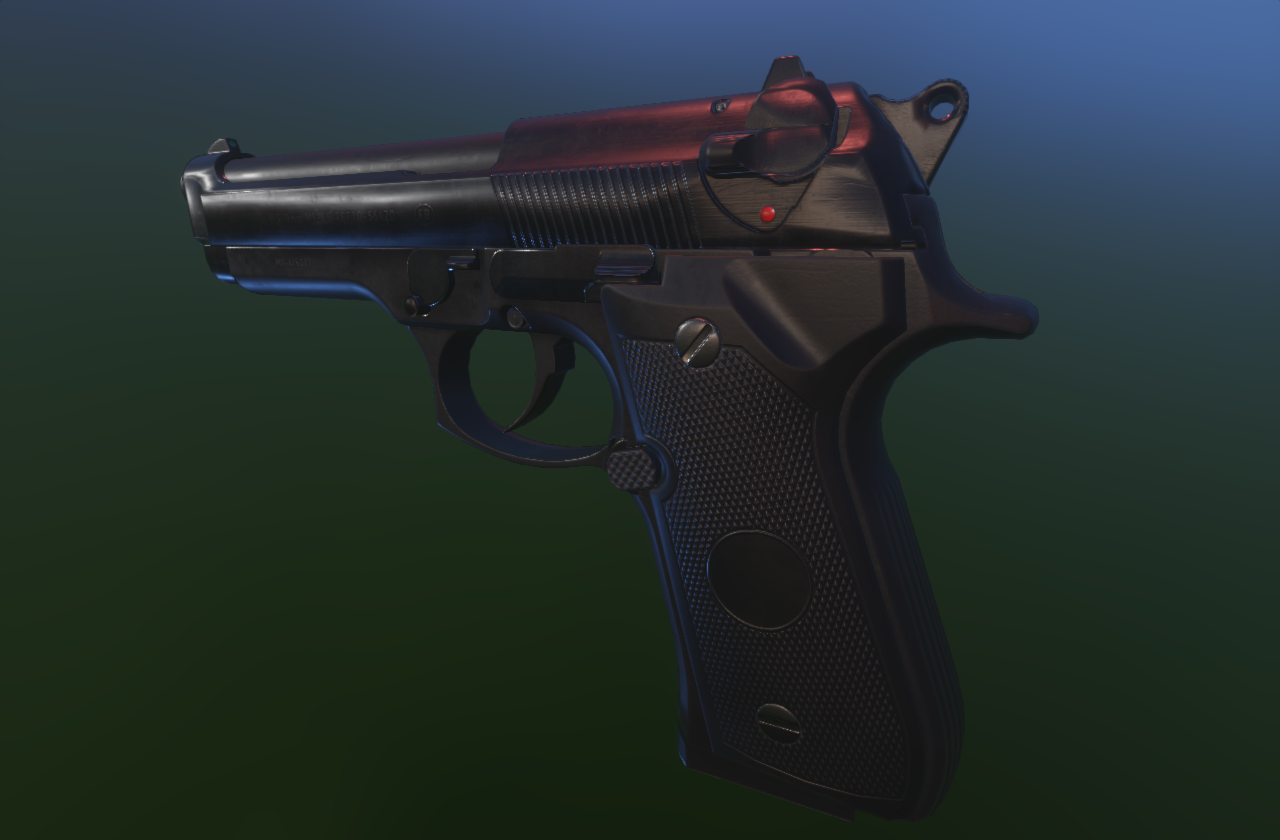
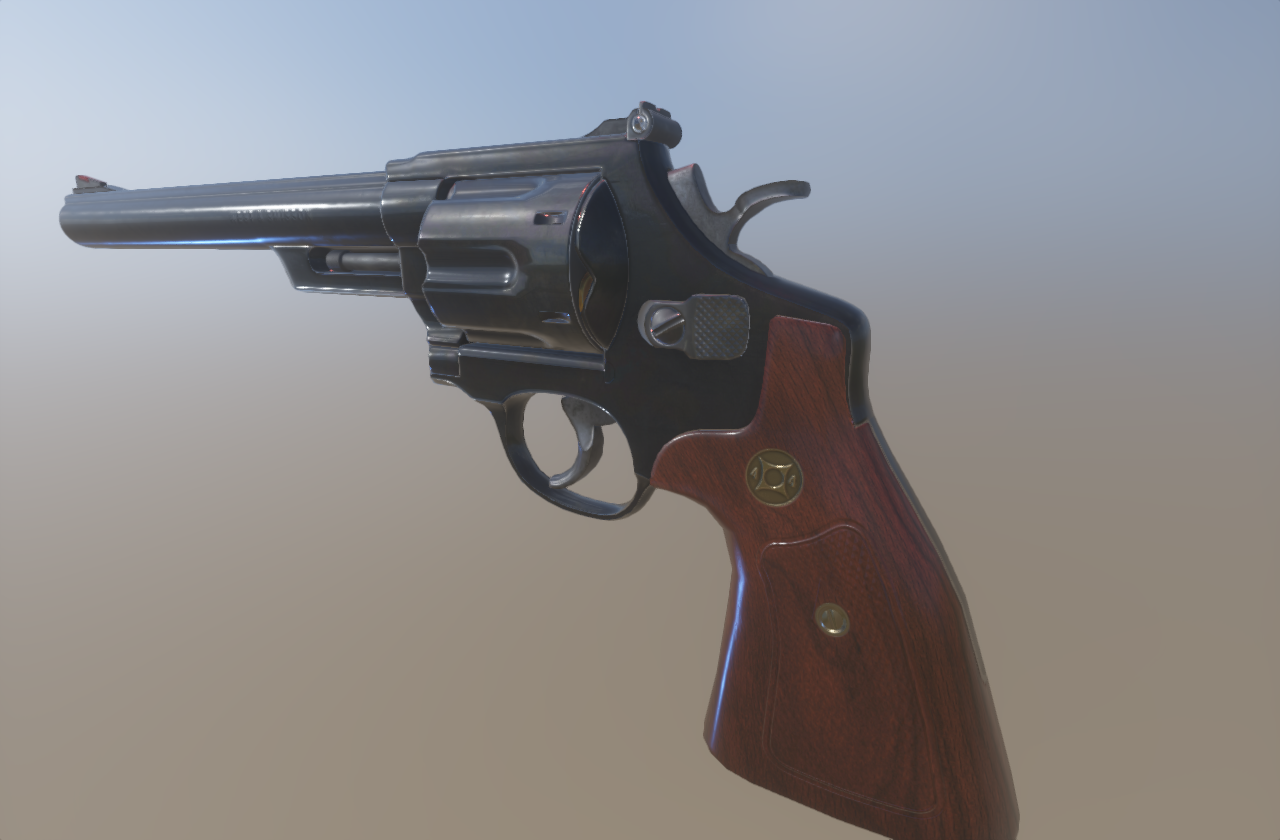
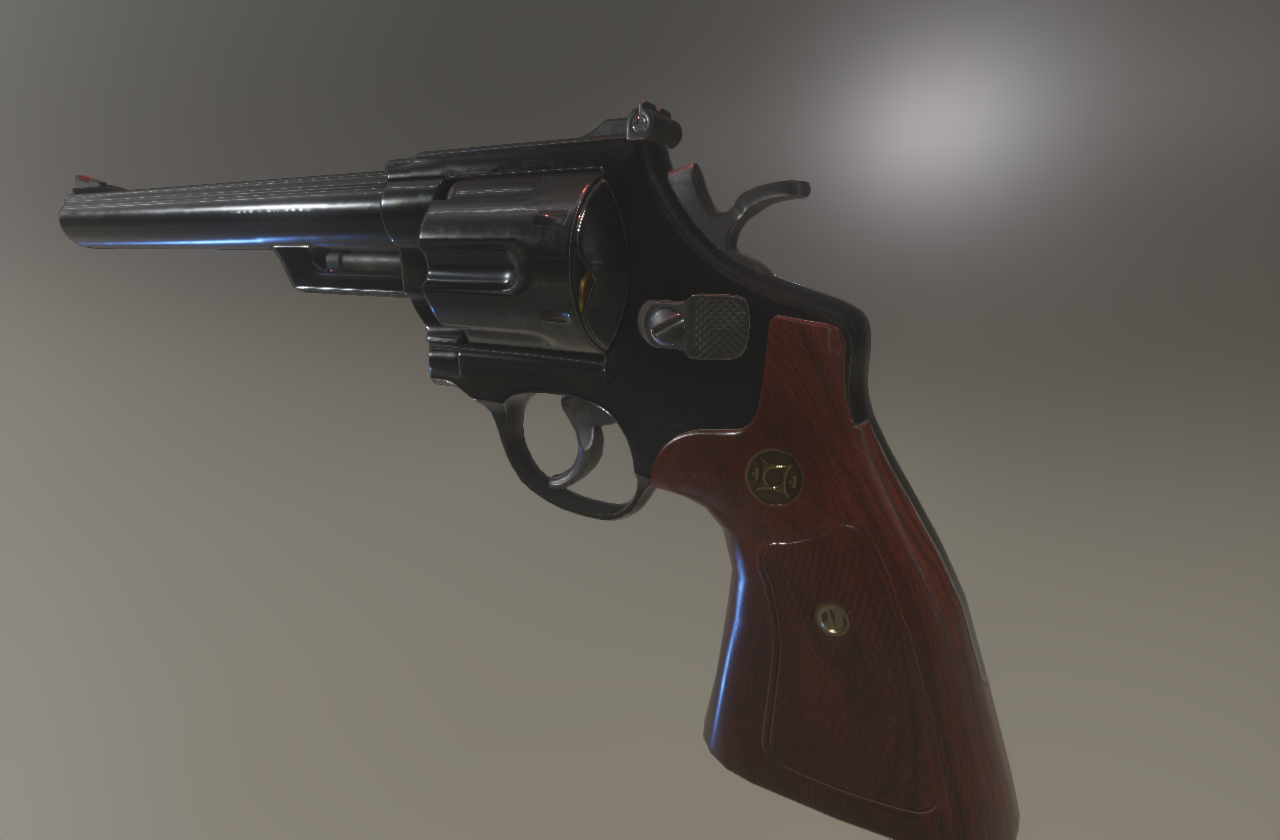
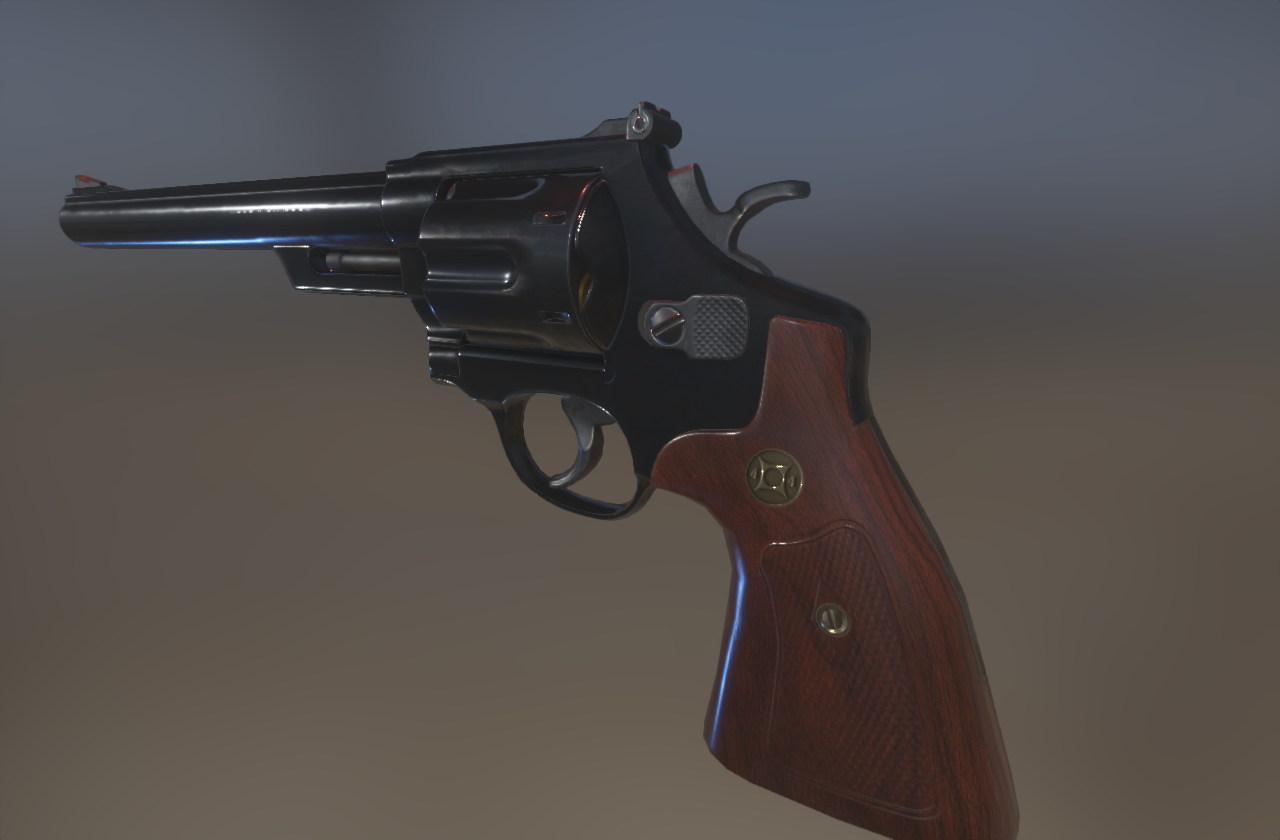
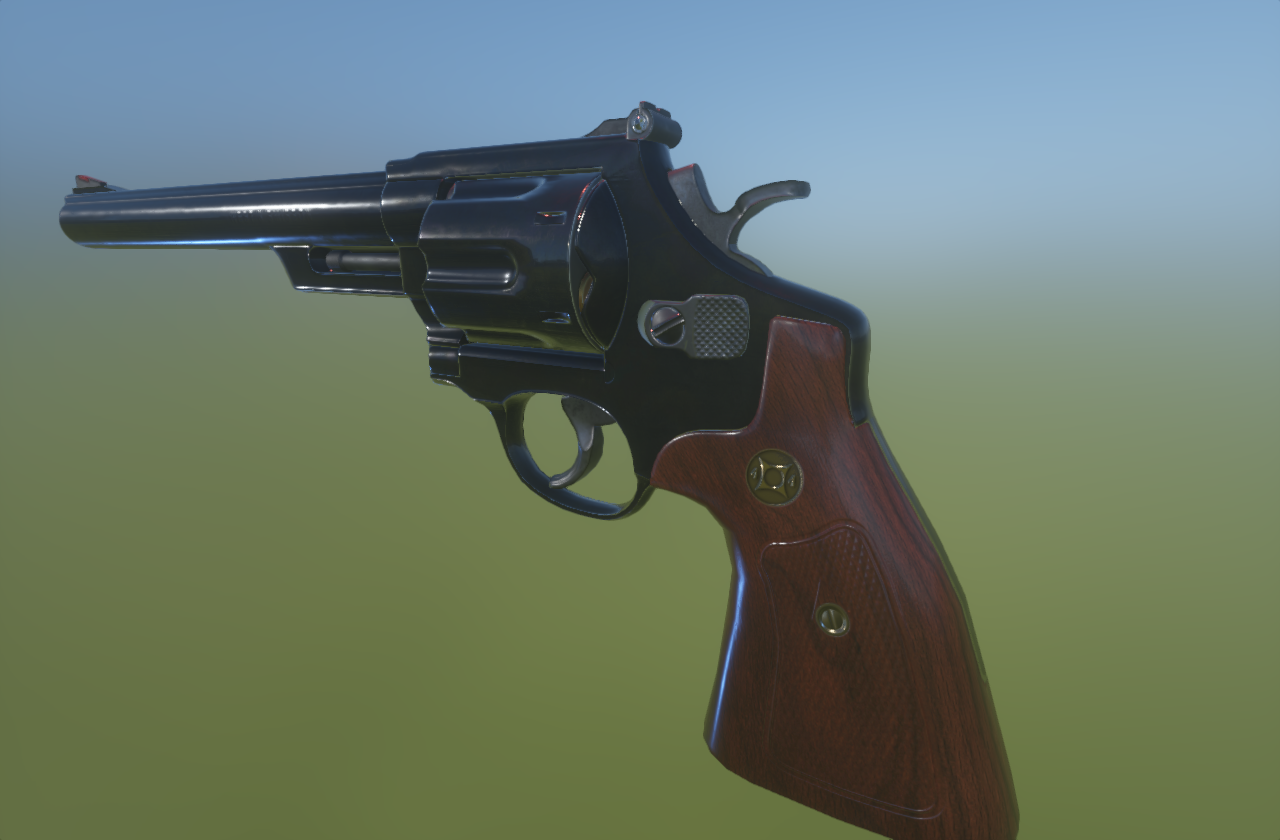
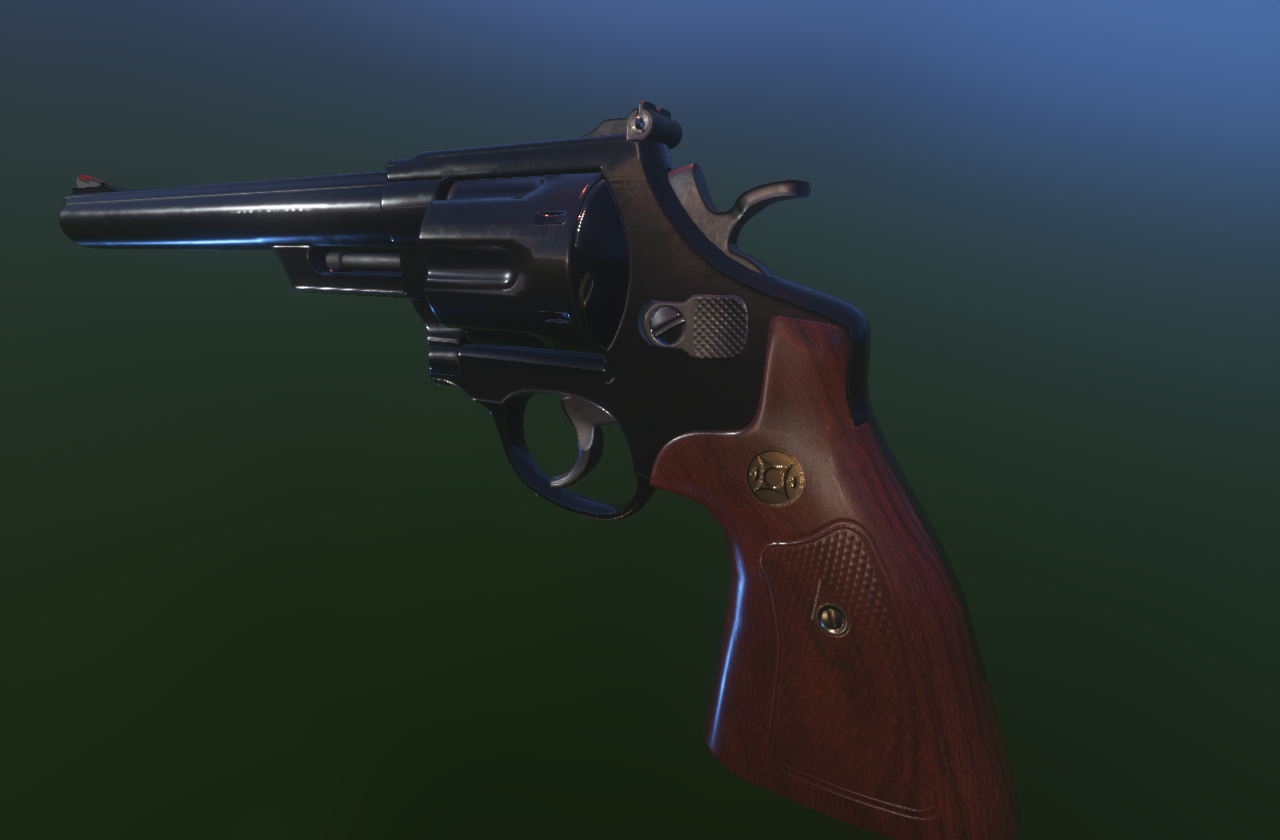
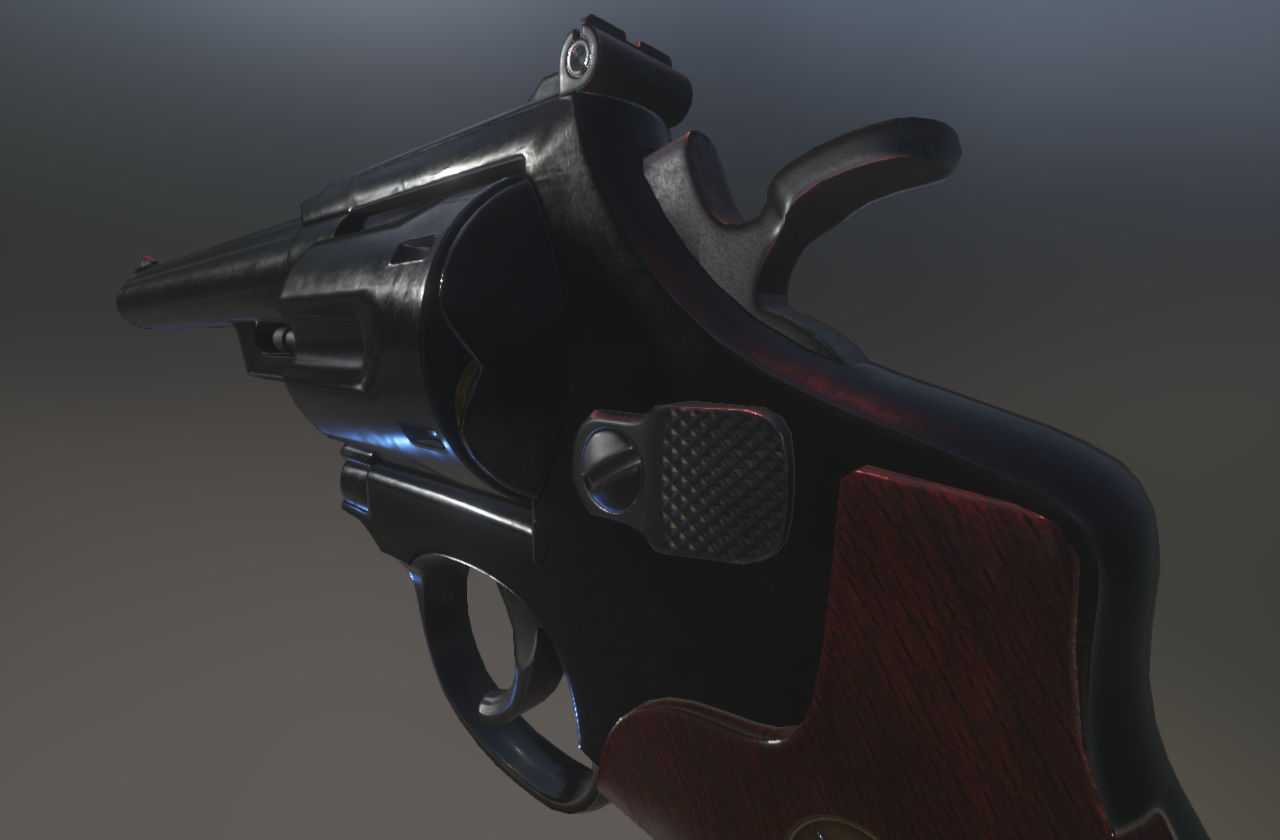
Here you can have a look how a gun looks like with lights:

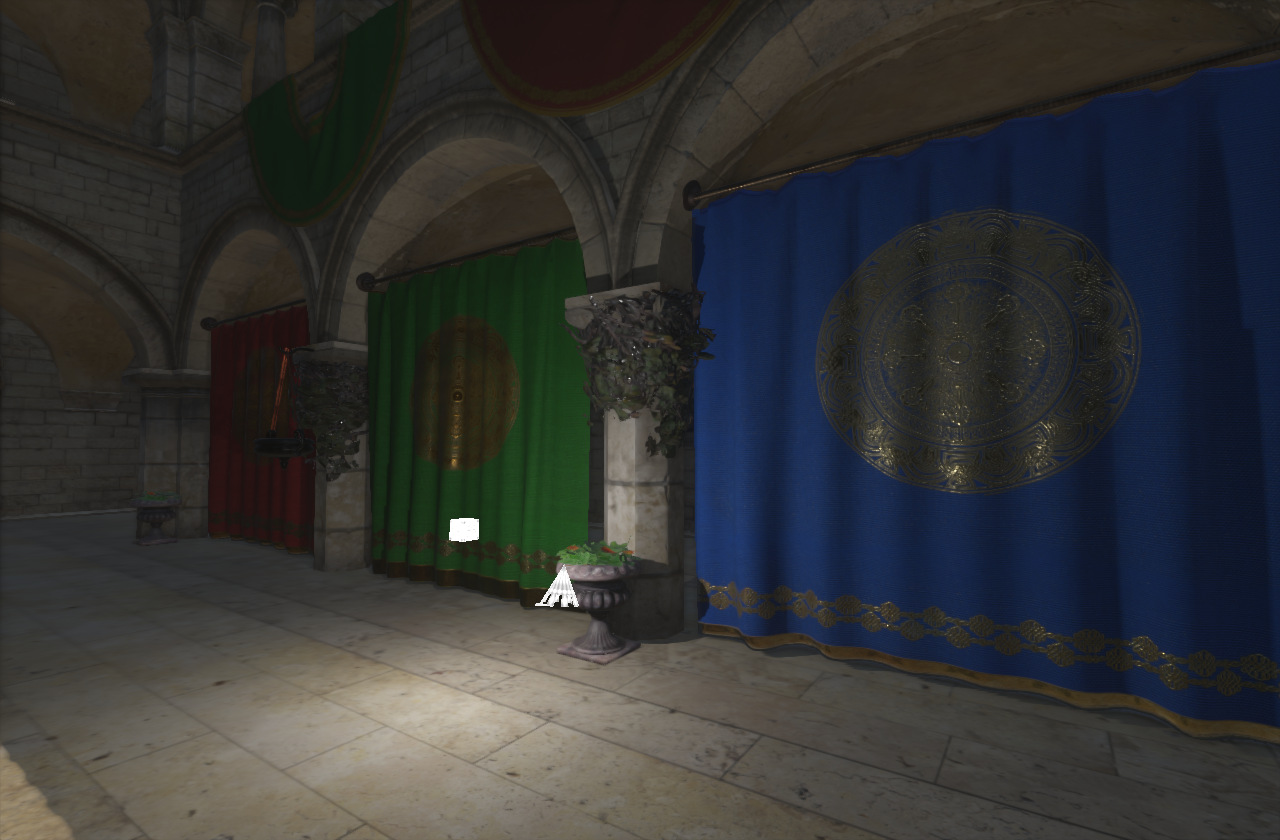
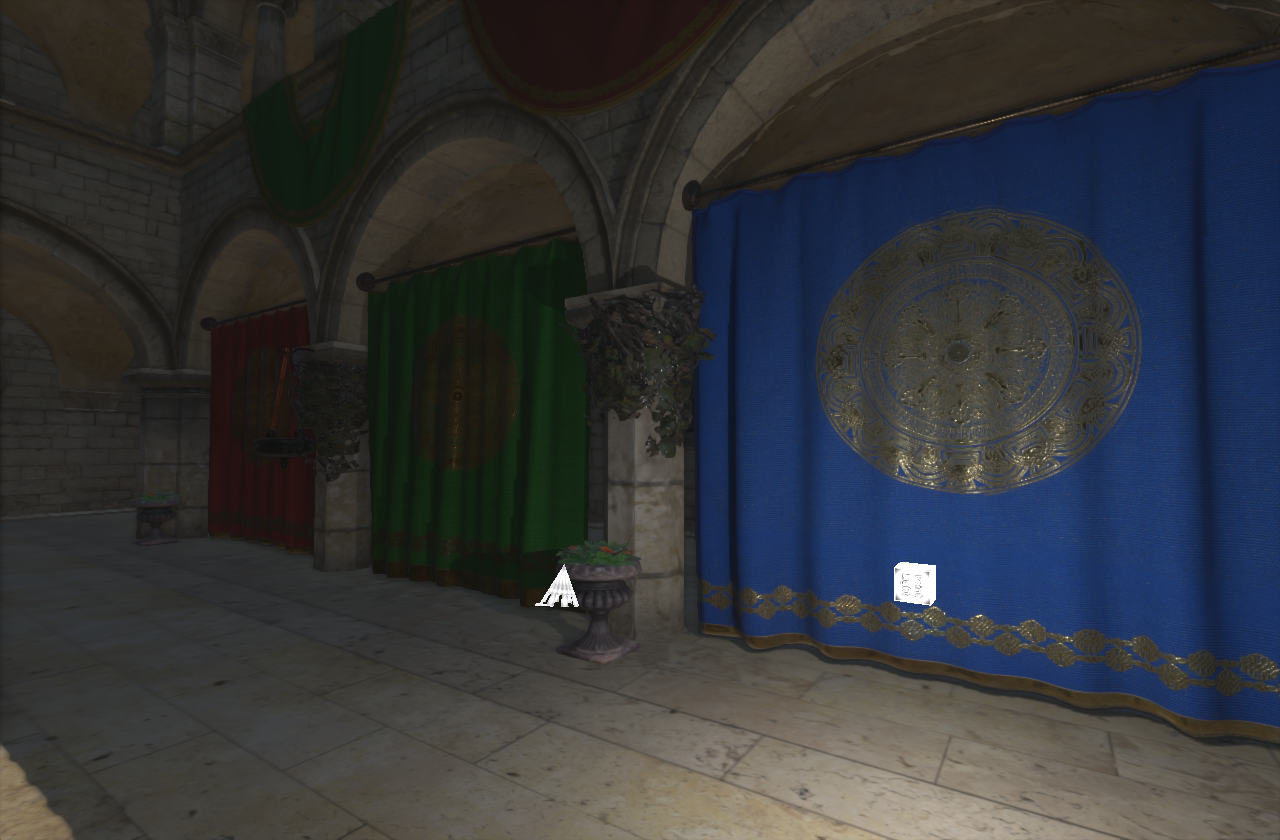
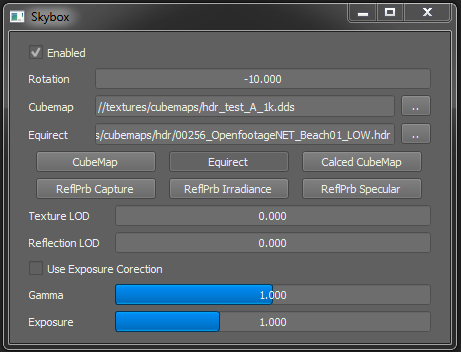
More Reflection Fun
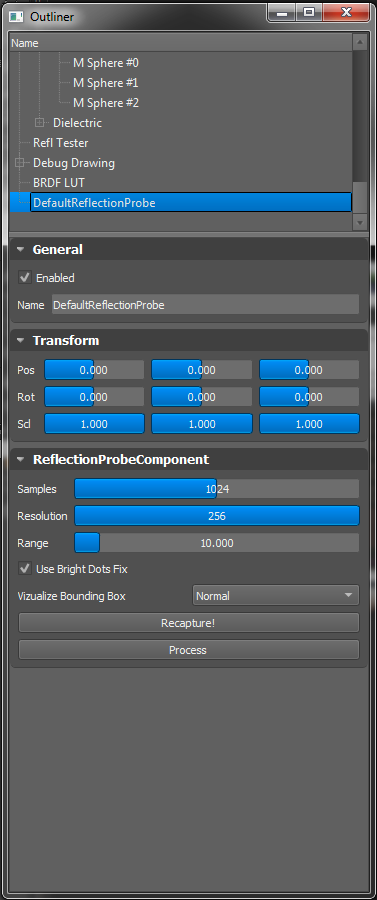
Of course when going PBR IBL the more accurate reflections the better. Having reflection probe capturing skybox pass only is the most boring stuff ever, so I did some research. One of the best sources for inspiration was a presentation done by Martin Sobek about Real-Time Reflections in Mafia III and Beyond and if you are interested in the topic I do recommend to check out his work. Also I've found some Unity blog on solving different issues with reflection probes.
If I should really simplify the the topic, a person needs to implement these following things:
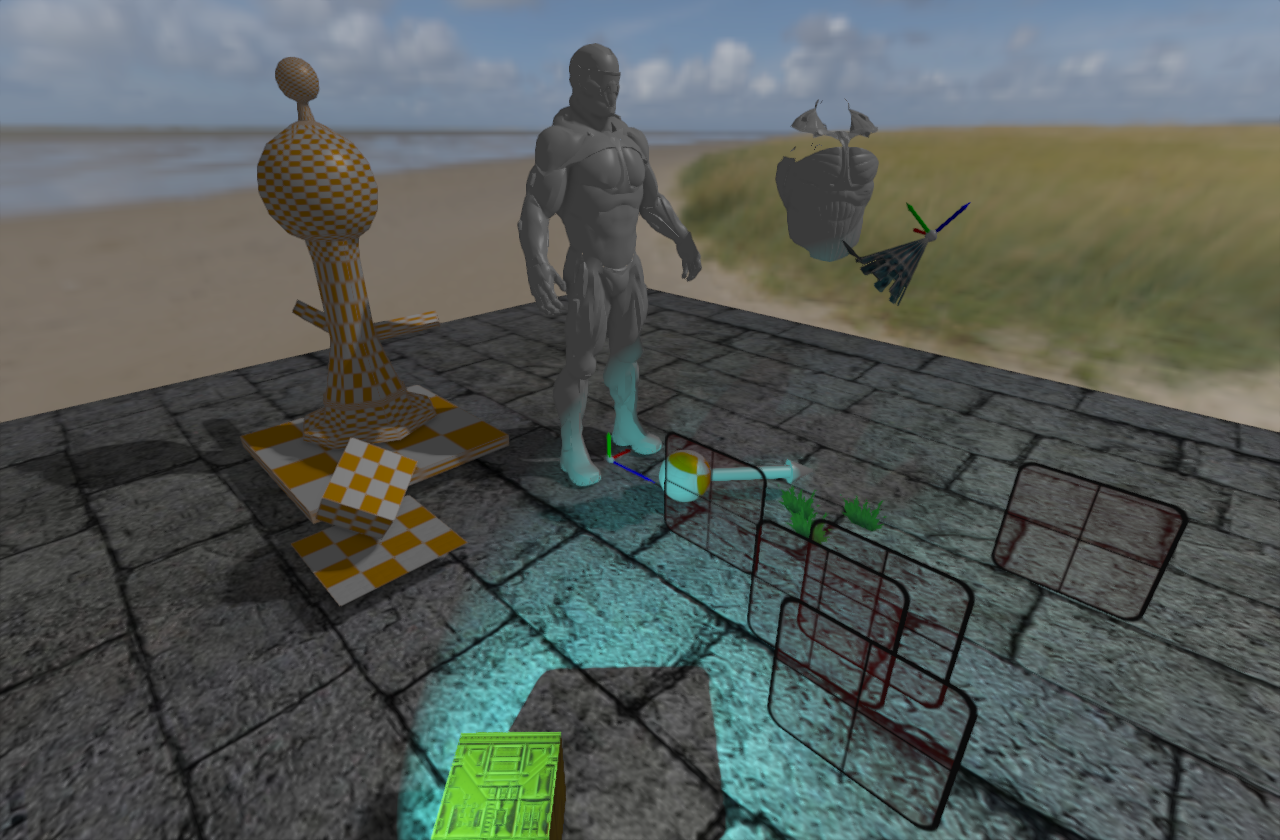
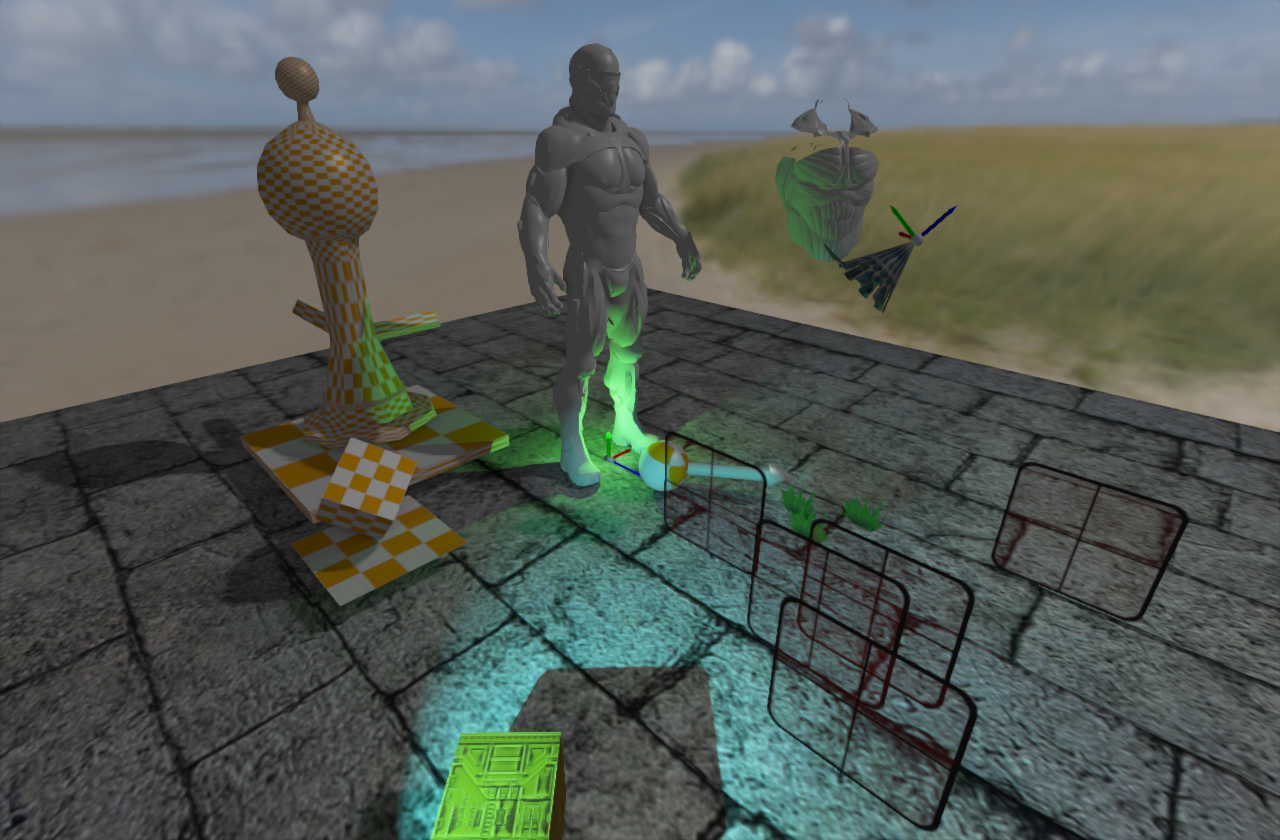
First you need to have reflection probes. Easy task. I already had queues with mesh renderers so you just need to render them again.
Real-Time Reflection Probe capturing Queue 4:
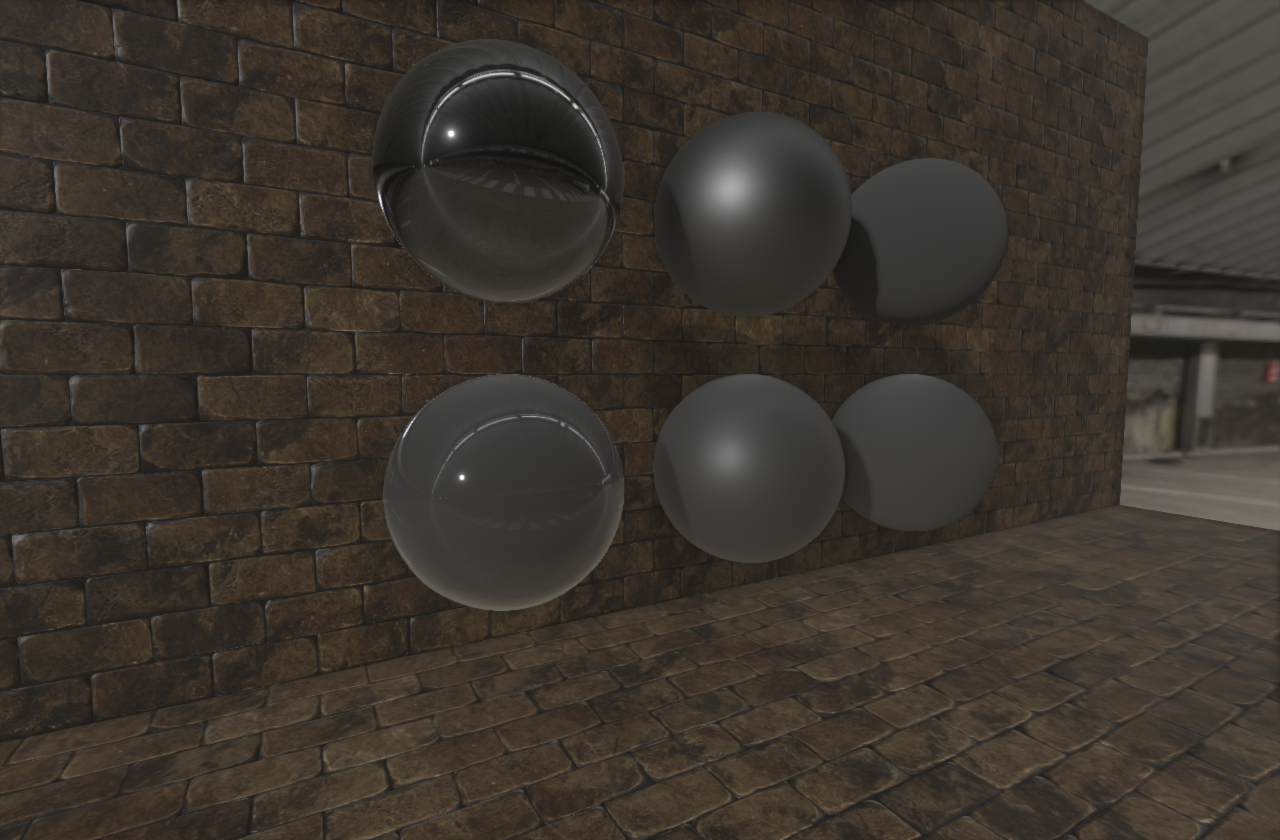
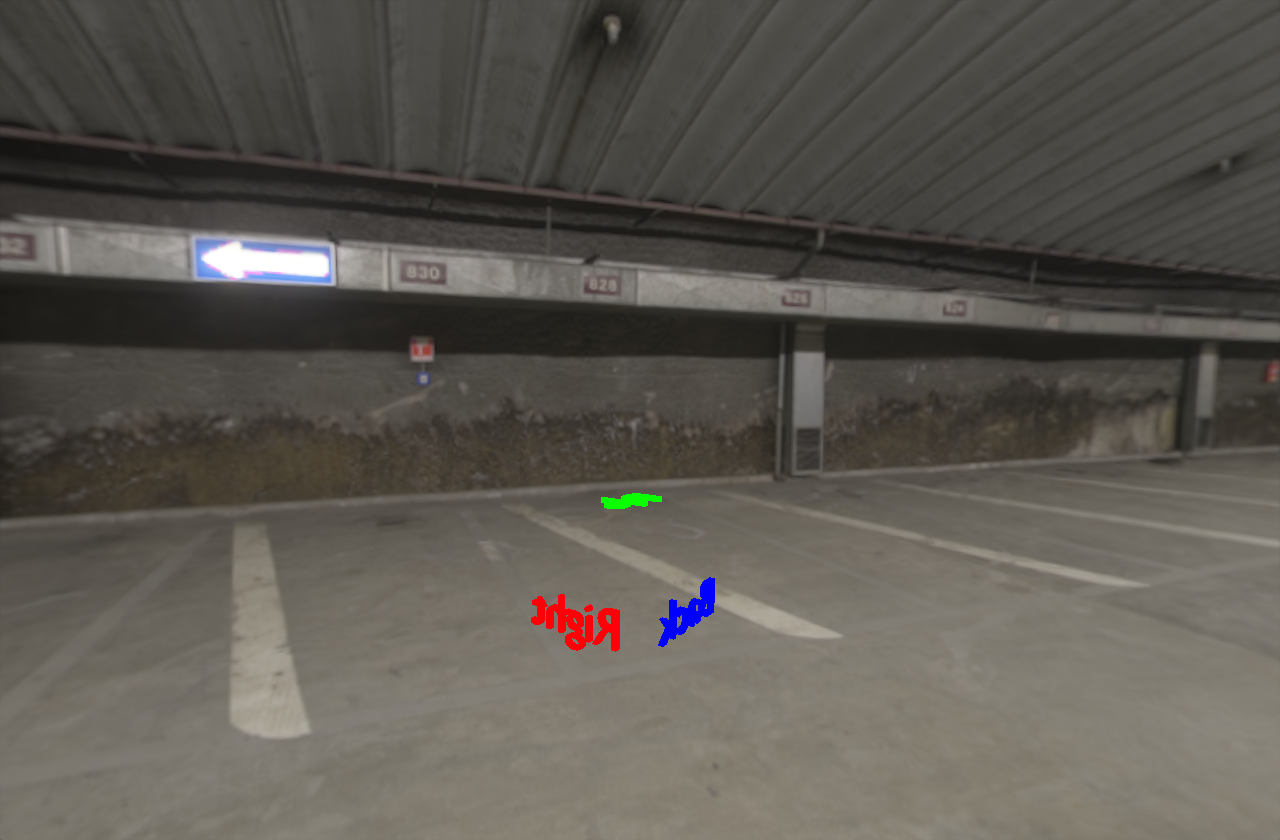

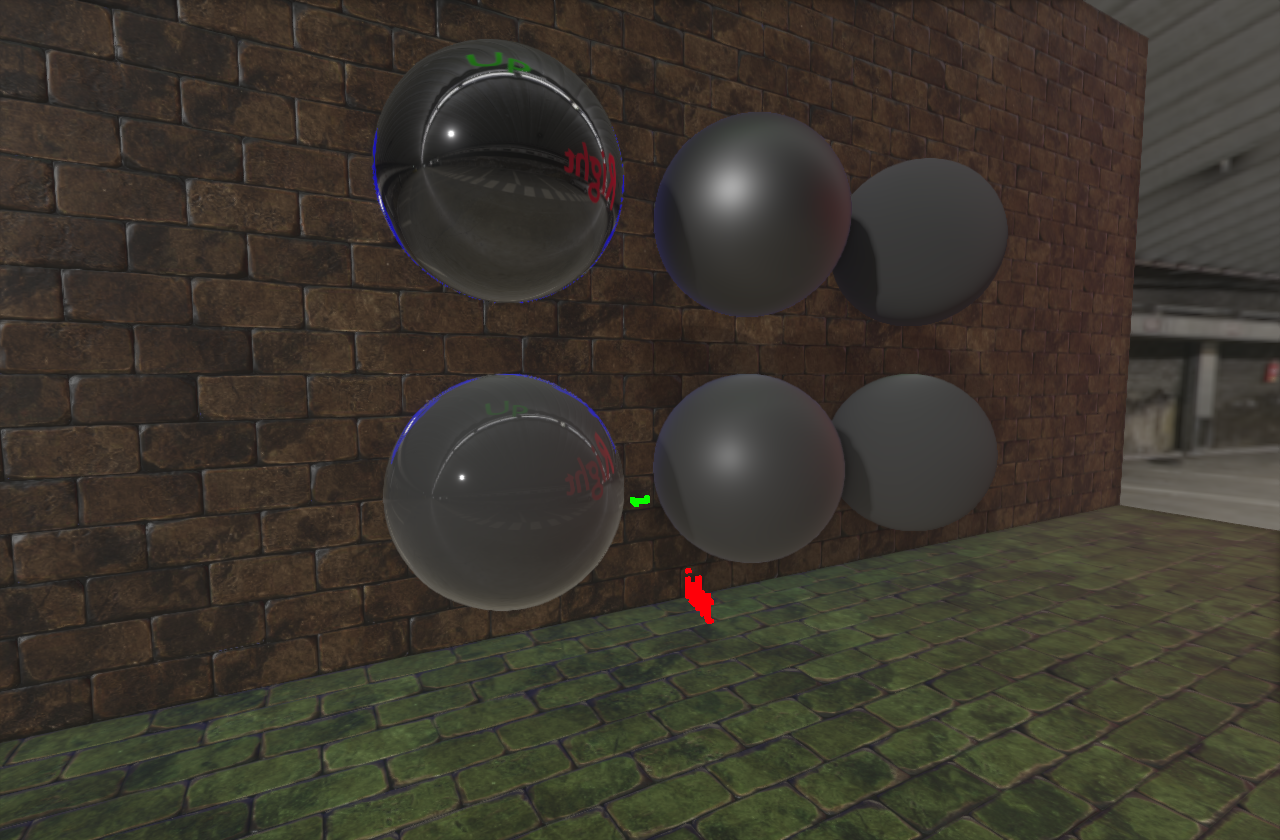
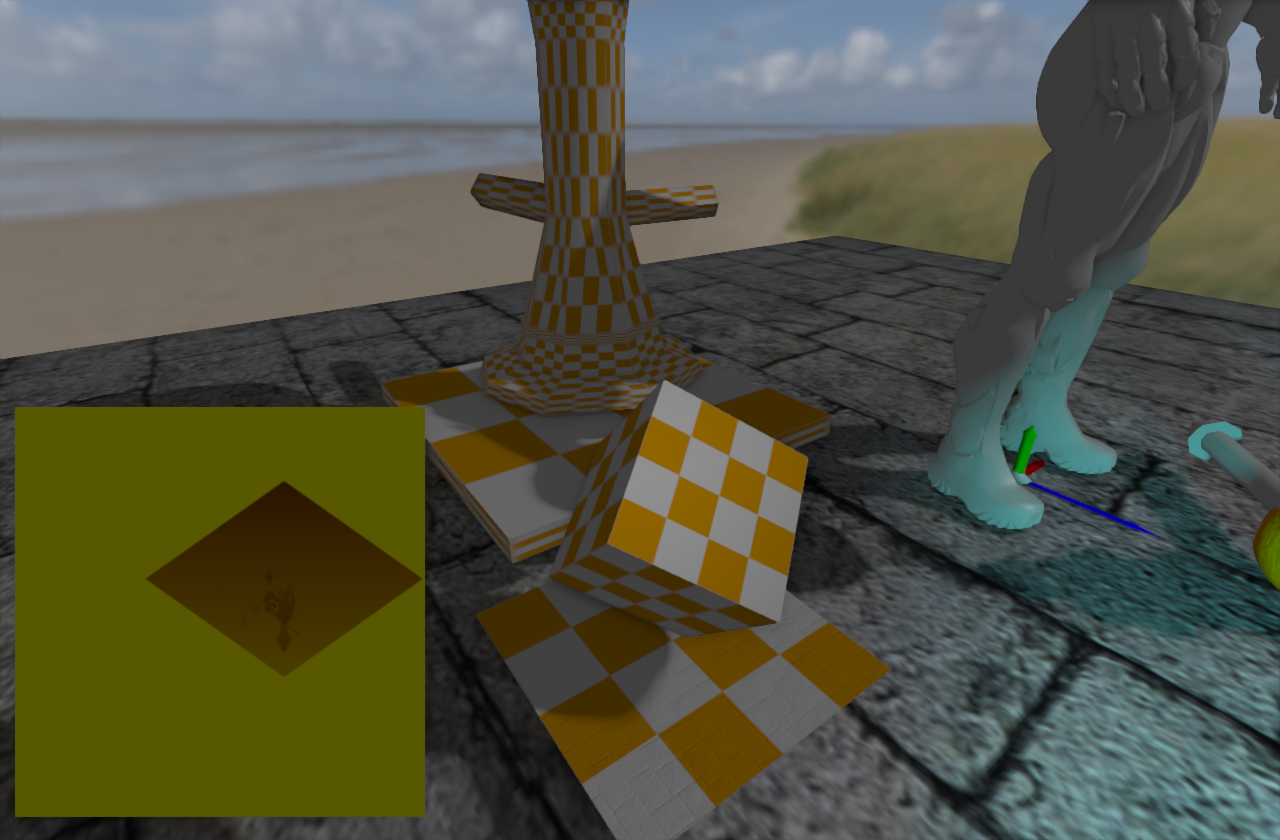
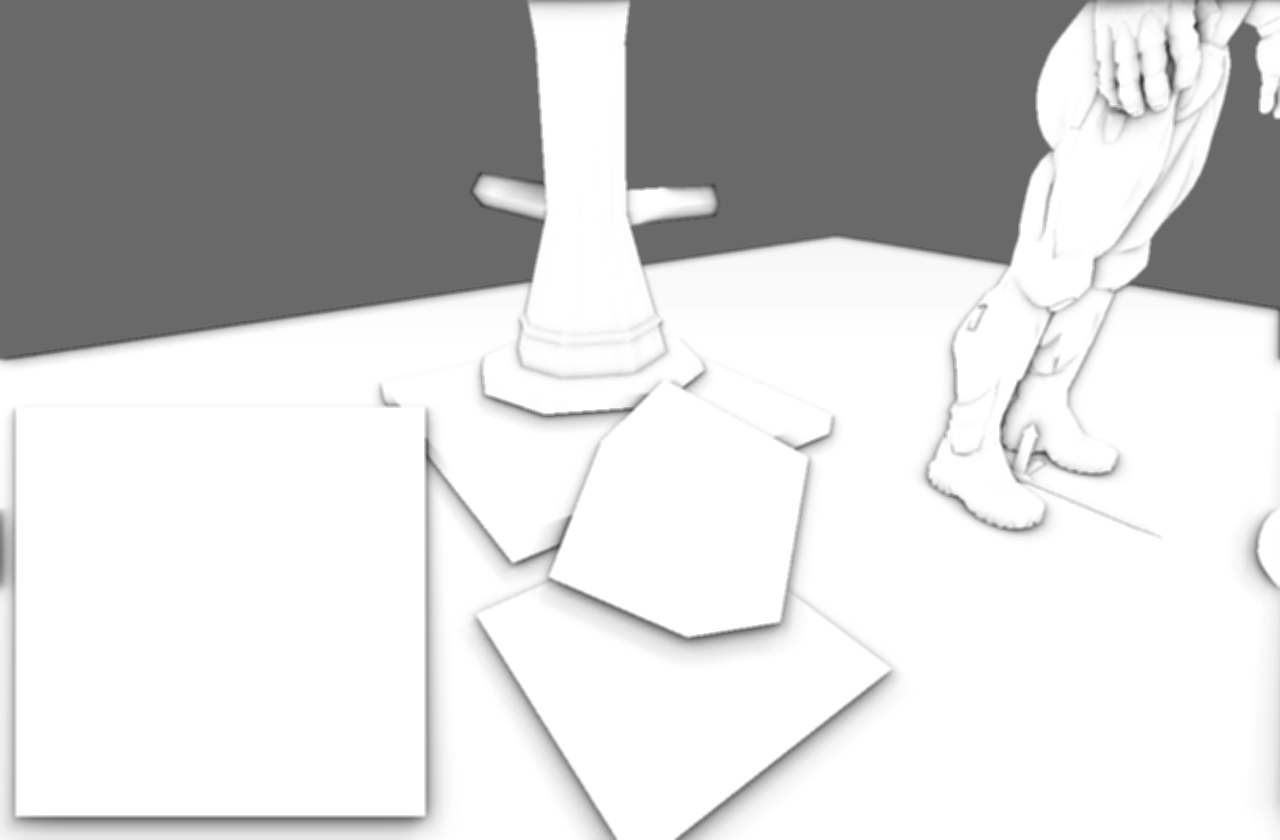
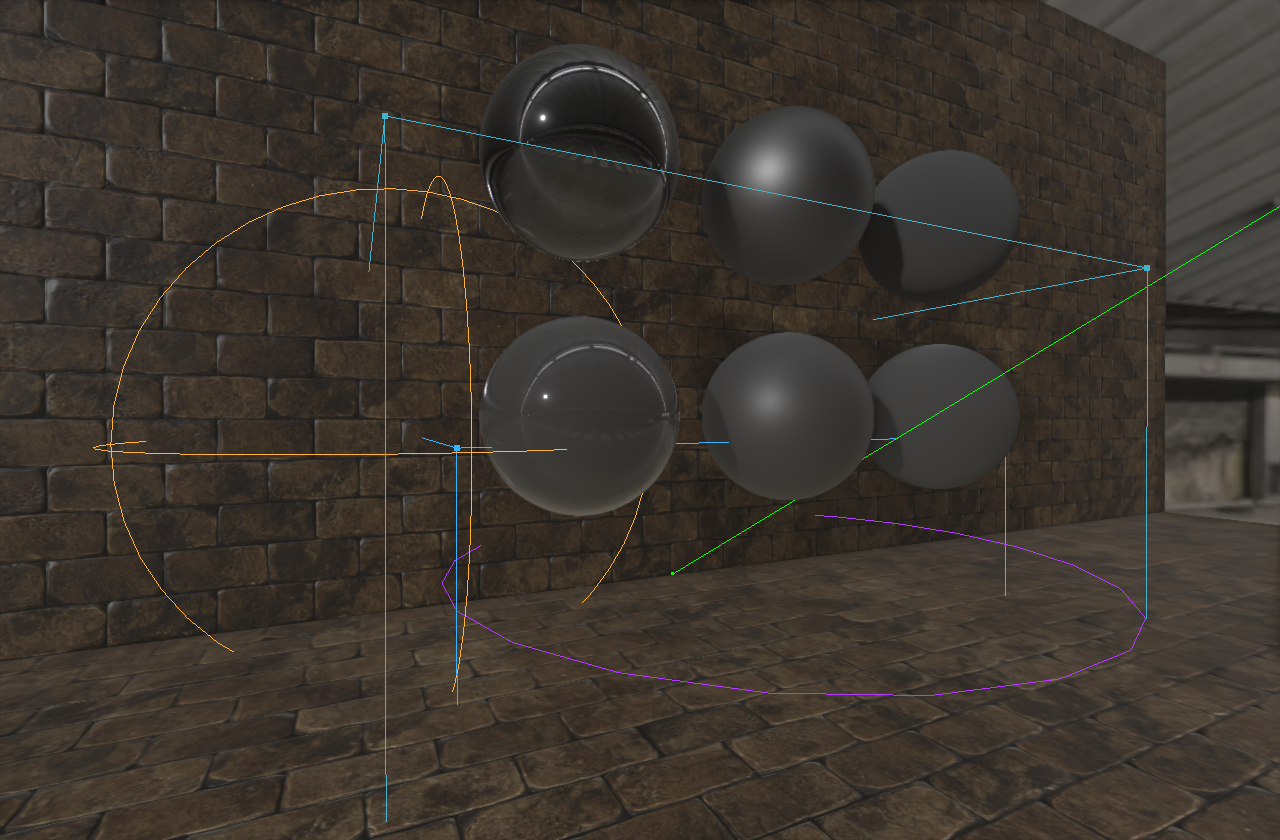
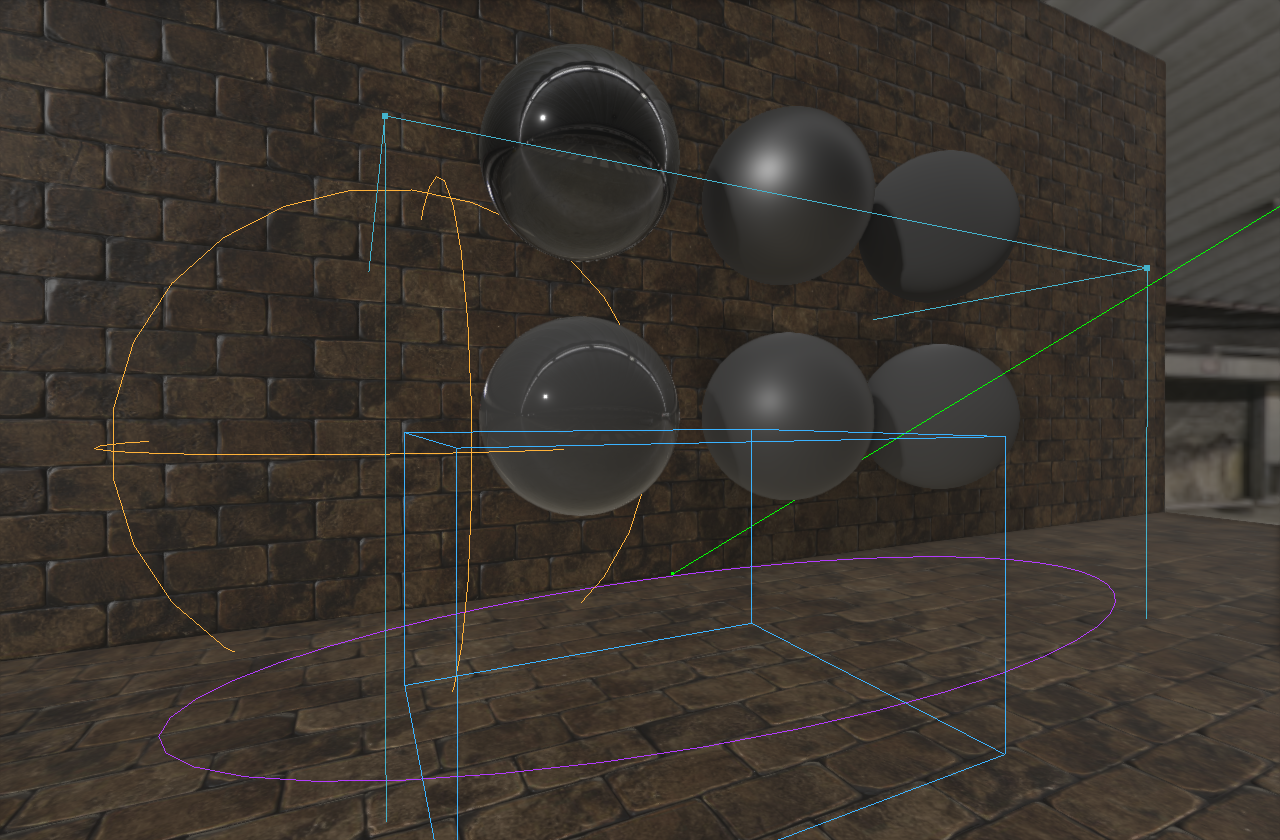
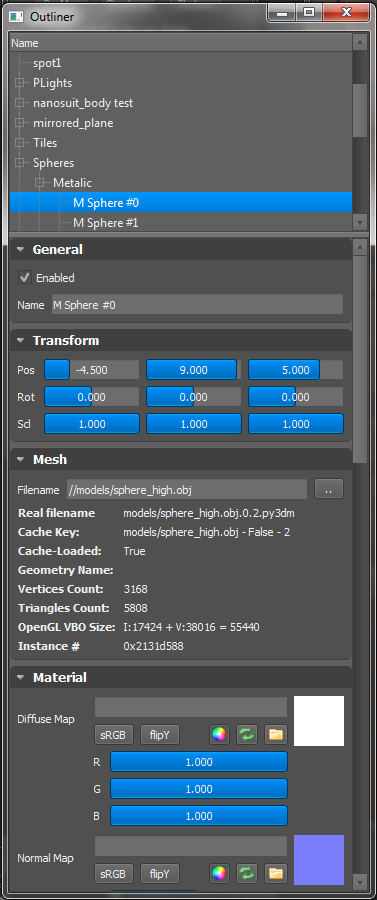
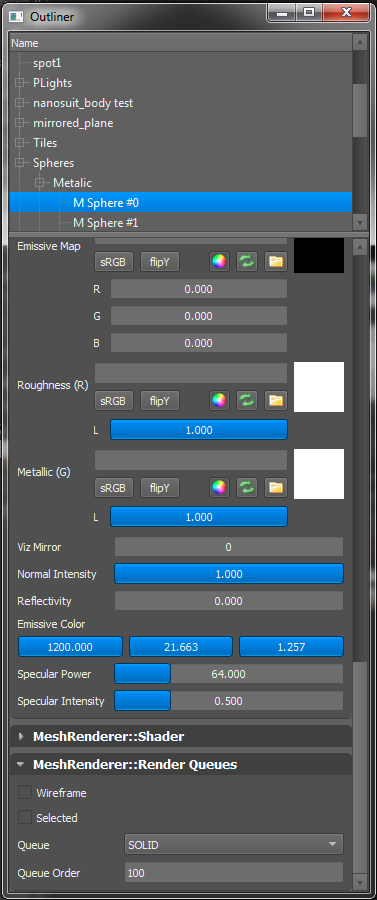
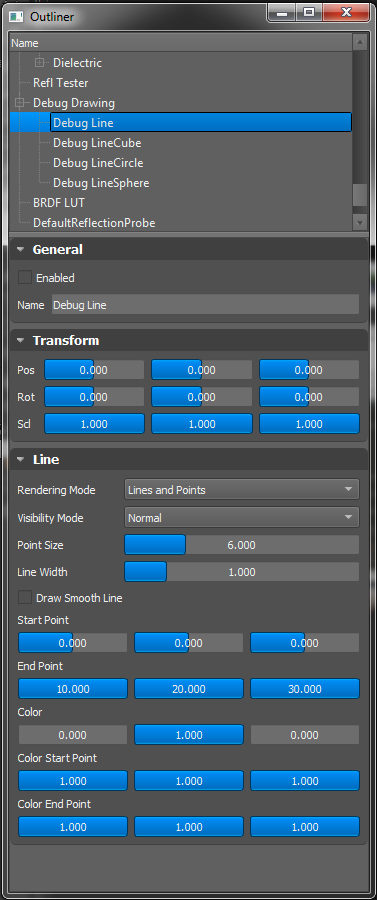
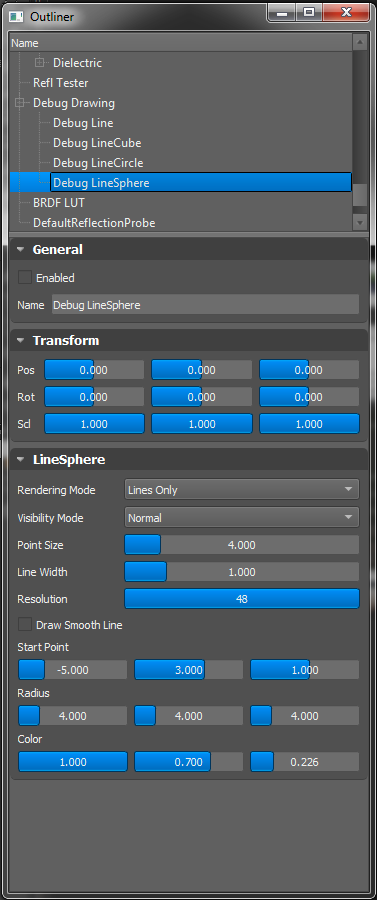
Also I wanted to be able to set and view the ranges of Reflection Probe Component in the Outliner panel, so I added new Line, Cube, Circle and Sphere visualisers for future use for point lights, triggers or volumes.
.png)
.png)
Carrying on?
I was happy with how the renderers looked, however I felt already that it is already going over my original goal and starts demand too much time and still I wasn't paid for doing it as my job. Everything was still done in the spare evenings...
There is an issue if you have two spheres near each other. So obviously you can't capture reflection probe each frame for every pixel but you can have for each sphere separate reflection probe. When you add a third sphere in between those two, then you need to figure out how to blend the reflections from multiple reflection probes :)... "fun".
Large flat areas? Damn, you should use planar reflections for that.
Another technique - Screen Space Reflections. You can reuse your own image you already rendered - great for wet floor. But on the edges - problems. Objects which are out of the camera view? No no, they won't be visible in the SSR.
Okay, still doable, it has been done already, just check out Martin's work.
And then?
I could add physics! Simple enough, you don't need to write physics engine. I would be really, really stupid to do so. Bullet is used in professional software like Blender or Houdini and many other softwares. It already got a python wrapper, so to have it in game engine a person would need to add physics component to represent it in the editor and send those data to the fully developed physics engine. But "main focus was rendering" still resonated in my head.
Then NVIDIA anounced the new RTX graphics card! :) I already knew about that for a few months and now, more than year after, as I'm writing this documentation, it is already well estabilished fact that this technology is a game changer! Every major engine or studio is already supporting new RTX GPUs and will follow this trend in the future.
However you can check final renderer's result at the conclusion bottom of the page.
More Postprocessing
Some other simple filters like gauss blur, sharpen, edge detect, grayscale conversion, etc were implemented. However there are still postprocesses on non-implemented wishlist (I should probably make this a trademark :D):
| Wishlist Feature | Reference / Docs / White paper |
|---|---|
| Depth of Field | DOOM (2016) - Graphics Study |
| Lens Flares |
John Chapman: Pseudo Lens Flares (2013) John Chapman: Screen Space Lens Flare (2017) |
| Cromatic Aberration | - |
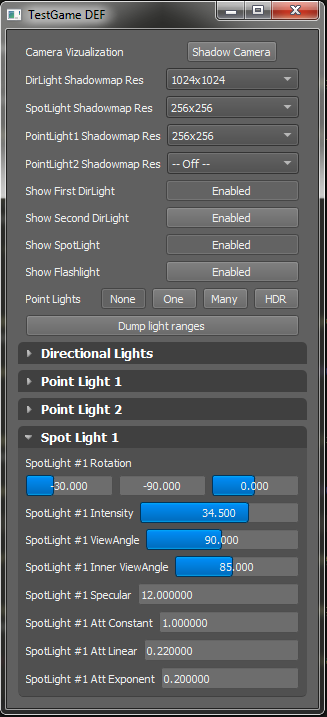
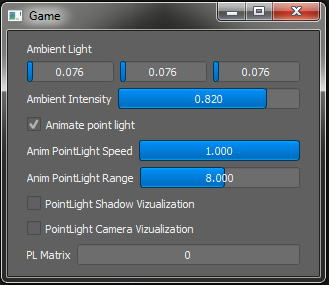
User Interface
I am quite a fan of PyQt5 so switching UI framework would be a waste of time for me. I did choose panels, to be able to move them freely across multiple screens. Forcing the panels into fixed UI layout is a simple task achievent by setting widget's parent. However I spent some time to polish the UI and make it dynamic and easy to use. Panel is created by 1 line of code, aso adding a widget with configurable minimum, maximum, etc:
DebugUI.instance.createPanel("Game", btnTitle="Game")

DebugUI.panels['Game'].addVector3fSlider('Ambient Light', self.setAmbientLight, default=[ambient.r, ambient.g, ambient.b],...)
DebugUI.panels['Game'].addCheckbox('Animate point light', self.setParam('animatePointLight'), default=self.parent.animatePointLight)
DebugUI.panels['Game'].addSlider('Anim PointLight Range', self.setParam('animPointLightRange'),  default=self.parent.animPointLightRange,
    input_max=15)
# more widgets here ...
Also several of the panels are dynamic. For example outliner, which is described below.
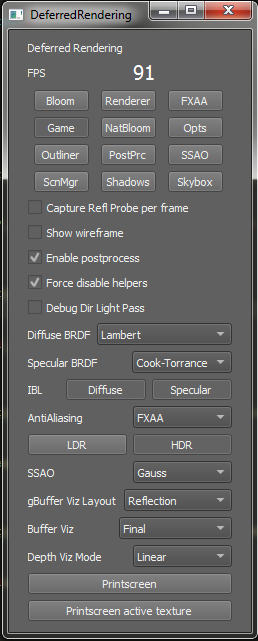
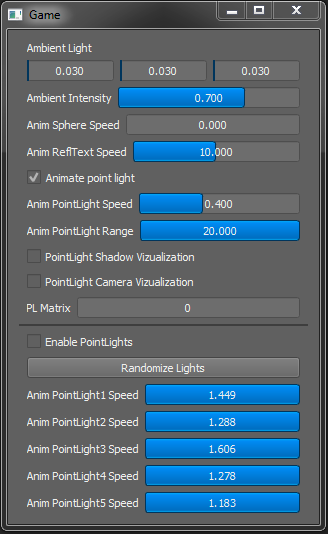
Some of the panels for different demos and renderers:


Qt Skin Generator
I didn't like the default skin for Qt5, so I have to write a generator for Qt QSS skins. Now, in 2019, I have written another version of Qt Skin Generator and released it publicly as a free product! The main reason to use the generator is to fix many problems Qt introduced when they took webdev CSS technology and made qss from it. Qt Skin Generator allows you to use Stylus and write your skin in human friendly form and auto compile it to valid qss and thanks to live-reload see the changes immediately. Thanks to stylus you can use inheritance, functions and variables. If you are interested in it, go ahead and check it out!
Custom Widgets
Through the time I have created also some interesting widgets:
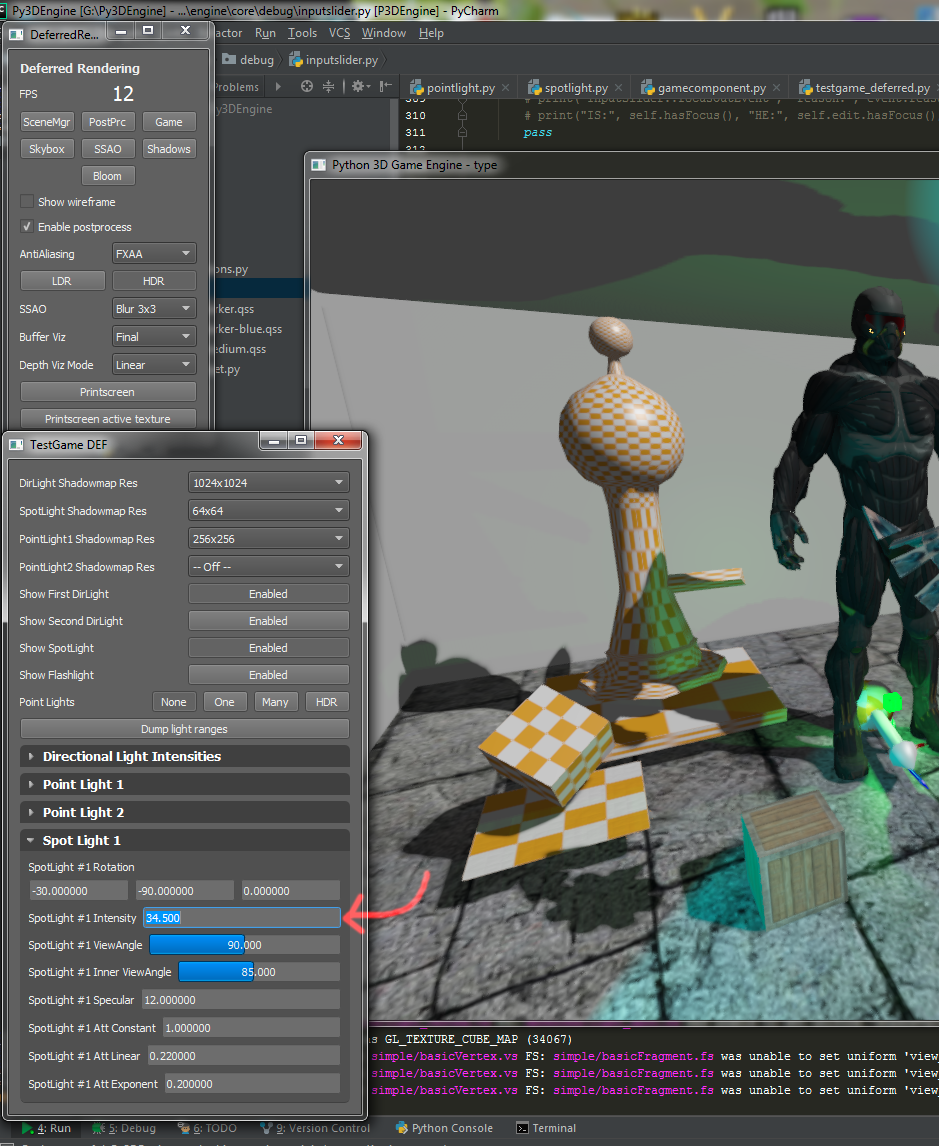
Input Slider Widget
This one is inspired by Blender UI. It supports 3 value types: percentage, integer and float. Displayed precission is also adjustable. More important is that you can tab/Ctrl+tab between elements, drag and slide to set a value. If you need more precision, when holding Shift key, the value adjust more precise. On the other hand, if you want to snap to certain values, when holding Ctrl it goes up/down by increments (default is 10%, but it's also adjustable). You can drag with cursor over the screen and it also works for multiple monitors. Just a nice touch is when you double click, you can type directly after the period.
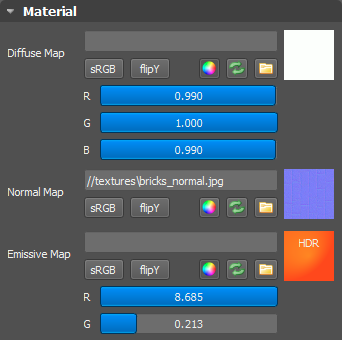
Texture Slot Widget
This widget support drag & drop of files, switching sRGB, flipping Y channel. The green arrow button registers current texture for live reload check, in case you're painting masks in photoshop. To see what you painted, you just need to save that file. Also it supports multiple formats, even .psd files. Or you can replace texture by color. Each channel is defined specific, so when you turn color on, you will get LDR or HDR clamped values or different channels RGB or RGBA. Also it previews you the color even in HDR values.
Callback for this widget is pretty simple, you are just destroying old texture and creating new one with new parameters, which is done by 2 lines of code so nothing special here. I also wanted to add advanced color picker, but I haven't find time for it.
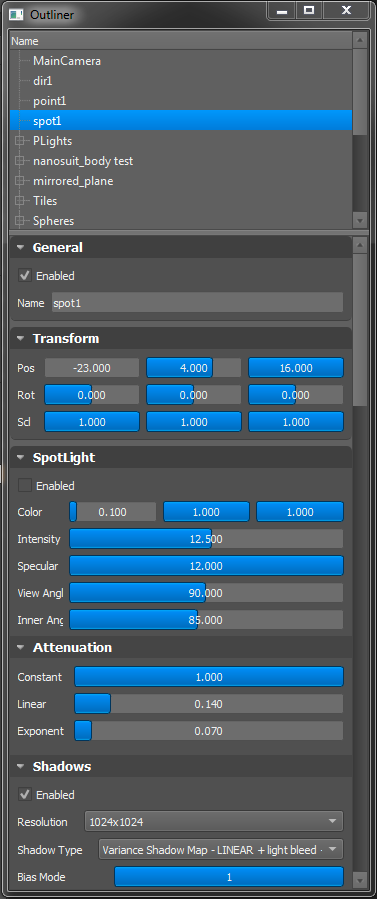
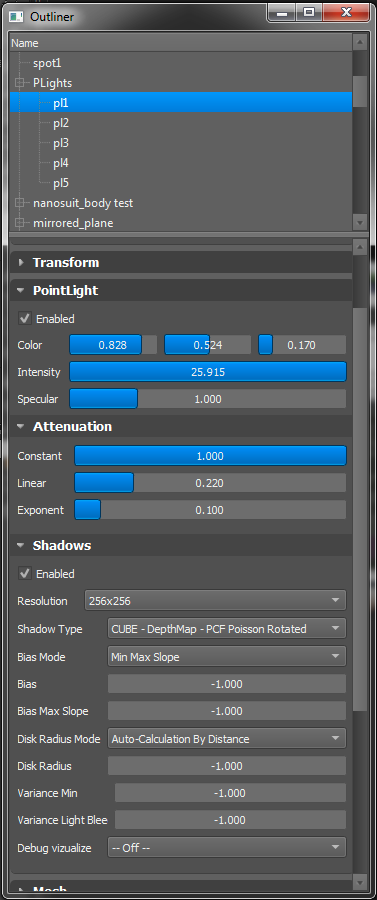
Dynamic Outliner
With word "dynamic" I mean that Outliner class has got only 396 lines of code. Outliner allows you to select any entity in the scene for which is then generated collapsible container for each attached component and shown in the final outliner panel. What to show for each component is described in Meta sub-class in each component, because even though I could use the full advantage of python's reflection I was thinking of C++ and wanted to have solution that could be easily transferable. Here is an example of how Meta class looks like for Line Renderer Component:
class Meta(metaclass=OrderedClassMembers):
    draw_mode = {
        "label": "Rendering Mode", "type": "Selectbox", "propname": "linerenderer.draw_mode",
        "callback": set_nested_attr,
        "kwargs": {
            'options': ["Lines Only", "Points Only", "Lines and Points"], 'label_width': 100,
        }
    }
    visibility = {
        "label": "Visibility Mode", "type": "Selectbox",
        "callback": set_nested_attr,
        "kwargs": {
            'options': ["Normal", "Always"], 'label_width': 100,
        }
    }
    # more definition here ...
So it basically looks like a json file ;) which was the point.
Some of the components displayed in outliner:
Some of the panels for different demos and renderers:
GLSL Coding
All of the GPU code is written in GLSL, because I didn't want to bother with writing in HLSL and cross-compile shaders to GLSL on OpenGL platform. GLSL does support #define macros, but does not support #include, which I had to implement on my own later. I also wanted to be able to implement different shading models and switch them in real-time, so I could compare differences for example between Blinn, Blinn-Phong and Oren-Nayar (Oren-Nayar ended up with 5 different implementations :D to compare the results others have achieved) shading models and later PBR IBL with different calculations. The shaders are kept in glsl text files and I did implement live reload to be able to develop and see results faster.
Optimalizations
The math library supports all operations between vectors, scalars, matrices and quaternions and it was refactored 4 times :). At the end I spent 14 days in a row to create C++'s GLM library wrapper to be able to use this math library from python and get better performance.
Next to my own obj reader, there is also PyAssimp for loading other formats. I do use intermediate format for storing mesh data on disk to be able to just open the file a push it to GPU (that's something u can't do with raw obj directly). Building the intermediate data allows to recalculate normals for flat and smooth shading. Also it goes through every vertex and edge and minimizes the duplicity of vertices on the "sharp" edges or uv seams (something PyAssimp library isn't doing or wasn't at that time).
Mesh Renderer Componens are stored in separate Queues. These are also sorted by material to avoid switching / (un-)binding shaders and re-setting uniforms each time. When I was designing the engine architecture I've made sure to abstract scene manager to be able to easily add support for quad tree, bsp and octree scene managers and extend them with Occlusion Culling.
Transforms are stored into Uniform Buffer Objects on GPU and (re-)calculated only if necessary. Also the support for UBO is working across multiple shaders and can be used for any other variables for across multiple shaders. Biggest limitation of UBOs is their size and count on Intel HD graphics drivers. Shader Storage Buffer Objects provide more freedom than UBOs and I wanted them for Forward+ Renderer (not implemented).
OpenGL 4.1 introduced concept of updating uniforms without need of binding current program with glProgramUniform and I wanted to support both methods, however time was limited and I didn't implemented this yet.
Profiling
Since the beginning I was using custom profiling and measuring in the console to be able to filter easily what I wanted to focus on. It looks like this (sponza sceen demo):
FPS   64 | render  990.226ms - avg 15.472ms | sleeps    0x 0.0ms | input   64x 3.5ms | update   64x 11.3ms |  loop time avg 15.729ms
TOTAL:             Bloom   74.222 ms     DEF-Ambient    6.749 ms         DEF-Geo  377.426 ms   DEF-LightsAll  378.075 ms DEF-geomSOLID+CUTOUT  373.222 ms            FXAA    4.762 ms  GL-SwapBuffers   12.294 ms ParentMatrixCount        0 x     SHDW-Render  239.351 ms   SHDW-TransUpd   53.787 ms UBO-calc&SetModelMats   44.239 ms    UBO-numCalcs    25152 x     Ubo-calcAll   35.641 ms      Ubo-setAll    8.554 ms frameRenderTotal  990.250 ms      liveReload    1.230 ms shaderUpdateBindSamplerTime    7.823 ms shaderUpdateTime    4.493 ms shadowPass-Blurring   13.645 ms shadowPass-RenderShadowMap  341.630 ms shadowRenderTotalTime  357.206 ms
AVERAGE:           Bloom    1.160 ms     DEF-Ambient    0.105 ms         DEF-Geo    5.897 ms   DEF-LightsAll    5.907 ms DEF-geomSOLID+CUTOUT    5.832 ms            FXAA    0.074 ms  GL-SwapBuffers    0.192 ms ParentMatrixCount        0 x     SHDW-Render    3.740 ms   SHDW-TransUpd    0.840 ms UBO-calc&SetModelMats    0.691 ms    UBO-numCalcs      393 x     Ubo-calcAll    0.557 ms      Ubo-setAll    0.134 ms frameRenderTotal   15.473 ms      liveReload    0.019 ms shaderUpdateBindSamplerTime    0.122 ms shaderUpdateTime    0.070 ms shadowPass-Blurring    0.213 ms shadowPass-RenderShadowMap    5.338 ms shadowRenderTotalTime    5.581 ms
FPS   65 | render  992.759ms - avg 15.273ms | sleeps    0x 0.0ms | input   65x 3.4ms | update   65x 10.6ms |  loop time avg 15.507ms
TOTAL:             Bloom   75.128 ms     DEF-Ambient    6.744 ms         DEF-Geo  379.732 ms   DEF-LightsAll  380.760 ms DEF-geomSOLID+CUTOUT  375.691 ms            FXAA    4.747 ms  GL-SwapBuffers   10.573 ms ParentMatrixCount        0 x     SHDW-Render  241.107 ms   SHDW-TransUpd   54.629 ms UBO-calc&SetModelMats   43.693 ms    UBO-numCalcs    25545 x     Ubo-calcAll   35.338 ms      Ubo-setAll    8.316 ms frameRenderTotal  992.781 ms      liveReload    1.197 ms shaderUpdateBindSamplerTime    7.862 ms shaderUpdateTime    4.506 ms shadowPass-Blurring   13.539 ms shadowPass-RenderShadowMap  344.603 ms shadowRenderTotalTime  360.021 ms
AVERAGE:           Bloom    1.156 ms     DEF-Ambient    0.104 ms         DEF-Geo    5.842 ms   DEF-LightsAll    5.858 ms DEF-geomSOLID+CUTOUT    5.780 ms            FXAA    0.073 ms  GL-SwapBuffers    0.163 ms ParentMatrixCount        0 x     SHDW-Render    3.709 ms   SHDW-TransUpd    0.840 ms UBO-calc&SetModelMats    0.672 ms    UBO-numCalcs      393 x     Ubo-calcAll    0.544 ms      Ubo-setAll    0.128 ms frameRenderTotal   15.274 ms      liveReload    0.018 ms shaderUpdateBindSamplerTime    0.121 ms shaderUpdateTime    0.069 ms shadowPass-Blurring    0.208 ms shadowPass-RenderShadowMap    5.302 ms shadowRenderTotalTime    5.539 ms
FPS   65 | render  991.280ms - avg 15.250ms | sleeps    0x 0.0ms | input   65x 3.4ms | update   65x 10.7ms |  loop time avg 15.491ms
Of course you can run python interperter with options:
python run.py -B -m cProfile -o output.prof
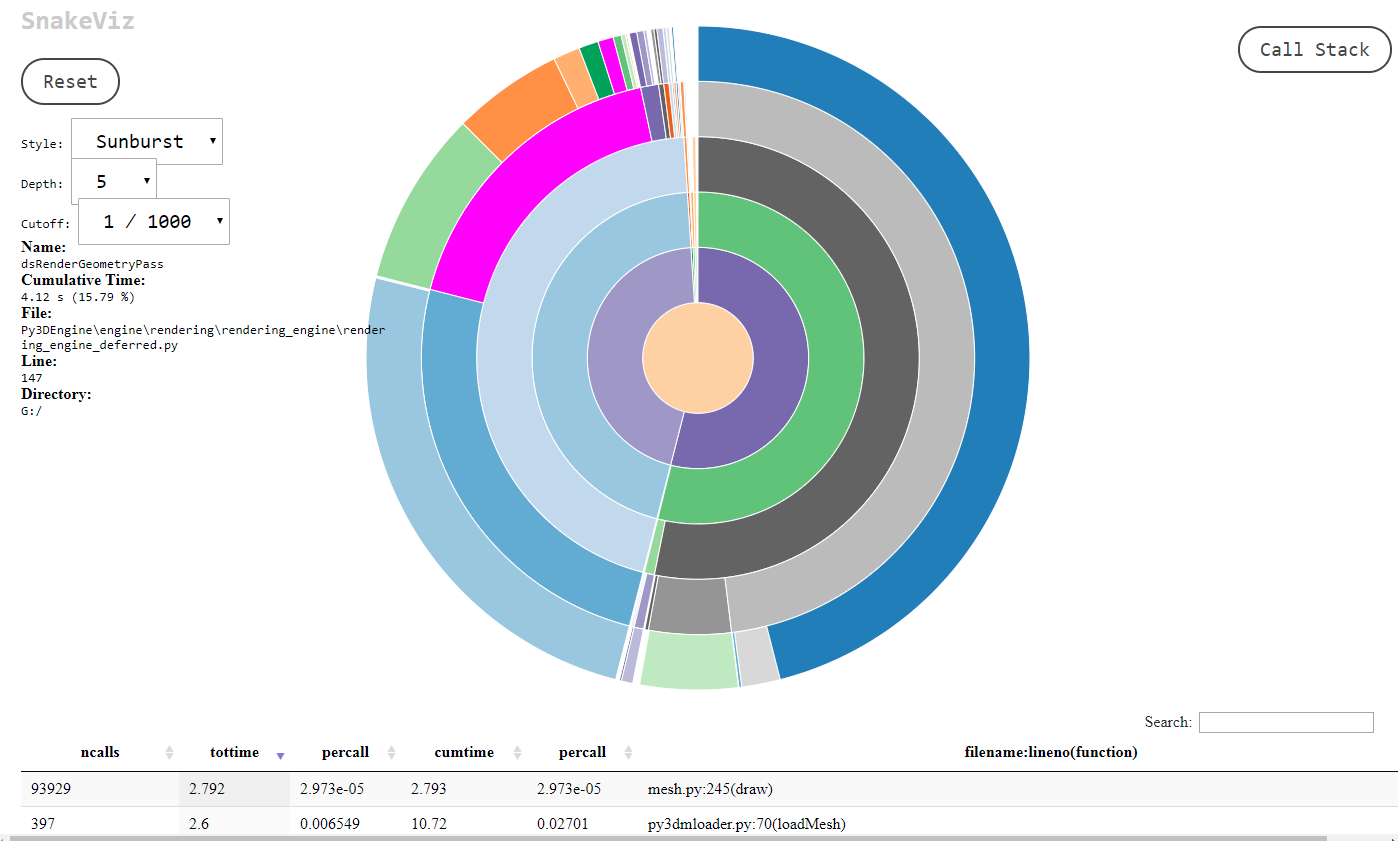
Running python interpretter like this will dump output.prof file and you can investigate with snakeviz tool how was good or bad was your performance. Mine diagram looks like the screenshot on the left side. This measuring is more precise and helped me to discover some bottlenecks. However when your glSwapBuffer command raises from usual 0.1 - 0.2 ms to 34 ms, then you are pretty much screwed and you need to test and learn from trial and errors ;).
Speaking of GPU debugging, RenderDoc proved to be one of the best tools out there. Even Unreal Engine got plugin for RenderDoc and it is great tool (better than Nvidia's Nsight in my opinion). I would like to express huge thanks to all the people out there who worked (and are working) on tools like RenderDoc and are giving these tools for free to everyone!
Conclusion
What a journey, right? Congratulations if you've managed to read this all to the end. It was quite an adventure and I am glad, that the main goal was achieved. And even more! It's a regular backbone of game engine with full update loop. For example even if you connect xbox or playstation controller at runtime it will be recognized and you can move around, because I also implemented full input manager support. I have learned a lot in the process and definitelly improved my skills as a technical artist for optimalizations and vfx. Sadly there are always things I would like to finish, but in my current situation it is almost impossible to do so only during free evenings (I still do want to have a social life :D). Huge thanks goes to my GF for being patient with me and all the support she's been giving me.
Another huge thanks goes to Epic Games, Guerrilla Games, id software and other developers / rendering programmers who are willing to go public with their knowledge and techniques and presentations. All of this was the huge inspiration and motivation to sit down and learn and write these rendering engines in the nights after regular work and do that for over an year long.
Beretta M9 gun with 3 directional lights and different hdr maps:
Magnum gun with 3 directional lights and different hdr maps:

BlenderFreak.com
BlenderFreak is a Django powered website about Blender, game engines and a bit of programming which also serves as portfolio presentation.
Pavel Křupala currently works as Technical Artist in the game industry and has huge passion for CG, especially Blender.